Official Enclosure Picture Thread #2 - post your pics!

Molding

Your pictures are awesome...I noticed you said you taped trash bags on the backs of the cages to prevent mold on the walls from the mistings, I taped saran wrap on the back, a strip on the top in front of the lighting/dripper and part way up on the side bottoms to keep my humidity up. Do I need to worry about the cage or saran wrap building up mold? Are chameleons really suseptable to mold?
 
Nice job. Looks great. Remember you can always add more plants. Which in turn helps give you cham more places to hide if needed. It will help keep his stress level down.
 
It's funny you way that because ever since I took out a plant and made it more open but with the pothos going around the outside of the Viv his mood has changed drastically. He was dark green/blackish for over 2 months and now he is pretty much always colourful. Comes out and explored everywhere. He even walks past the dog when she is lead on the floor ect
 
Here are my enclosures all custom made from wood, mesh and glass .

The one on the left was a file cabinet which was rotated sideways and worked on to make it a 2 in 1 ...these only cost about 60 dollars each to make.

 
Rory's nook

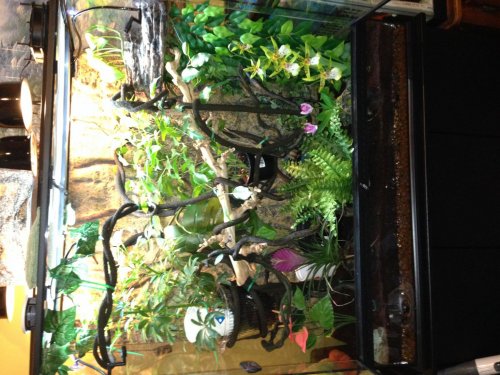
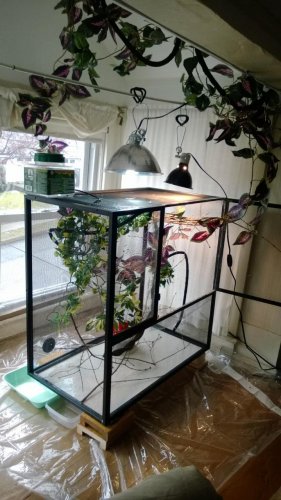
This is a work in progress - I will be adding more vines and live plants, but so far, I am pretty proud of it for my first time! I am cheap, but also creative (I think one trait stems from the other haha), so I decked out this little window-lined nook in the extra bedroom to accommodate Rorschach when he grows to be too big for his 3' tall cage...he will have 6 and 1/2 ish feet to climb! To keep the moisture off of the floor when I mist it all, I put down a dollar store shower curtain liner. My drainage system is simply propping the cage up with secured, treated scraps of wood from my dad's workshop - one side 1/2" higher than the other - then I drilled holes in the lower side corner. There is a Styrofoam produce container to collect the water. Also, the lamps are suspended from an old curtain rod that was left in the house when we bought it.
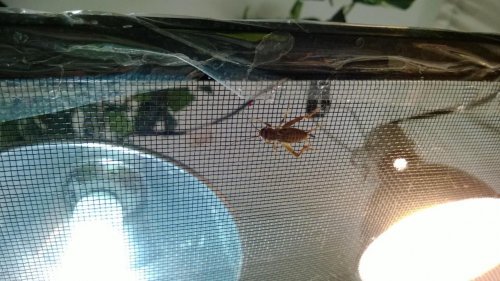
To keep crickets contained in the cage, I cut strips of the shower curtain and hot-glued them around the inside edges of the cage door (image 3). They can't stick to the plastic, so they have no where to go! I attached the exit-vine to his basking perch that I made out of lilac branches - the crickets generally stay off of it. This way, he can crawl in and out of the cage whenever he wants to hunt, bask, or just climb around.
Let me know if you have other fun ideas!!
 

Attachments

  • WP_20140111_001.jpg
    WP_20140111_001.jpg
    141.1 KB · Views: 348
  • WP_20140111_002.jpg
    WP_20140111_002.jpg
    123.7 KB · Views: 290
  • WP_20140111_004.jpg
    WP_20140111_004.jpg
    166.3 KB · Views: 326


What do you have on the outside of your enclosure?
also.. did you make that lattice type thing in there?! How did you do that! It's perfect.. my guy loves to climb all over the screen, and I'd feel so much better if I gave him something else to grab. Im worried about him ripping his little nails out.
 
also.. did you make that lattice type thing in there?! How did you do that!

I'll answer this for Shaunny. ;) That's a garden fence/border you can buy at Menards (as well as other places). Not sure if they're seasonal or not (if you live in colder climate. The one I bought is 48" his already, so it should fit perfectly in my new 24x24x48 enclosure. Then you just pull it apart like an accordion to your desired width.

1003064_0477200_A_400.jpg

fantastic! thanks :)
 

Ok so I would love too build something like this with me being a carpenter/bench joiner but when I had Trevor on the exo-terror glass Viv I had a massive problem with hard water on the glass. It's pretty hard where I live in the uk which is a problem but also very good for you because of all the minerals in it. I couldn't keep the dam cage clean though
 
Ok so I would love too build something like this with me being a carpenter/bench joiner but when I had Trevor on the exo-terror glass Viv I had a massive problem with hard water on the glass. It's pretty hard where I live in the uk which is a problem but also very good for you because of all the minerals in it. I couldn't keep the dam cage clean though

I use distilled water for the misting system, doesnt leave water spots on the glass at all.
I have some of the build info here, https://www.chameleonforums.com/new-enclosure-122283/

wow there is actually a lot going on here! Very cool terrarium. You make it?

Yes I did, the pictures don't do it justice, the background is 3D and all the wires are hidden, It's integrated into the table its on so that the water reservoir and the drainage tank is in the drawer
 
wow all of u must be very rich. because with my amount of money I don't think I could make an enclosure as great as any of these. I am officially too embarrassed to post my cage.
 
This is Sargent's Cage for right now since he is still a young one. I have some live plants and trees growing as he grows for his larger cage. I tried putting him on his Ficus tree and he absolutely hates live plants.... should be interesting when he gets older.
 

Attachments

  • IMG_7089.jpg
    IMG_7089.jpg
    253.7 KB · Views: 388
This is my new cage for my panther 36x36x18. I am thinking in removing the substrate. Anything else you guys think I need?
 

Attachments

  • Sunny cage.jpg
    Sunny cage.jpg
    257.9 KB · Views: 415
Iguanarium

So I haven't seen very many pictures of chameleons in the repti breeze iguanarium if any at all. So I thought I would show some pictures of my male ambilobe in his new permanent home. The dementions are 48x36x18. It takes a lot of misting to keep up humidity but well worth it.


Back
Top Bottom