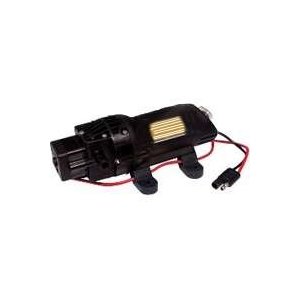
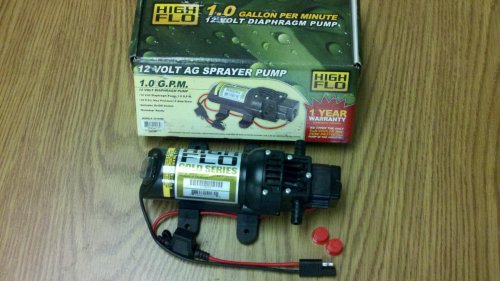
Whew! It's been a long week (almost two since I've been able to work on the new chamy home). I finally found the pump I want and ordered it on Amazon. Ebay is way to expensive! Should be here by next weekend. The seller posted "Replacement pump for... planters or back up water systems. Can also be used for potable water. Includes on/off switch. Ball bearing drive assures longer pump life. Self-priming capability. Diaphragm design eliminates troublesome shaft seal. Maximum pressure: 35 PSI. Replaces Fimco Model No. 5273882,5275015 and Flojet Model LF112301." Specs say it has a min. 8 ft. vertical lift and runs on less than 4 amps. Pumps 1gal/minute. I have a power supply already that will fit it. With shipping it was just pennies over $35.
Navigation
Install the app
How to install the app on iOS
Follow along with the video below to see how to install our site as a web app on your home screen.
Note: This feature may not be available in some browsers.
More options
You are using an out of date browser. It may not display this or other websites correctly.
You should upgrade or use an alternative browser.
You should upgrade or use an alternative browser.
The Season For Cage Builds
- Thread starter mrfixit01
- Start date
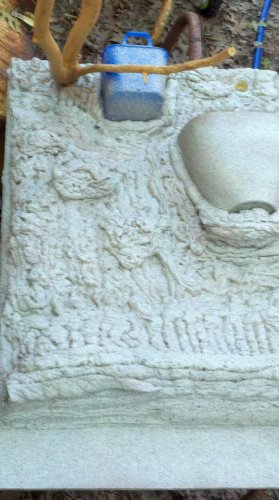
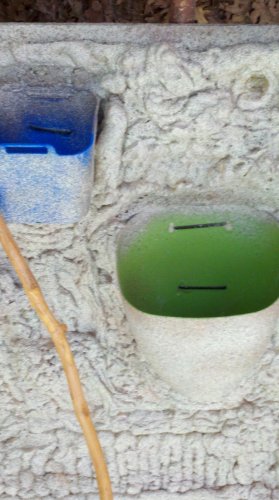
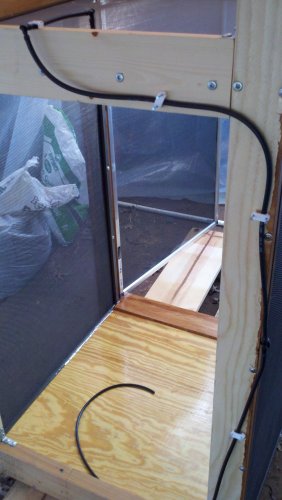
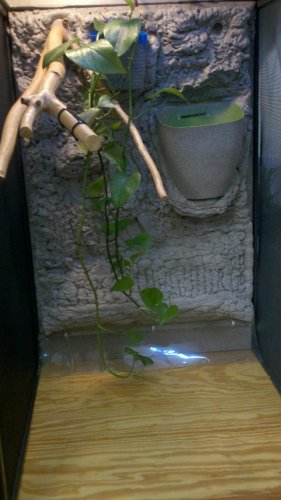
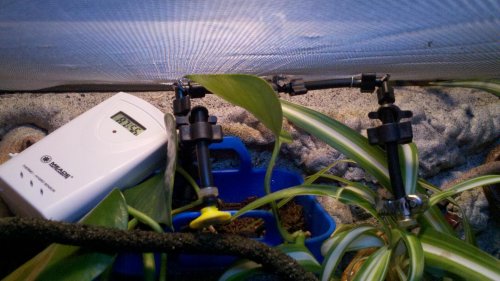
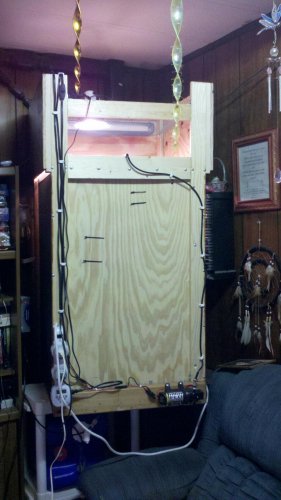
Ok, so I've got the pump ordered. There was still some touch-up to do on the climbing wall. Folks, remember if you use the Foam Stuff insulation spray to build your "rock wall", after it dries either use some rough sandpaper or maybe a soft wire brush to rough the surfaces or your paint/sealer won't stick!!! Now that that's fixed, I did one final clear silicone sealer around the pots, edges of the wall board, and all the bottom and side cage corners. Also made the drip/spray line. It has a manual cut-off in case I want to do maintenance and don't want air in the upper line. So here are a few pics of those items. Note the zip-ties inside the two pots. Those are also sealed from behind with spray foam and inside with clear silicone.
Attachments
NorCalAnthony
Avid Member
Ok, so I've got the pump ordered. There was still some touch-up to do on the climbing wall. Folks, remember if you use the Foam Stuff insulation spray to build your "rock wall", after it dries either use some rough sandpaper or maybe a soft wire brush to rough the surfaces or your paint/sealer won't stick!!! Now that that's fixed, I did one final clear silicone sealer around the pots, edges of the wall board, and all the bottom and side cage corners. Also made the drip/spray line. It has a manual cut-off in case I want to do maintenance and don't want air in the upper line. So here are a few pics of those items. Note the zip-ties inside the two pots. Those are also sealed from behind with spray foam and inside with clear silicone.
Your cage is coming along really nice. Let us know how your pump works out. I wound up doing something similar to your planter idea since my original plan kinda flopped lol.
Your cage is coming along really nice. Let us know how your pump works out. I wound up doing something similar to your planter idea since my original plan kinda flopped lol.
I know the pump is not particularly powerful but I only have one mister nozzle and the water supply will be very close by so there shouldn't be a problem. Ha, know what you mean. We always have 'plan B' don't we? The plants have been set for a couple of weeks and seem to be doing fine. I am ready to assemble the pieces today and see if it all still fits. Instead of a 5-gal bucket I am going to get a camping water tank and use it. Have heard some things about chemical leach in the plastic buckets and was worried. Wal-mart has one for $12.88 in Sporting Goods so I'll get one next trip! Thanks for all your help and comments. I really appreciate it!
")
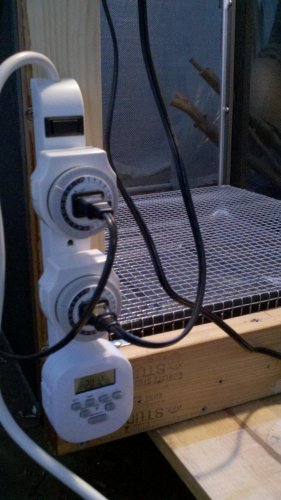
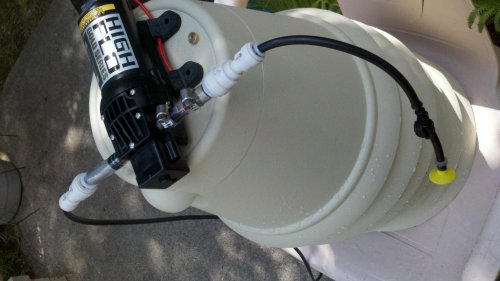
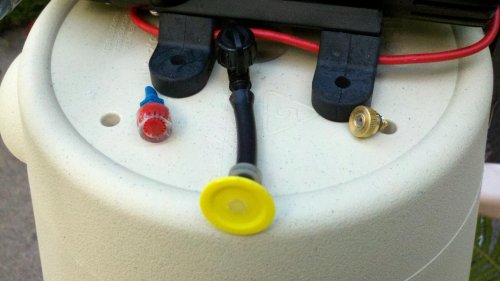
Just a couple of finishing pics. Lights and timers are in place. Pump shipped today. Also, I found a 7-gal. Aqua-Tainer at Wal-Mart for 12.88. When I opened the vent cap there was a hole exactly large enough for the 1/4" tubing. Weather was bad all day so I couldn't work in the shed. More later!!!
Attachments

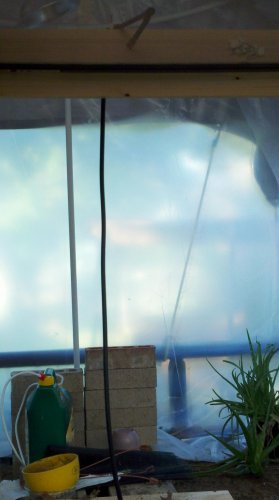
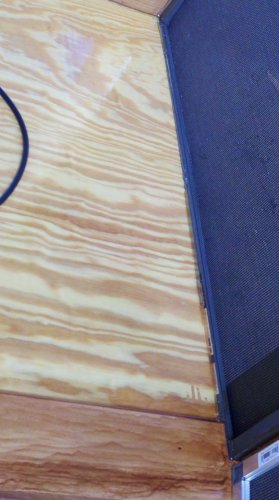
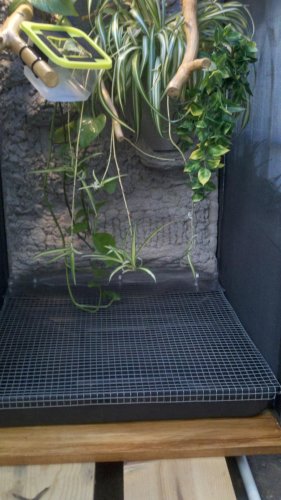
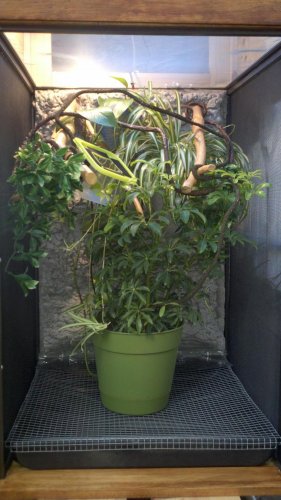
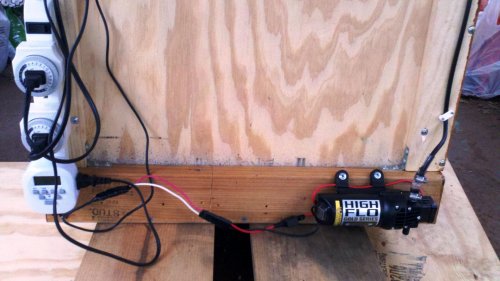
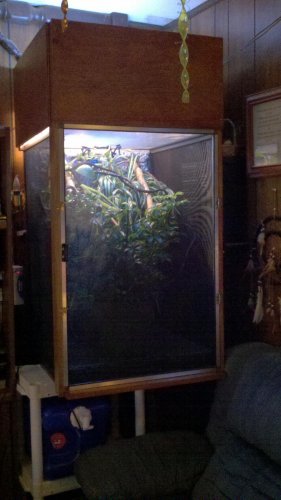
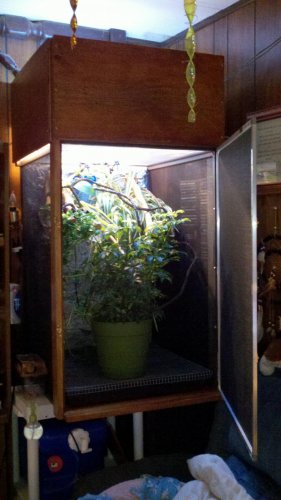
Well, tonight I put all the pieces together in the sweltering greenhouse. It fits like a glove. Here are just a few pics front and back from start to finish. Now all I need is a chamy and the pump, which should arrive Friday according to Amazon. Enjoy...
Attachments

NorCalAnthony
Avid Member
Well, tonight I put all the pieces together in the sweltering greenhouse. It fits like a glove. Here are just a few pics front and back from start to finish. Now all I need is a chamy and the pump, which should arrive Friday according to Amazon. Enjoy...
It looks great. Not sure if I mentioned it earlier but I really like the way you have the branch coming out of the wall like that. Gives me ideas for my next build... lol
Thanks. The bigger branch has two screws through the back the smaller one only has one. I did have to remove it until the back was in place and the spider plant was put into the other pot. Imagine my fun trying to hold the branch inside and put the screw in from the back! Lol (My arms aren't that long.)
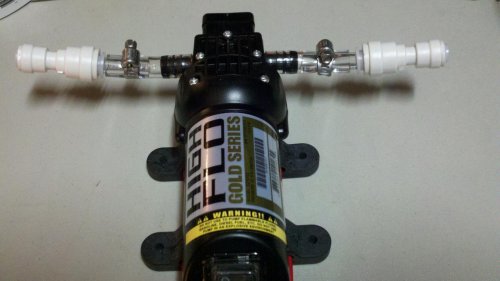
My pump came in last night. First I had to make a step-down adapter to go from 3/8" barb to 1/4" od. I took a couple inches each of 3/8" id and 1/4" id clear vinyl tubing and slid one into the other. On the high pressure side I had to put two 3/8" hose clamps. Don't need any on the low (feed) side. Then added a quick-connect coupling (3/8" od to 1/4" od). I had to find an electrical plug adapter to connect to my old laptop power supply. Found one at Autozone for $2.99. Don't bother looking at hardware stores. They don't have this item!
Today I have been trying to find a setup that works. Even at the low 35psi it is too much for a single nozzle. I think I'm going to have to split the feed line into a 4-way. Next I will try two spray nozzles and two misting nozzles. Currently I'm trying two different misting nozzles. One is from a personal hand-pump mister the other is a brass and stainless steel mist nozzle from Lowe's by Orbit ArizonaMist.
Today I have been trying to find a setup that works. Even at the low 35psi it is too much for a single nozzle. I think I'm going to have to split the feed line into a 4-way. Next I will try two spray nozzles and two misting nozzles. Currently I'm trying two different misting nozzles. One is from a personal hand-pump mister the other is a brass and stainless steel mist nozzle from Lowe's by Orbit ArizonaMist.
Attachments
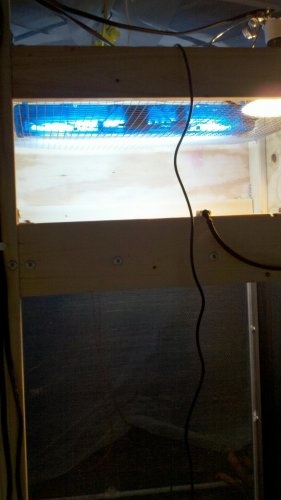
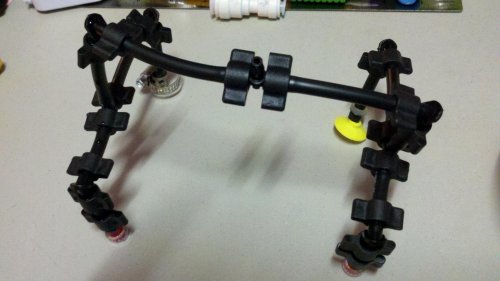
So today I spent my time making a 4-way spray-mist assembly. Here are a few pics of the final assembly. One problem is the pump's power needs. It is a 12vdc 4a. It has a 5amp fuse. Therefore I believe it needs a 12vdc 4-5a power supply. My power supply is a 12vdc 3.5a (4.2a max). So, even though it does pump, there is not enough amperes to make it crank very fast. Found another power unit on Amazon that should do the trick. This one does a small mist and sort of drip/spits out of the sprayer nozzles. LOL. What an experiment. Hope you all learn some shortcuts from all of my trials. Ha!!! Still the whole sprayer assembly only cost around $50. That's not too bad for a first effort, is it?  Note the temp. at the top is 86f and 56 humidity without anything running but the lights.
Note the temp. at the top is 86f and 56 humidity without anything running but the lights.Attachments
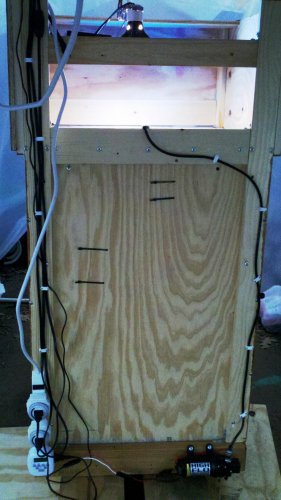
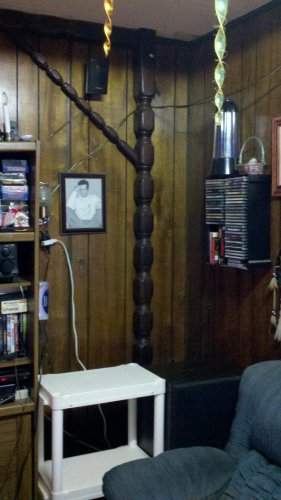
So today is the target date to have our new chamy home ready. Spent most of the night planning how to move things around and get the 'house' in place. Here are a few final pics making room and setting up the new unit. This is not a light-weight unit but not terribly heavy.Over all it measures 27" x 27" x 52 1/2". Flushed the water tank yesterday and filled with filtered water. Added ReptiSafe this morning. Double checked timers, lights and nozzles. Now just wait for the cycles to see if everything still times ok. Just waiting for Rambo to arrive from NC tomorrow morning! Yippee!!! Can't wait to see the little fella. We're ready for you...
Attachments
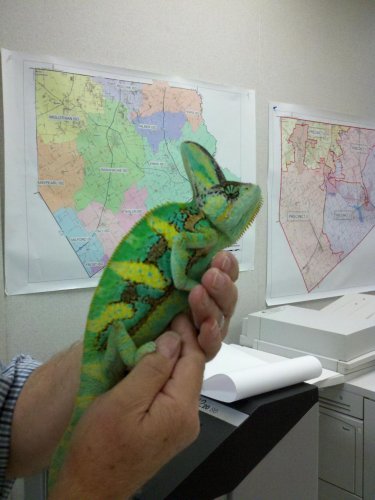
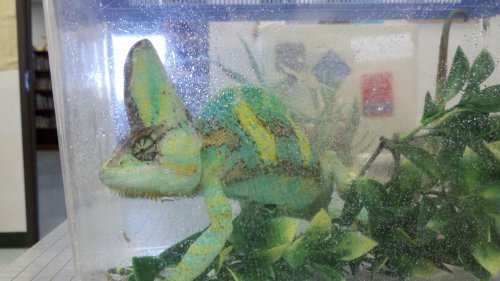
Well, Rambo just flew in and boy are his legs tired! Lol. Thanks to Kelley for letting us have a go at being his new family. We will try our very hardest to make him comfortable and happy!!! 
Thanks to Kelley for letting us have a go at being his new family. We will try our very hardest to make him comfortable and happy!!! Attachments
reptilover
New Member
Wow cage is really coming together nicely! And rambo is a beautiful boy!
What u mean the 35psi is to much? I was looking at getting a pump and doing my own mist king style setup
Nice change and build btw looking great")
At first I thought it was too high a psi. The cheapest MistKing is 75 psi. Then I found that my power supply was not strong enough. It maxed out at 4.2 amps and the pump doesn't start working until it reaches 4 amps. I have an 8 amp power supply coming that should make it pump properly. Right now it has a small mist from two nozzles and drips from the other too. Even so it pumped 1 gallon during the past 24 hrs. Pump only cost $36 delivered. Have about another $15 in parts and enough left over to do part of a second mist system. One side note: we can't even hear the pump when it runs so we forget to look and see how it does until we hear water dripping!!! LOL
And thanks for the nice compliment!
Similar threads
- Replies
- 32
- Views
- 10K
- Replies
- 10
- Views
- 4K