summoner12
Avid Member


Recently a couple of people have asked about making home misting systems. I had seen a similar design on another forum a couple of years ago. I decided to build a hand pump auto mister.
Items Purchased/needed:
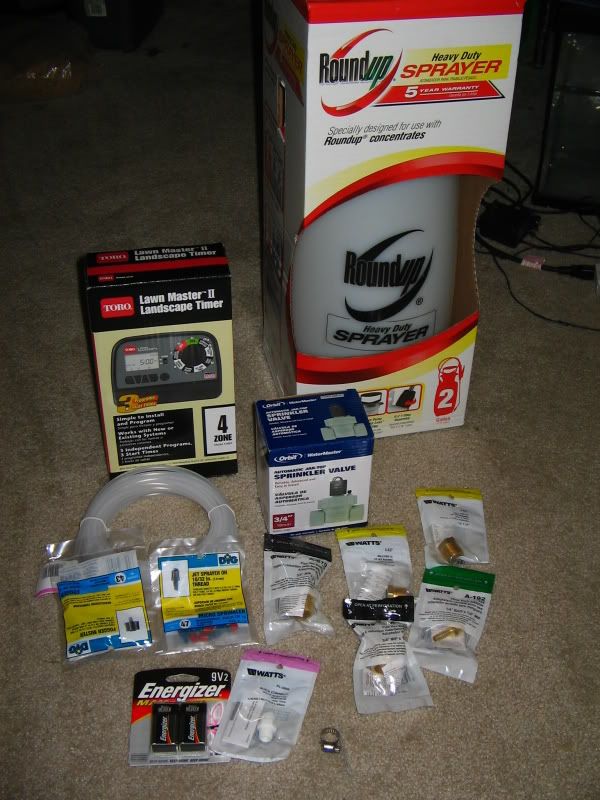
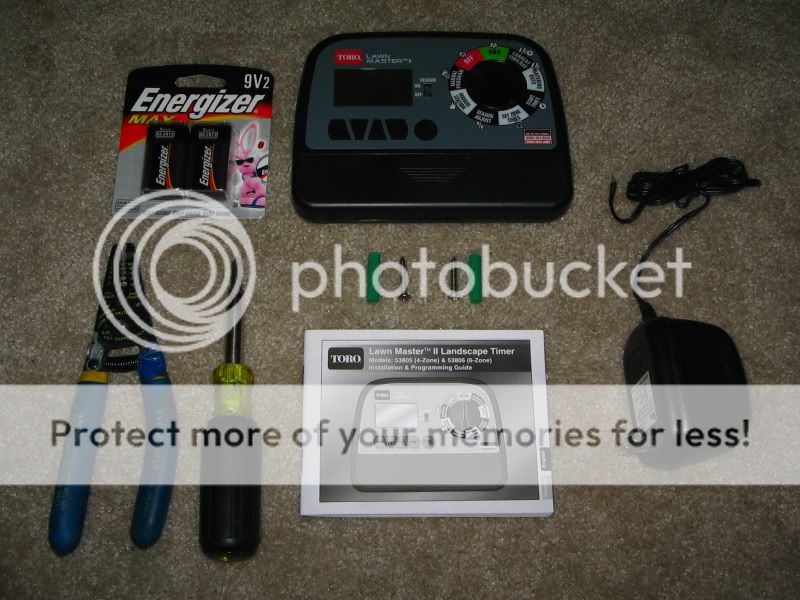
The items.

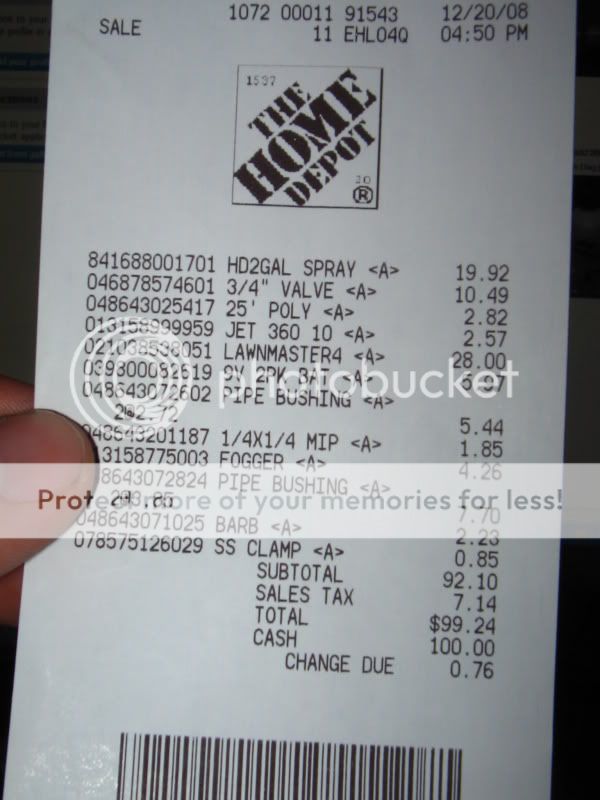
The receipt.
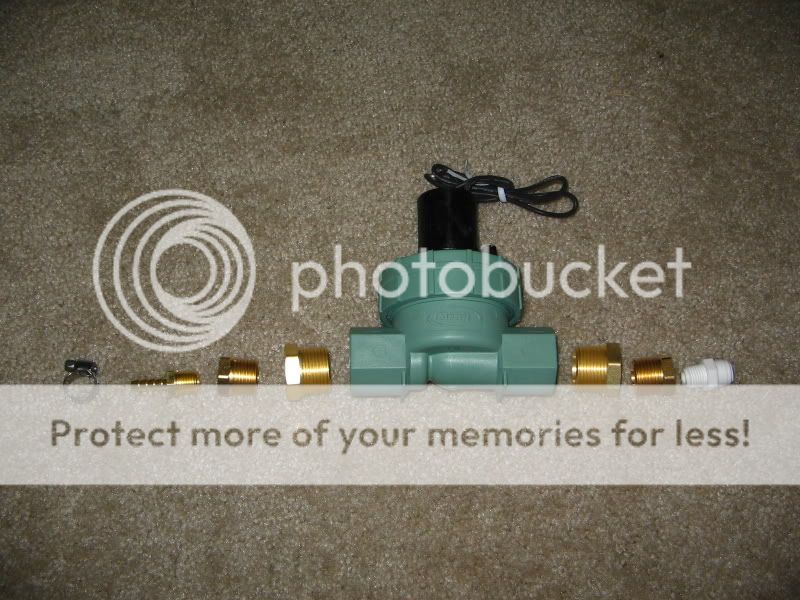
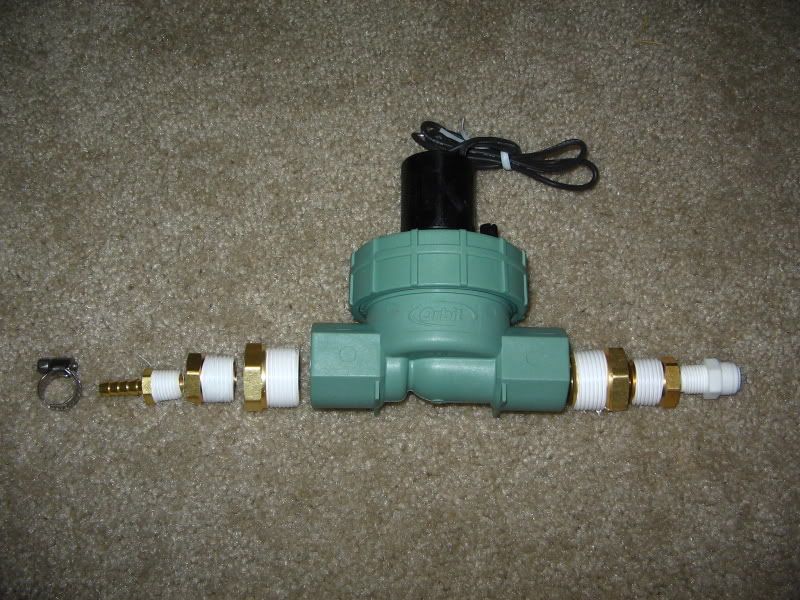
To begin start with the pipe fittings. Open the packages and arrange them in the order to be used. Keep the flow of the valve in mind. The valve will have arrows on each end indicating direction of flow. Use a couple of wraps of Teflon tape on the mail threads. I had sealing issues with the 3/4" adapters sealing to the valve, a few extra wraps will be needed") .
.
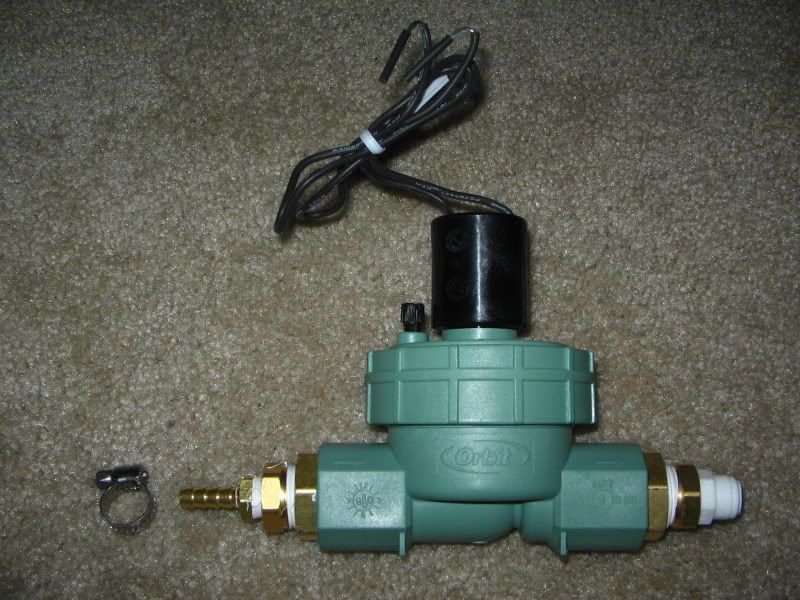
Assembled. This was before I knew I had a sealing issue. You can see the brass fitting is threaded in all the way into the valve. If you have enough Teflon on the threads you shouldn't be able to thread the fitting in all the way, as you see here. I had about a 1/8" gap between the hex of the fitting to the plastic. Also you'll notice in this photo the valve is backwards to the photos above. This is because the two photos above I had the valve orientated incorrectly, again watch the arrows on the valve.
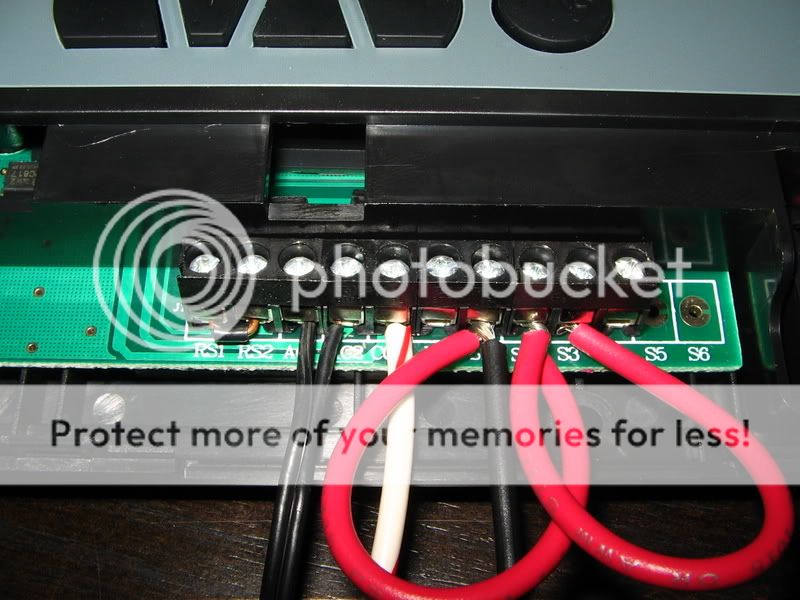
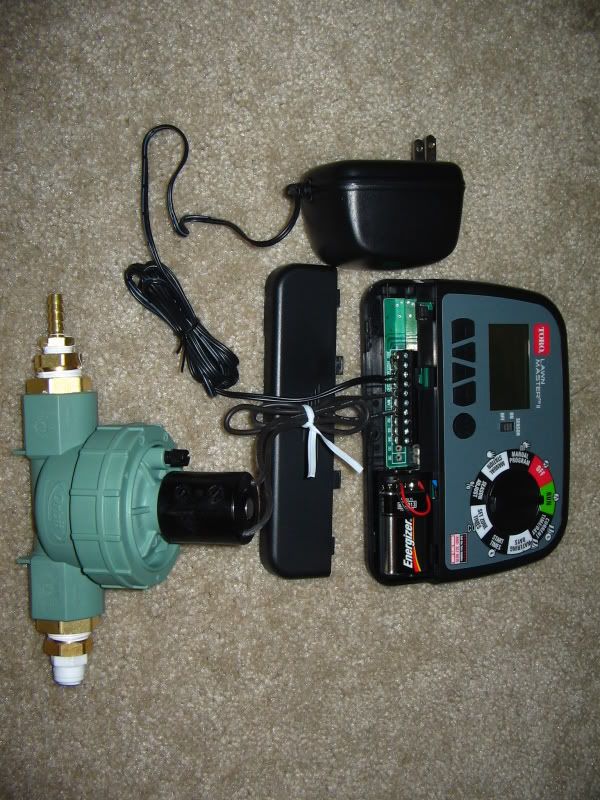
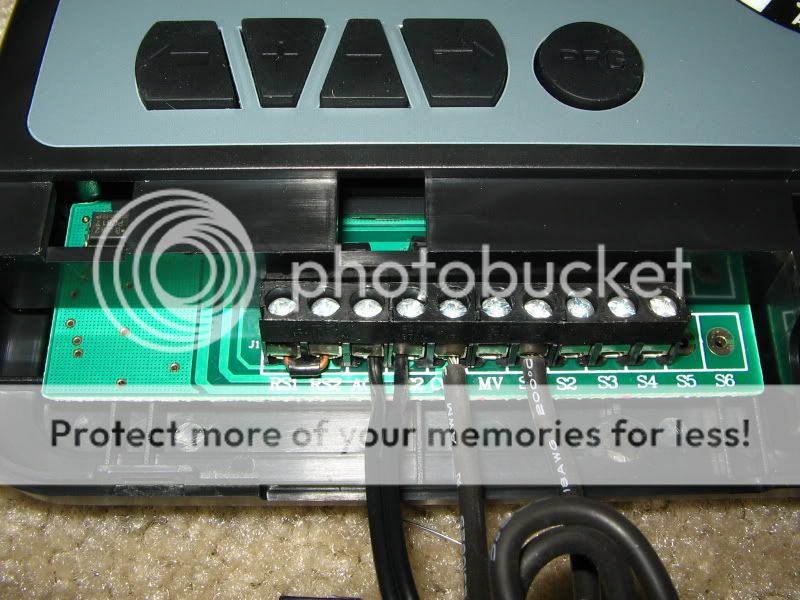
Next I tested my controller. You will need a small screw driver with a flat blade or philips head. Install the battery. Then connect the power supply. The power supply is 24VAC and does not need to be connected in any particular way. The valve is also using AC power and does not require the wires to be connected in any order. The manual will tell you to use the 'com' slot as a common wire and then use the other wire from the valve on the S1 terminal.
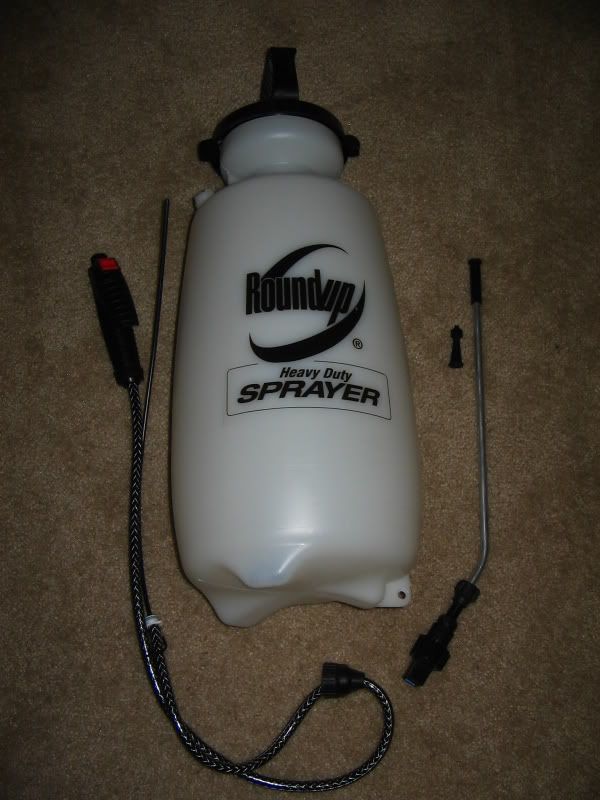
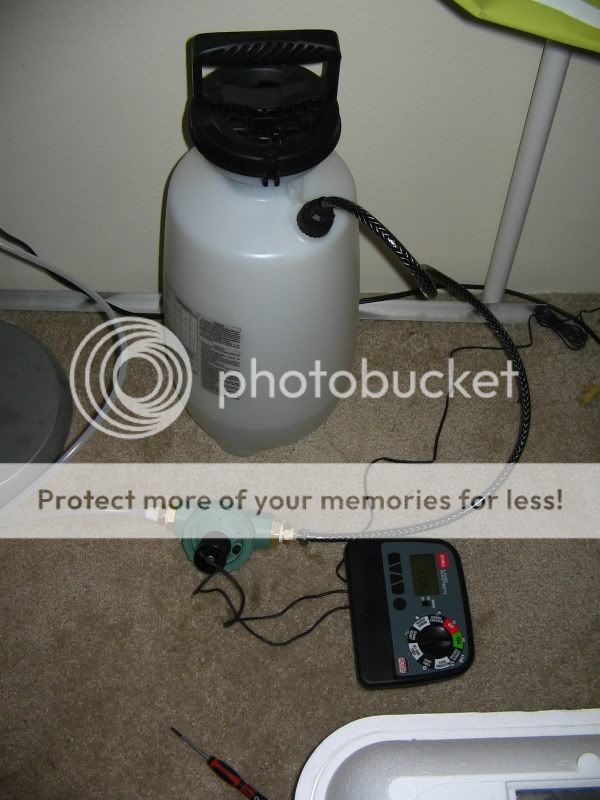
Next I connected the tank to the valve. I used a 2 gallon hand pump pressure sprayer.
Remove the screw cap that holds the hose to the spray handle. You will need to give a little tug to separate the hose from the barb on the handle.
Then cut the flared end off and remove the screw cap.
Next slide the hose over the barb on the valve and install the hose clamp nice and tight.
Items Purchased/needed:
- 1-Hand pump garden mister.
- 1-Garden sprinkler controller.
- 1-Garden sprinkler solenoid valve (3/4").
- 2-3/4" MIP to 1/2"FIP pipe bushing.
- 2-1/2" MIP to 1/4" FIP pipe bushing.
- 1-1/4" bard to 1/4" MIP hose barb adapter.
- 1-1/4"OD to 1/4" MIP push to connect adapter.
- 1-Hose clamp.
- 1-25' 1/4"poly tubing.
- 1-9v battery.
- 1-5 pack of 'fogger mister' nozzles.
- 1-Teflon tape.
The items.
The receipt.
To begin start with the pipe fittings. Open the packages and arrange them in the order to be used. Keep the flow of the valve in mind. The valve will have arrows on each end indicating direction of flow. Use a couple of wraps of Teflon tape on the mail threads. I had sealing issues with the 3/4" adapters sealing to the valve, a few extra wraps will be needed
.
Assembled. This was before I knew I had a sealing issue. You can see the brass fitting is threaded in all the way into the valve. If you have enough Teflon on the threads you shouldn't be able to thread the fitting in all the way, as you see here. I had about a 1/8" gap between the hex of the fitting to the plastic. Also you'll notice in this photo the valve is backwards to the photos above. This is because the two photos above I had the valve orientated incorrectly, again watch the arrows on the valve.
Next I tested my controller. You will need a small screw driver with a flat blade or philips head. Install the battery. Then connect the power supply. The power supply is 24VAC and does not need to be connected in any particular way. The valve is also using AC power and does not require the wires to be connected in any order. The manual will tell you to use the 'com' slot as a common wire and then use the other wire from the valve on the S1 terminal.
Next I connected the tank to the valve. I used a 2 gallon hand pump pressure sprayer.
Remove the screw cap that holds the hose to the spray handle. You will need to give a little tug to separate the hose from the barb on the handle.
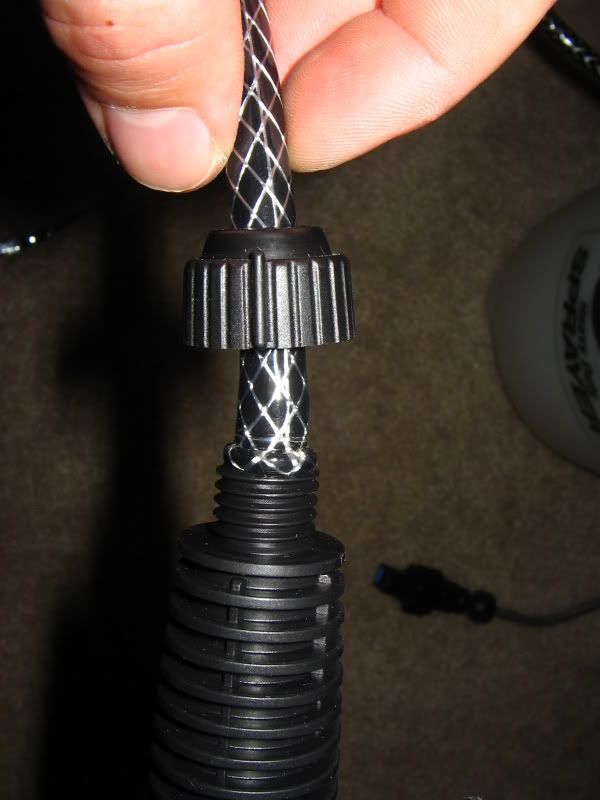

Then cut the flared end off and remove the screw cap.

Next slide the hose over the barb on the valve and install the hose clamp nice and tight.


") ).
).