DIY Aluminum 8020 Quick Frame Enclosure Build

Sgt. Bilko

Established Member
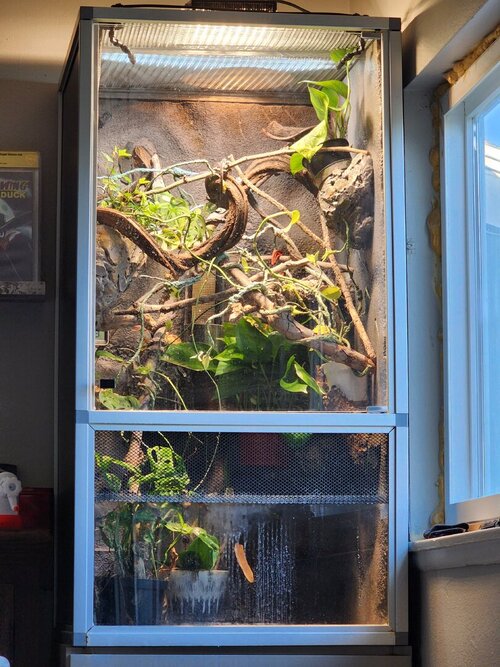
Sharing my DIY enclosure adventure!!

From my previous thread, I researched the types of material, availability and cost. I wanted an easy to build and STURDY enclosure for our soon to be Panther Cham family member. I’ve decided to create an 8020 Quick Frame enclosure. The material is rigid an accommodates interchangeable space for a screen or PVC side.

BD15A1C9-1524-42D9-A8C2-BABDAF7867C9.jpeg


I drew up a quick iso diagram to create a BOM and ordered online from Motion Ai. The enclosure size is large (will be 4’x2’x4’).

Next up…Building the frame.
 
I did this as well! I went with black 1/4" pvc and love it. Some tips I learned was cut to length and then miter just the panel rail to fit, don't hammer any of the connections together until you're 100% sure They are correct. If you go to 8020's website you can find a local distributor for you instead of using McMaster (much cheaper) and you can get many different extrusion profiles.

My 1st one was a 4x4x2 and then downsized due to space to a 2x2x4.

I also added some venting at 12in from the bottom (as you can see) and my screen top is made from aluminum stucco lathe from the hardware store.

This allowed me larger mesh so more UVB would penatrate.
 

Attachments

  • 20230219_075528.jpg
    20230219_075528.jpg
    225 KB · Views: 125
I did this as well! I went with black 1/4" pvc and love it. Some tips I learned was cut to length and then miter just the panel rail to fit, don't hammer any of the connections together until you're 100% sure They are correct. If you go to 8020's website you can find a local distributor for you instead of using McMaster (much cheaper) and you can get many different extrusion profiles.

My 1st one was a 4x4x2 and then downsized due to space to a 2x2x4.

I also added some venting at 12in from the bottom (as you can see) and my screen top is made from aluminum stucco lathe from the hardware store.

This allowed me larger mesh so more UVB would penatrate.
Thank you for the tips! I’ve been looking at PVC sheets. I’m looking today at this one from Menards. It has a wood grain design. Was thinking to paint it with drylok brown and black/white accents.

5F66B3DF-75B5-4B4C-A1BC-82C46B04A890.png


For those 8020 connectors which were loose fitting (shouldn’t be the case, but I had a few), did you add something to the connector to secure it better?
 
Thank you for the tips! I’ve been looking at PVC sheets. I’m looking today at this one from Menards. It has a wood grain design. Was thinking to paint it with drylok brown and black/white accents.

View attachment 335015

For those 8020 connectors which were loose fitting (shouldn’t be the case, but I had a few), did you add something to the connector to secure it better?
No gravity holds it together just fine. You could always add a self tapping screw if you felt you needed to
 
I did this as well! I went with black 1/4" pvc and love it. Some tips I learned was cut to length and then miter just the panel rail to fit, don't hammer any of the connections together until you're 100% sure They are correct. If you go to 8020's website you can find a local distributor for you instead of using McMaster (much cheaper) and you can get many different extrusion profiles.

My 1st one was a 4x4x2 and then downsized due to space to a 2x2x4.

I also added some venting at 12in from the bottom (as you can see) and my screen top is made from aluminum stucco lathe from the hardware store.

This allowed me larger mesh so more UVB would penatrate.
Great looking enclosure, by the way! Is the back wall shaped foam board insulation?
 
Great looking enclosure, by the way! Is the back wall shaped foam board insulation?
Yeah it's 2in eps and I used a blow torch to shape it and then painted it with several different colors. Did that on walls and back. I love it and it really blends in well with the plants
 
Yeah it's 2in eps and I used a blow torch to shape it and then painted it with several different colors. Did that on walls and back. I love it and it really blends in well with the plants
Blow torch is super smart and less mess! Great tip, thanks!
 
I chose to self cut the Quick Frame, in an effort to keep costs low. The Diablo blade did a good job.
E3F4B0D1-82C4-4CAD-B411-C3E8EFAC25E0.jpeg


Straight cuts, then 45 degree with the miter saw. Took about 2 hours to get all of the frame pieces cut.

127C35C3-6590-421D-9319-541B439663A3.jpeg
 
Mounted the door hinges, using clamps to hold the desired position. All hardware is stainless steel to prevent corrosion. This was a good stopping point for the weekend. Next up screen frames (48”x48” mill aluminum kits and mesh inside the terrarium). I’m continuing the PVC board research, as what my local Home Depot and Menards did not have 1/4” at the size I need.

BA42B2DC-2C14-4D97-A5DE-E35A0FFF82CD.jpeg

24EEFEC9-31D0-4AF9-AEB0-EE0A9660EB9E.jpeg

5263E594-54D5-4108-8845-4B52D23C64A7.jpeg
 
Purchased 1/4” PVC sheets from
Home Depot (pic below). Sadly, they didn’t carry a 4’x4’ board for the cathedral I’m
building, so I’m combining two on the back. Shouldn’t be a big deal to create a waterproof seal for them. I’ll deal with that later.


21B674DE-2BFB-45BD-9CF0-0C72FD206F1B.jpeg


With all four boards installed, the terrarium is starting to take shape.

AD722A87-A7B4-4AD9-8420-8CAD440F6D3B.jpeg


0BA909E7-E6D0-4EFC-9531-F93401CA07E4.jpeg

Next up, screen inserts.
 
Spent time this evening purchasing and cutting 1/4” acrylic sheets (48”x48”). Luckily my local Menards had this in stock and for a reasonable price. Screens up next, but not until the weekend.

B785437D-5C08-4360-BD19-174C5B6ABE60.jpeg
 
Great advice. I do plan on adding marine grade silicone sealant to the frame flanges. Terrarium looks great, nice and big.
Did the same, laid all the plates in silicone sealant in the frame flanges. But, after months it started to let water through. Best to lay an extra layer after silicone sealant on top of it as well.
 
Did the same, laid all the plates in silicone sealant in the frame flanges. But, after months it started to let water through. Best to lay an extra layer after silicone sealant on top of it as well.

My work had "flowable silicone" so i used that. You can use just about any silicone as long as it doesnt have mold inhibitors, and if it does, its not going to stick real well...
 
Back
Top Bottom