I sucessfully Breed my Panther yesterday

HBSOLID

New Member
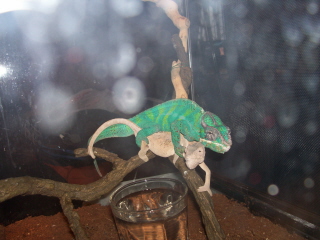
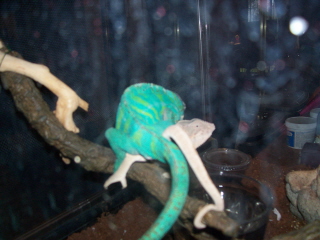
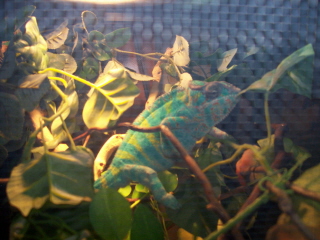
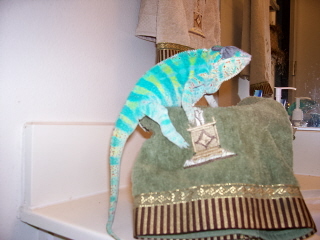
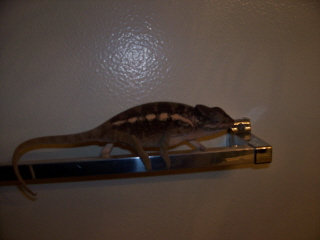
I took the advice of a few members on this board, and I came out with a successful out come, but I was only able to breed them once which lasted for a hour and 30 mins. MY male Panther is a Ambanja and My female is a WC so i don't no what the colors might be
 

Attachments

  • 102_0986.JPG
    102_0986.JPG
    75.4 KB · Views: 175
  • 102_0984.JPG
    102_0984.JPG
    76.9 KB · Views: 214
  • 100_0909.JPG
    100_0909.JPG
    95.1 KB · Views: 195
  • 100_0904.JPG
    100_0904.JPG
    74.9 KB · Views: 218
Also I like any input if possible, about my further steps, most of all which Incubator would be best and etc.... Thank in advance
 
When you breed you can leave them together for several copulations. I leave mine together for 2 or 3 days mating will occur several times. If they start to stress one another then you can separate.
 
Yeah....! My male always attack the female after mating. I don't why sometimes he could tolerate another female to stay several days.
 
This is helpful information from Liddy and Ed from kammerflage kreations.
EGG LAYING . . .

Gravid females often show signs of "nesting" when they pace around the cage sides or floor of their environment. They are searching for a spot to lay their eggs. The location they are looking for is something safe and private. Here is the technique we use to make this provision:

Prepare a clean 26 gallon plastic trash can by filling the bottom with approximately 18-24 inches of sterile potting soil. Add enough water to the soil to make it damp, but not wet. Place a clean potted plant into the soil along one of the trash can edges. This will provide her the necessary privacy while digging her nest, leaves to lick water from when she's thirsty and a place to perch when tired. If the cage is indoors, attach a 60wt. clamp lamp to the side of the trash can pointed toward the inside edge. This will provide her with low lighting and warmth.

You can dig "test holes" for your chameleon to possibly use. Pat the soil down firmly and make a tunnel that goes down at a 90 degree angle toward the bottom of the can. Make sure the soil on top of the tunnel is packed firmly so it doesn't collapse when the female goes in and starts digging. When we do this, we usually create the tunnel between the potted plant and the wall of the trash can. It's a nice snug spot that the female feels secure using. Some females take hours or several days to begin the nesting process while others begin almost immediately after being introduced to the trash can.

Once she has completed her nest, she will turn around facing outward and lay her eggs. After laying, she turns back around and buries the eggs. She will continue to bury them and pat the soil down along the top. When she is finished, her nest site will be completely hidden and only you and she will know where the eggs are!

NOTE: It is important to allow her to complete the egg burying process. Do not stop her before she is finished (to make things easier for her) or she may be compelled to repeat the process over and over again.

Once she is finished with the egg laying process, remove the female to her own enclosure and carefully excavate the eggs. See the "Egg Incubation" page for additional instructions.


EGG INCUBATION PREPARATION . . .

Prepare an incubation container using a plastic container with a top that seals. We prefer to use vermiculite as the incubation medium.

Measure 2 quarts of vermiculite and place it in a microwavable bowl. Cook the dry vermiculite on high for 2 minutes so any mold spores or possible germs can be killed. Once heated, add 1-cup distilled or purified water and mix thoroughly. Be careful while mixing because the vermiculite comes out of the microwave very hot! The mixture should be moist but not "wet". It should stick together when squeezed.

Pour the vermiculite into the washed out plastic incubation container and pat down firmly. Allow mixture to cool to room temperature. Using your index finger, push inside the vermiculite to make a tiny hole for each egg to go into. Place each egg on it's side, not on it's end. Leave 1/4 of the egg exposed at the top so you can easily view it from time to time. Eggs should be spread out approximately one inch from each other. Form rows so you can easily add water between the eggs if needed at some point during the incubation process.

Mark your container with the number of eggs and date they were laid. Keep the lid tightly covered to avoid evaporation and loss of humidity. Check eggs once every 2 weeks or so and more frequently as they get closer to hatching. Remove any infertile eggs if necessary. Avoid picking eggs up as they incubate as not to disturb or possibly detach the growing embryo.
 
Back
Top Bottom