So a tip, as you mentioned a background.
Silicon, and really anything will not stick to liquid rubber. That is one of its biggest disadvantages. The other is it never fully cures, and won't add any strenght, aside of course from the fact Silicon will not stick.
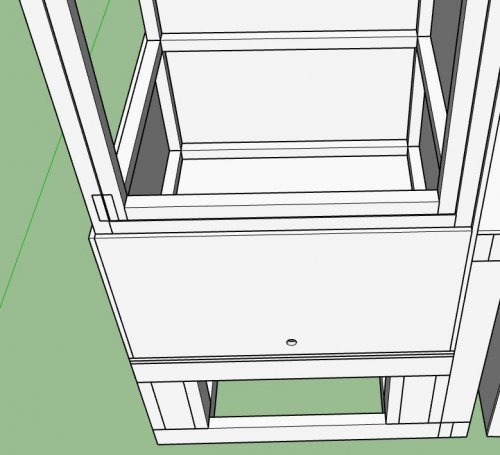
This can be bad and good, for the same reason. When the wood expands and contracts, it can move with it, it can also split due to this and leak.
Another thing to keep in mind, Pond Armor can be thinned for applying, LR cannot, you may think it's cheaper, but it really isn't. It's very very thick, and it will take 2x as much as pond Armor to do the same area. I'm sorry to say, there is no cheap way out of a proper seal, your going to spend a decent chunk of change on that.
A few other options to chew, is Max CLR epoxy, you can get it tinted or keep it clear, it will add strenght, and you can add fiberglass Matt to add more.
And Sweet Water Epoxy Paint. You can do the whole cage with this, and it's the easiest of everything listed to actually apply. It's just like regular paint going on, but it's epoxy and dries as such. You should fiberglass corners for strenght first. Warning on this one, it dries 100% non toxic, it's actually the only product discussed here made for this purpose (Fish tanks, Animal cages) but it's very very toxic before it cures and stinks bad! So plan on painting outside. It is safe after a week of curing, it's made by a company that does fish stuff. This is what Zoos and such use for their large aquariums. It's also, probably the least expensive seeing how much it covers, as a thinner amount is needed. At 85 a gallon, you could probably do the whole proposed cage inside out with 1 gallon.
You could also do a mix, like Sweetwater everything, then also LR the substrate bin for extra security. The biggest issue with the LR, is that silicon won't stick and UV will turn it an ugly color fairly quickly. In the soil bin that doesn't matter.
Ok
Also another heads up on that note, just as silicon won't stick to it, it won't stick to silicon. So if you decide to go with LR, do not use silicon anywhere first.
 .
.

 .
.")