It's pretty straightforward. Install the bulkhead, a section of ro tubing from the reservoir to the pump, and your water line from the pump to the misting head.
Key points among the way-
-If using a plastic container (like most of us are), try to drill the hole on the flattest part of the container. The flatter, the less of a chance of leakage.
make the hole as clean as possible. A stepped drill bit works extremely well for this if you have one. If you do not, just take your time. I seem to have better luck working my way up to the final hole size as opposed to just drilling the final hole size from the beginning. Either way, once finished, clean up the hole and remove any plastic burrs so the hole is as smooth as possible.
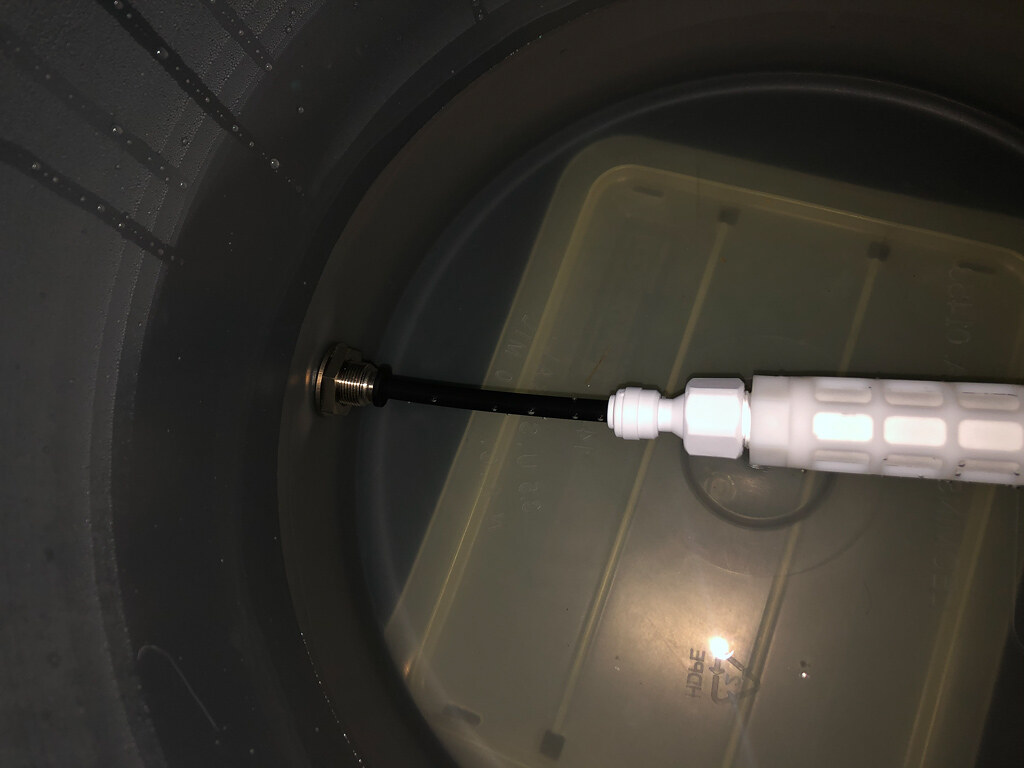
Regarding the supplied filter, it's attached to the side of the bulkhead inside the reservoir with a piece of ro tubing. If you use it, try to have the filter mounted so it's parallel to the bottom of the reservoir. If you drill the bulkhead through the side, just a piece of tubing will work. If you drill through the bottom, you probably will want to put a 90 between the bulkhead and the fitting. Use a piece of tubing long enough so you can easily remove the filter when it starts to clog (and it WILL clog. In a few weeks, when you notice your mist isn't as strong as it used to be, most likely it will be because of the clogged filter.) The filter also unscrews from the fitting base, if that is an easier way for you to remove it.
-It is best to have the pump BELOW the bottom of the reservoir. (Think of the water draining into the pump). This will make it much easier to get the pump primed initially.
-Be sure to follow the arrow on the pump pertaining to the direction of the water through the pump. If installed backwards, the pump will be trying to push air from the mister line into the reservoir.
-Avoid any sharp bends in the tubing. If the turn is too sharp, cut the line and install a 90° fitting.
-Remove the plastic cover from the misting head ONCE INSTALLED into the cage. They produce an extremely fine mist, and accidentally bumping/dropping the nozzle will pretty much ruin it . They take the time to put those protective covers on the heads for a reason!
")
-Make sure any tubing is FULLY pushed it the the fittings! When you have the tubing inserted into the fitting, give a very hard push. The tube should push in around another quarter inch, and yes, most of the time it will feel like you are pushing too hard. But you're not.
Once up and running, the pump has a lot of pressure that creates vibration in the water line. Depending on your setup, it may be "slapping " the side of your cage. This can be corrected by fastening the line down. You can use the supplied tubing clips for this. But to use the clips, you have to drill into the cage frame to atach the clips with the supplied screws. I have used miniature (the smallest they make) Command hooks in the past with success. Attach the hooks to the frame of the cage, and use 4" zip ties to attach the ro tubing to the hooks. Though not as effective as the supplied clips, it doesn't require any drilling. (I have Reptibreeze cages. On other styles of enclosures, YMMV.)
One of the few beefs I have with MK is the timers. They are pretty rudimentary. It's a slow process to set them up, and to make changes to your misting schedule. The instructions provided online are pretty easy to follow. They do not automatically correct for DST. And i wish there was a "countdown" mode to manually mist, instead of having to stand there and hold the override button down. Gets pretty boting after about 30 seconds. However, they will hold the time and your program if you lose power or unplug the unit for a time. Not sure just how long that time frame is though.
Hope this helps. Good luck and don't be intimidated!