Navigation
Install the app
How to install the app on iOS
Follow along with the video below to see how to install our site as a web app on your home screen.
Note: This feature may not be available in some browsers.
More options
You are using an out of date browser. It may not display this or other websites correctly.
You should upgrade or use an alternative browser.
You should upgrade or use an alternative browser.
New Cage Build!
- Thread starter Tyaeda
- Start date
NickBoudin
New Member
A good trick I've used in the past is to put a few drops of black acrylic paint into a 1$ water spray bottle, and add about 2 cups of water and shake well. Spray that onto the rocks from a far and use a wet rag to wipe the excess wherever you don't want it. This way it's so thin that it gets in all the cracks and adds depth, but you can also wipe it off with a wet towel of the obvious flat areas that wouldn't be so dark. Hope this helps! ")
streetmike84
New Member
If you want to use wood you can use yacht varnish this should stop water getting in the wood
Tyaeda
Established Member
Thanks Everyone!
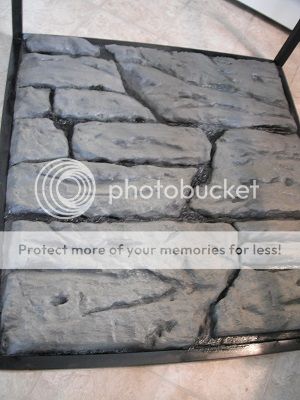
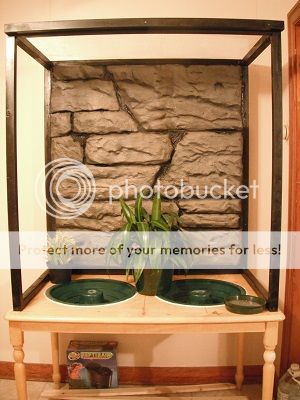
Sorry for the delay - the husband and I both work 12 hour shifts, so progress has been slow since we've been back to work. However, we completed the painting of the rockwall, and permanently installed it into the frame. We completely sealed the entire perimeter with silicone, so that no water seeps through to the plywood backing. Here's what it looks like now.

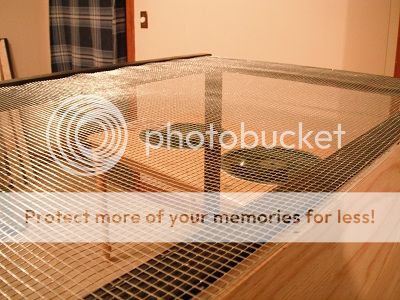
Next we cut and stapled on the 1/4 inch chicken fencing for the top.
Next we cut all of the trim and top plates we need. We're going to sand everything but the cedar top plate black. While we do that we're going to screen in the sides and doors with black painted aluminum window screen. Pictures to come!
Sorry for the delay - the husband and I both work 12 hour shifts, so progress has been slow since we've been back to work. However, we completed the painting of the rockwall, and permanently installed it into the frame. We completely sealed the entire perimeter with silicone, so that no water seeps through to the plywood backing. Here's what it looks like now.
Next we cut and stapled on the 1/4 inch chicken fencing for the top.
Next we cut all of the trim and top plates we need. We're going to sand everything but the cedar top plate black. While we do that we're going to screen in the sides and doors with black painted aluminum window screen. Pictures to come!
Chameleon Creator
New Member
Looks great so far, I really want to build a custom cage as nice as this one is turning out
Tyaeda
Established Member
Thanks!
It's pretty easy, just have to plan ahead, and buy extra stuff for when those plans don't work exactly like you wanted them too
I've made I don't know how many "last trips" to Home Depot, I bought a few of the wrong things, but I think anyone on any build would encounter some of the same problems.
We're taking our time with things. We're not in the same rush we were when we first got Mr.Pink. I'm glad this isn't our first build though - we learned a lot on our last one that we simply wouldn't have known until we had wasted a ton of money.
Mr.Pink is going to love his new digs once they're ready for him.

II Knucklez II
New Member
awesome build!
Tyaeda
Established Member
Thanks guys
I'm going to be doing some more work on it tomorrow probably. I ran out of screen - something else I have to go get more of.
I did the waterproof test of the rockwall yesterday, and that turned out good. I didn't really explain the painting process fully so here it goes:
First I used acrylic craft paint (diluted) to cover the entire face of the rockwall to paint it a flat grey colour.
Next I enhanced the texture and 3d effect by applying a darker grey colour to the shadowed areas, again making sure that the paint got into all of the nooks and crannies.
Once that all dried, I carefully went over the entire thing again to make sure there were no bare spots - this is VERY important for the next steps.
After everything was completely painted, it was time for the oil based spray paint. Most if not all spray paint eats styrofoam, but the acrylic paint provided some protection against that.
Spraying at different angles, from more than twice the suggested distance written on the cans, I used both Sand and Camouflage Green to add more colour variation. This was also the first coat of waterproofing.
Once dried, I added three thin clear coats from a distance. By then the rockwall was almost completely waterproof. I did one more coat at the suggested distance on the can for good measure.
Like I said before, once that was dry, I installed it into the frame with silicone, and then applied a generous bead of silicone all around the perimeter. Since that wasn't all that sightly, I took a left over can of black spray bomb and painted the silicone edges, and in between each "rock" so everything matched up. This also made the shadowed parts look more indented.
To test for water proofing, I poured a little water on a few spots on the wall, making sure that nothing soaked in. I didn't find any spots, but if I did I would have applied another clear top coat.
Tyaeda
Established Member
Ok. I know I've been slacking off, but it really is hard for me to get much done with the work schedule I'm on. But we're almost done!
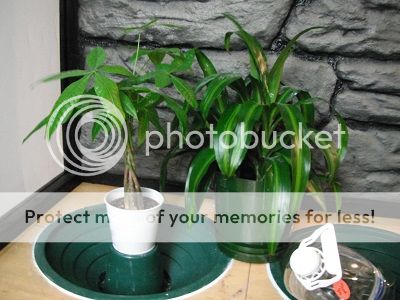
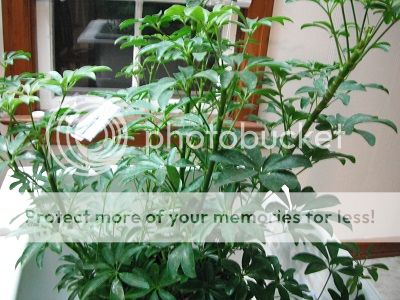
The mistking has been ordered, and should be here in a few days Purchased a nice 36" ballast for $60 on sale, and another 24" t5 grow light. I went a little crazy buying plants. Bought a giant schefflera monstrosity, dinky schefflera, small money tree, plus some coleus seeds that I have germinating in my kitchen right now I have some passion flower seeds on order - don't really know how that's going to work out, but I think it's worth a shot. I'm also waiting to find some ficus - I'm pretty bent on making a free range in a spare bedroom in my house sometime in the future ")
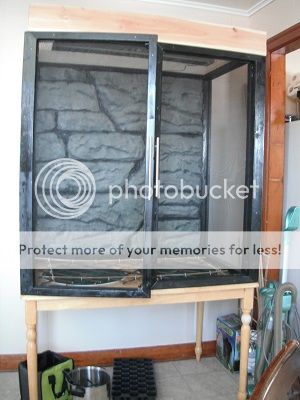
As far as the actual build goes - we're approaching the finish line here too. The screen has been stapled to the outside of both sides and door panels. I stapled it to the outside so the staples will be covered the trim. The trim's been cut, sanded, and painted the same black. I'm going to explain this step a little more once I can get some better pictures. But it's all attached now, and it looks like a million bucks.
All we have left to do now is the cedar top plate which will hide a lot of the hardware on top. After that we'll install all of the lights and what have you, and Mr. Pink will be ready to move in
Now for some pictures:
The mistking has been ordered, and should be here in a few days
Purchased a nice 36" ballast for $60 on sale, and another 24" t5 grow light. I went a little crazy buying plants. Bought a giant schefflera monstrosity, dinky schefflera, small money tree, plus some coleus seeds that I have germinating in my kitchen right now I have some passion flower seeds on order - don't really know how that's going to work out, but I think it's worth a shot. I'm also waiting to find some ficus - I'm pretty bent on making a free range in a spare bedroom in my house sometime in the future As far as the actual build goes - we're approaching the finish line here too. The screen has been stapled to the outside of both sides and door panels. I stapled it to the outside so the staples will be covered the trim. The trim's been cut, sanded, and painted the same black. I'm going to explain this step a little more once I can get some better pictures. But it's all attached now, and it looks like a million bucks.
All we have left to do now is the cedar top plate which will hide a lot of the hardware on top. After that we'll install all of the lights and what have you, and Mr. Pink will be ready to move in
Now for some pictures:

SaintJimmy
Avid Member
Looks absolutely amazing. I can't wait to see the 100% furnished and finished product.
Tyaeda
Established Member
Looks absolutely amazing. I can't wait to see the 100% furnished and finished product.
Thanks! We can't wait either. My husband and I will be devoting the whole day to the finishing touches to the build. Once it's complete I'll take lots of pictures.
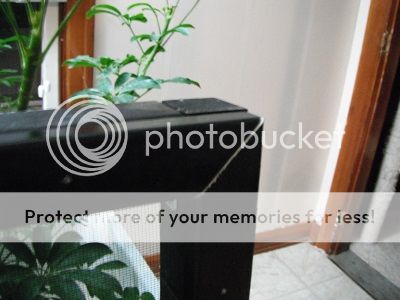
I have to go out today and try and find some wire shelving racks to use for the bottom of the cage. I was trying to rearrange some plants, and encountered a problem. The tree stands that I have in place of drainage only allow you to put plants in the exact middle. A lot of space is being wasted on the funnel part of the stands.
Tyaeda
Established Member
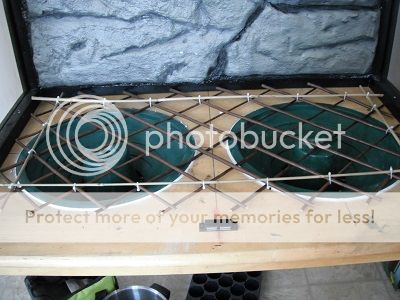
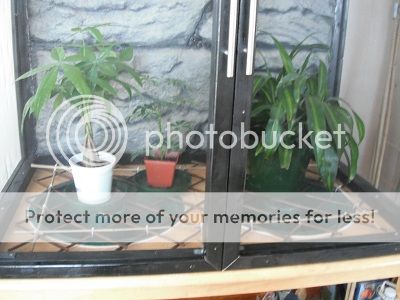
Found a solution to my problem. I used garden lattice stretched and cut to fit the entire bottom of the cage. I zip-tied 4 bamboo sticks on each side to keep the lattice from stretching or collapsing. Et voila! Somewhere for my plants to sit
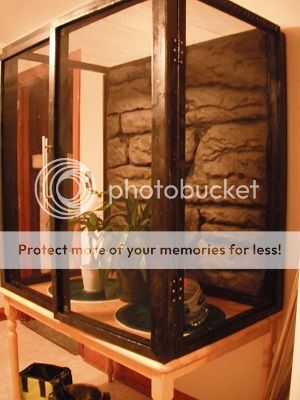
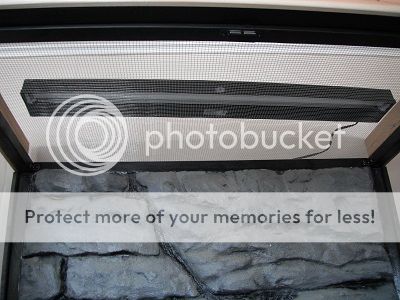
And we finally put the top plate on both sides and the front of the cage. We didn't build up the back because that's where we want all of the excess wires and tubing to hide behind. Here's a pic of the new uvb setup we got.
And here's what it looks like now! C'est Fini! (Feeling a bit french today )
)
And we finally put the top plate on both sides and the front of the cage. We didn't build up the back because that's where we want all of the excess wires and tubing to hide behind. Here's a pic of the new uvb setup we got.
And here's what it looks like now! C'est Fini! (Feeling a bit french today
)
Similar threads
- Replies
- 9
- Views
- 2K
- Replies
- 8
- Views
- 3K
- Replies
- 40
- Views
- 11K