My Bioactive Enclosure

Kangofett

New Member
Hello
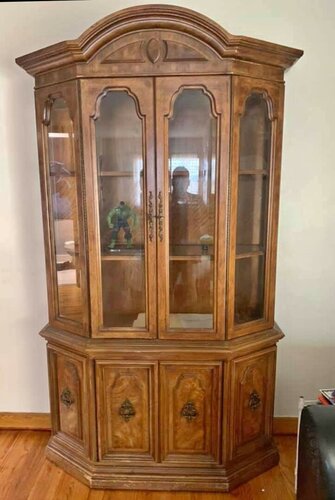
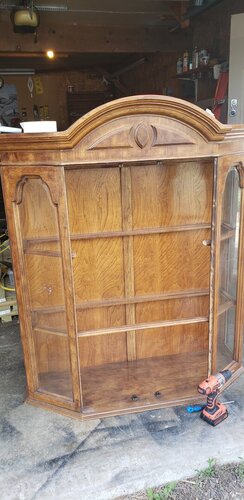
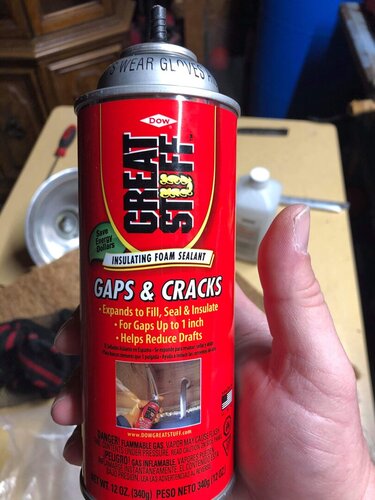
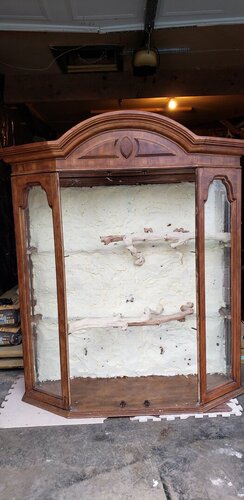
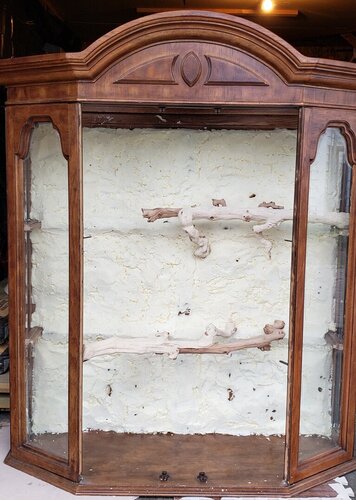
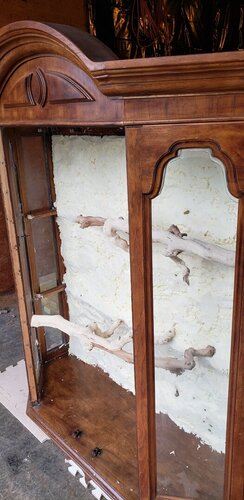
I'm gona be posting how I'm building my Bioactive Enclosure for a vailed chameleon as I complete each step to help people as I go.

I'm not doing this alone as I am having guidance and assistance from a friend with many years of experience.

Thank you all for checking this out and coming along for the ride.

-Kango
 
The first step was to buy a cabinet that would look good and have ample room for a chameleon.
For this I used a china cabinet I found on Facebook Marketplace.
I loved the unique shape to it and knew the doors would be great to keep my cats out of it.
It is a old handmade cabinet that separates into two parts, upper and lower, and already had a space up top where a light was already mounted. Everything on it sealed up tight so it would be a great cat deterrent.
 

Attachments

  • 20200601_110348.jpg
    20200601_110348.jpg
    108.4 KB · Views: 52
Next we removed the doors, old light system, and the plastic that was just under the light.

We then used silicone on all the edges on the inside of the tank.
This required us to remove the rubber door trim and refill these areas with silicone.

Once everything was filled we let it dry for a day.

We used two to three cans of silicone for this.
 

Attachments

  • 20200524_160625.jpg
    20200524_160625.jpg
    139.5 KB · Views: 45
  • 20200531_154259.jpg
    20200531_154259.jpg
    115.6 KB · Views: 49
Coming back the next day we started the process of foaming the entire back wall.
We foamed heavy around the shelf frame to round it out so there would be no lip for water or mold to form.

This didn't take too long but we did go through many cans of foam.
We then let it sit overnight to allow the foam to expand and set.

In total we used six to eight cans of foam.
 

Attachments

  • 20200525_175228.jpg
    20200525_175228.jpg
    161.2 KB · Views: 54
  • 612033937.jpg
    612033937.jpg
    97 KB · Views: 61
  • received_222821058972976.jpeg
    received_222821058972976.jpeg
    149.5 KB · Views: 67
Last edited:
Now that brings us to our current time.
Yesterday we started to cut and form the foam.
The goal here was to cut off all the "shiny" spots to prep for the next phase of the wall.

This task of cutting took many hours but we managed to do it in one afternoon.
We also cut back the shelf at this time and added a few branches that we had on hand. We screwed these in to make them more secure.

As you can see the cutting did reveal some bald spots that need to be refilled with foam. We are also going to add some more of the framework.
 

Attachments

  • 20200531_191315.jpg
    20200531_191315.jpg
    122.5 KB · Views: 52
  • 20200531_200546.jpg
    20200531_200546.jpg
    177.1 KB · Views: 59
  • 20200531_191321.jpg
    20200531_191321.jpg
    131.6 KB · Views: 60
  • 20200531_191329.jpg
    20200531_191329.jpg
    128.8 KB · Views: 52
The soil bin? I think you skipped a step.

Actually a few, because that Great stuff is NOT going to waterproof that backboard. That backing is going to rot, during the life of that Veiled.
 
The soil bin? I think you skipped a step.

Actually a few, because that Great stuff is NOT going to waterproof that backboard. That backing is going to rot, during the life of that Veiled.
For the soil bin we will be constructing one.

We are aware that the Great Stuff will not waterproof the enclosure. So we will be applying a thick layer of silicone and coco coir.
 
For the soil bin we will be constructing one.

We are aware that the Great Stuff will not waterproof the enclosure. So we will be applying a thick layer of silicone and coco coir.


Yes, I realize that. The issue is the silicon and coconut coir will also not make that waterproof.

You did that backwards hate to tell you that, but its the reality. The enclosure needed to be waterproofed before you greaf stuff.
 
Yes, I realize that. The issue is the silicon and coconut coir will also not make that waterproof.

You did that backwards hate to tell you that, but its the reality. The enclosure needed to be waterproofed before you greaf stuff.
Actually if he puts a good layer of silicone and coco coir after he builds the substrate box I think he’ll be fine. Silicone is definitely waterproof and I have never seen my silicone coco coir walls absorb any water. When the mister goes off it just sheds down to the bottom. If done right I think he’s still in good shape.
 
Actually if he puts a good layer of silicone and coco coir after he builds the substrate box I think he’ll be fine. Silicone is definitely waterproof and I have never seen my silicone coco coir walls absorb any water. When the mister goes off it just sheds down to the bottom. If done right I think he’s still in good shape.

Problems are,

A. The silicon and coco fiber will fall off, little bits over time.

B. The Humidity is what is going to cause the most rot issues. Which is why its important to seal well. The silicon and coconut coir will not stop the humidity from getting behind the foam.

To each their own and I hope it works out. However having seen this done before I know it will not long term.

It will last 4-5 years, but not much longer.
Agreed, but maybe that’s all he’s going for...

I don’t know about you but after four or five years I’m ready to change stuff up anyway lmao ?
 
For the custom substrate box, make sure the moisture does not leak through the back, or that insects don't do so. I have to agree, the moisture will eventually penetrate, and there are probably going to be tiny spots that you missed with the silicone that will cause it to absorb moisture.
 
For the custom substrate box, make sure the moisture does not leak through the back, or that insects don't do so. I have to agree, the moisture will eventually penetrate, and there are probably going to be tiny spots that you missed with the silicone that will cause it to absorb moisture.
Agreed it’s not a permanent solution, but I think it will work for a while. Even if he had coated it in FlexSeal it would eventually fail. No matter how he constructs it with wood involved it will eventually fail...
 
Back
Top Bottom