summoner12
Avid Member


At the San Diego Reptile Super Show I met Marty from Mist King for the first time. I have purchased from him and talked with him on the phone and through email many times. It was great to meet him in person and shake his hand. While hanging out at his booth talking I started to play with the display he had setup on the table. He had a box with a button that operated a pump under and some misters that were setup in a terreriam that was on top of the table.
This is the box he had on the table. It looked great! (this is a pic I took after taking out his cords and installing what I planned to use..... but ya get the idea....)

A lot of people would walk up and press the button and not hold it... and the response was "it doesn't work" or "oh, you have to hold it....". I told Marty he needed a 'delay off' timer relay. He looked at me like 'a what?'. I tried to explain myself to him but we ended up agreeing that I would just build him something if he sent me his button and box.
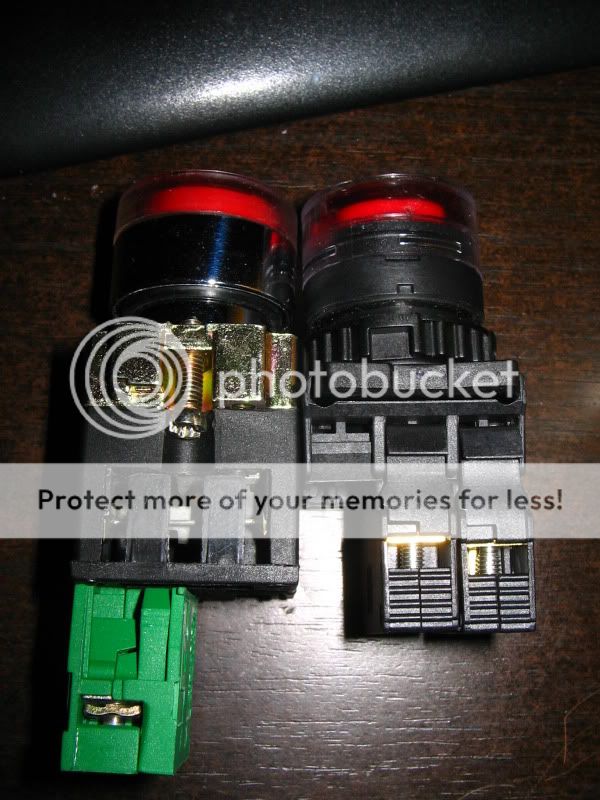
I made some purchases online and did a little shopping at Fry's... A week or so after the box arrived I had a working rough draft. I ended up replacing Marty's button with a new one. You can't really tell from outside of the box... but I like mine because it has a lower profile inside the box.
The original idea was to make the relay fit inside of the box with the button. I guess I didn't realize how small the box was when I suggested the idea . What I ended up doing instead, was making a second box to sit under the table that had all the components and a single cable that would go to the button box that would trigger the timer. This makes things simple for the box and button 'display', there won't be a bunch of cords running around the top of the table if I separate the two.
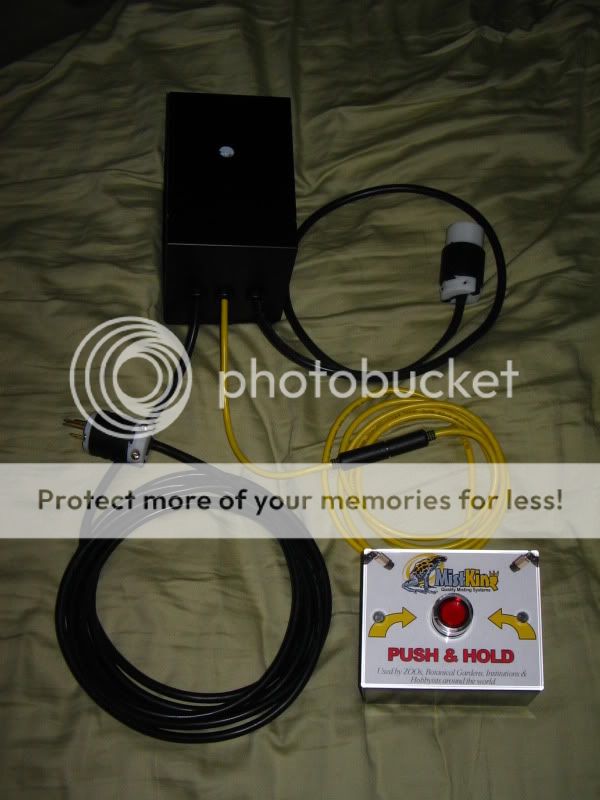
This is the completed version of the whole sha-bang.... kinda
At first I was going to make the cord going from the button box to the relay box connect directly together, as one. But I started thinking... This means the two boxes will have to be packed together and could get damaged in shipping and moving around... it also meant the cables would get tangled and messy as time goes on and the display is moved around and used.
So I told him I would put on connectors for the trigger cord and make an extension cord for it as well. This would give him some flexibility. I don't have the cord in the shot.. but this is the final product I will be sending him.
Here are some pics of the inside guts...
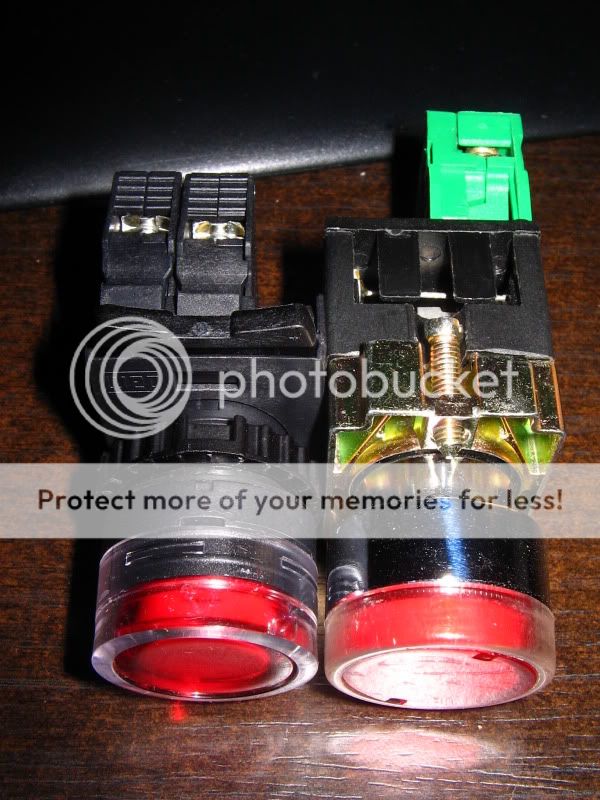
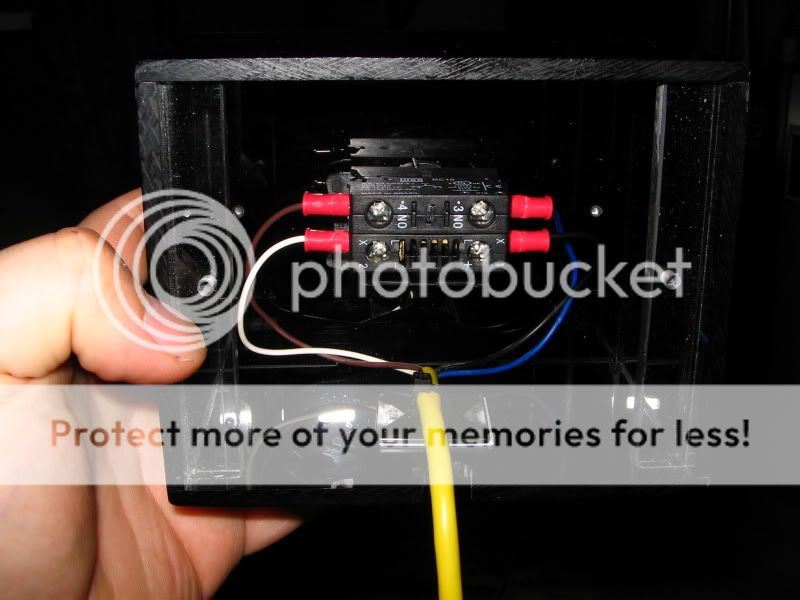
Inside the button box... The lower 'block' is a light housing to illuminate the button and the upper 'block' is the 'switch'.
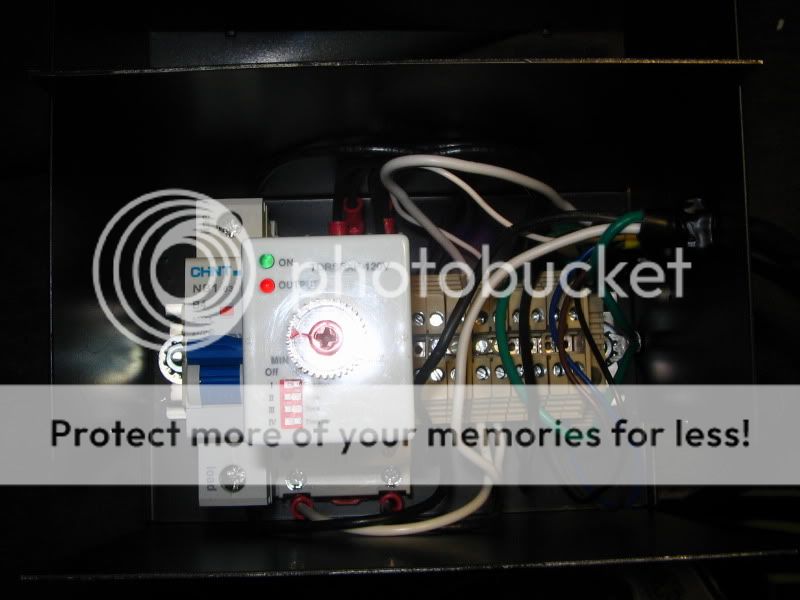
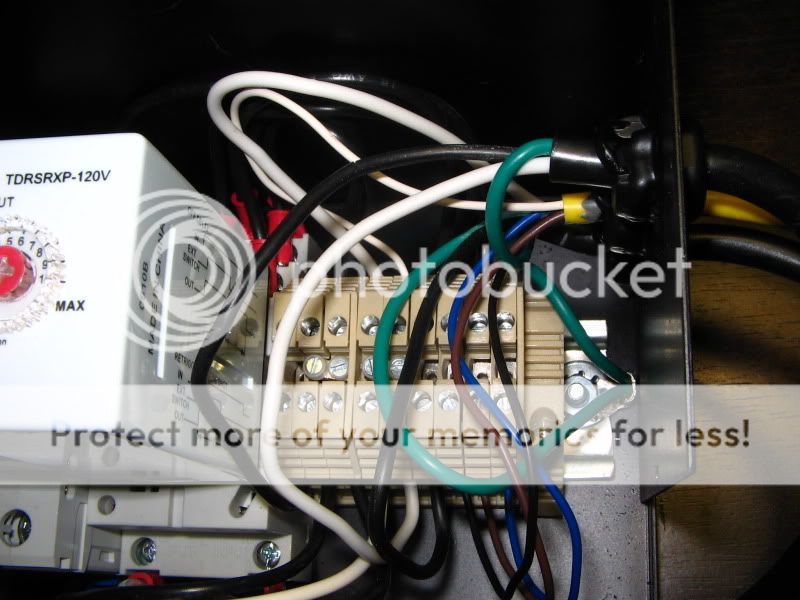
This is the inside of the relay box. Here you can see the delay relay, circuit break, and the terminal blocks and a few wires.... .
.
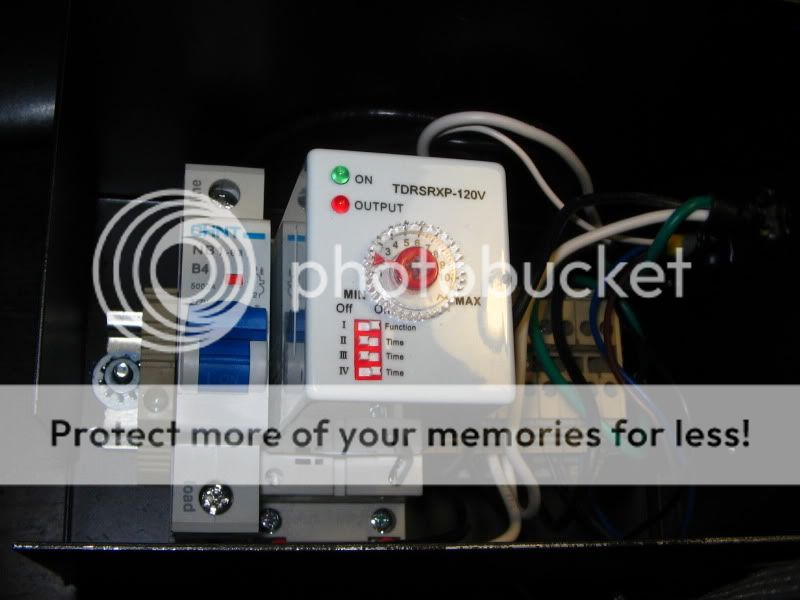
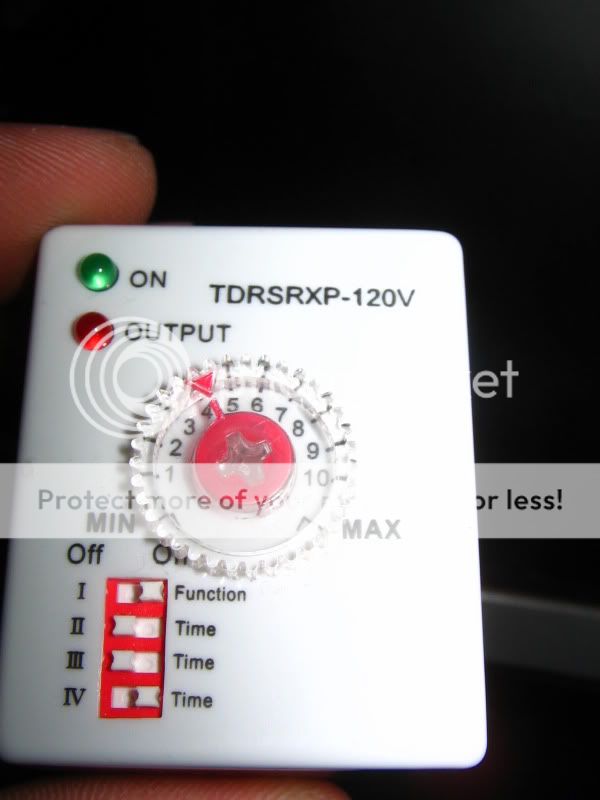
The relay I am using is very versitil. It can do a delay from 0.1-1.0 seconds or 1-10 hours. You select the range by setting the dip switches and turning the knob sets the delay. Here is the setup....
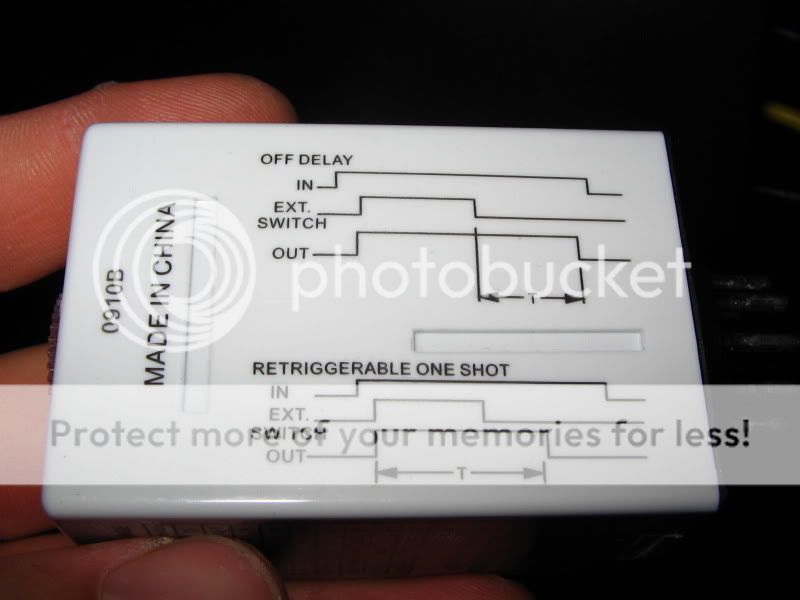
This relay can also be setup as a 'one shot' or 'off delay' timer. That means.... once the button is pressed the timer starts (one shot) or when the button is released the timer starts (off delay). This shows the way it would work....
This is the box he had on the table. It looked great! (this is a pic I took after taking out his cords and installing what I planned to use..... but ya get the idea....)
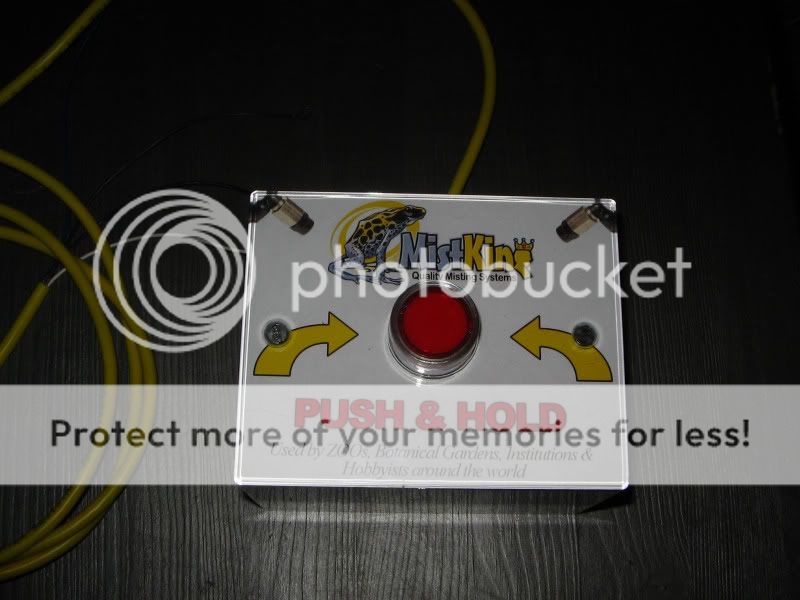
A lot of people would walk up and press the button and not hold it... and the response was "it doesn't work" or "oh, you have to hold it....". I told Marty he needed a 'delay off' timer relay. He looked at me like 'a what?'. I tried to explain myself to him but we ended up agreeing that I would just build him something if he sent me his button and box.
I made some purchases online and did a little shopping at Fry's... A week or so after the box arrived I had a working rough draft. I ended up replacing Marty's button with a new one. You can't really tell from outside of the box... but I like mine because it has a lower profile inside the box.
The original idea was to make the relay fit inside of the box with the button. I guess I didn't realize how small the box was when I suggested the idea
. What I ended up doing instead, was making a second box to sit under the table that had all the components and a single cable that would go to the button box that would trigger the timer. This makes things simple for the box and button 'display', there won't be a bunch of cords running around the top of the table if I separate the two. This is the completed version of the whole sha-bang.... kinda
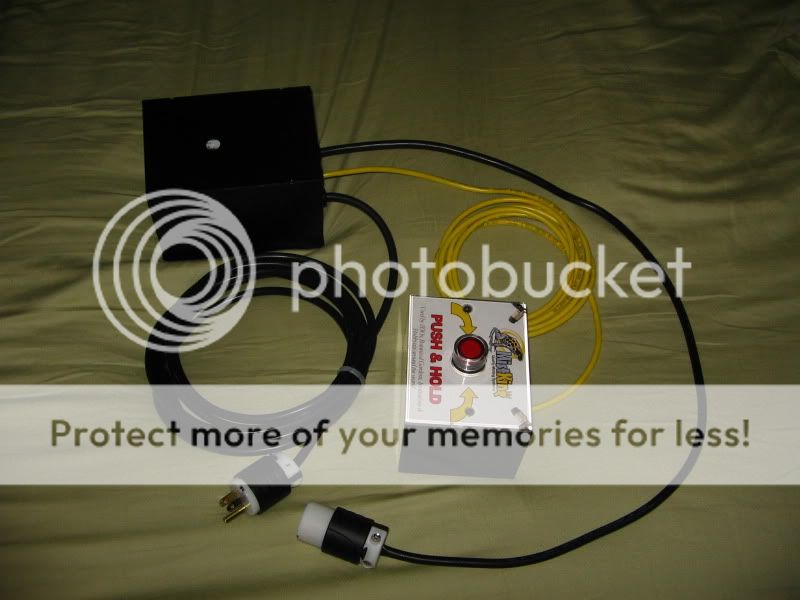
At first I was going to make the cord going from the button box to the relay box connect directly together, as one. But I started thinking... This means the two boxes will have to be packed together and could get damaged in shipping and moving around... it also meant the cables would get tangled and messy as time goes on and the display is moved around and used.
So I told him I would put on connectors for the trigger cord and make an extension cord for it as well. This would give him some flexibility. I don't have the cord in the shot.. but this is the final product I will be sending him.
Here are some pics of the inside guts...
Inside the button box... The lower 'block' is a light housing to illuminate the button and the upper 'block' is the 'switch'.
This is the inside of the relay box. Here you can see the delay relay, circuit break, and the terminal blocks and a few wires....
.
The relay I am using is very versitil. It can do a delay from 0.1-1.0 seconds or 1-10 hours. You select the range by setting the dip switches and turning the knob sets the delay. Here is the setup....
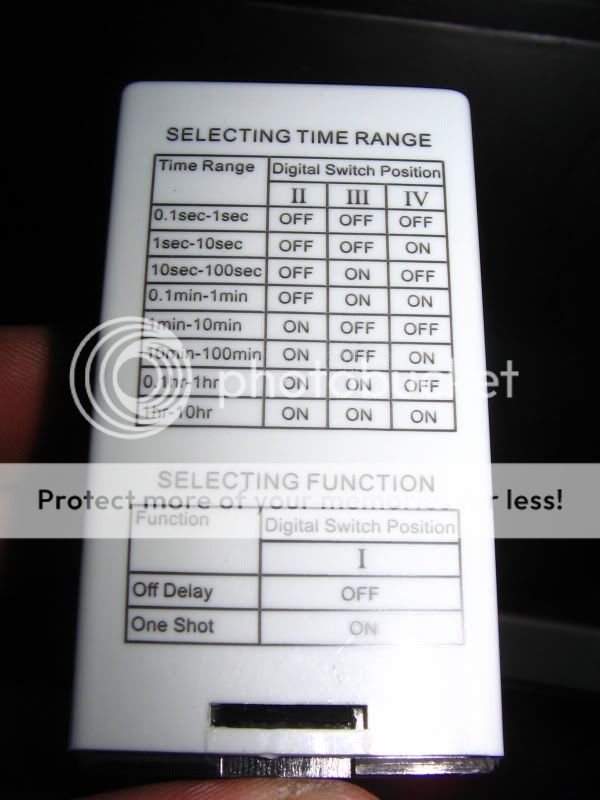
This relay can also be setup as a 'one shot' or 'off delay' timer. That means.... once the button is pressed the timer starts (one shot) or when the button is released the timer starts (off delay). This shows the way it would work....


")