Navigation
Install the app
How to install the app on iOS
Follow along with the video below to see how to install our site as a web app on your home screen.
Note: This feature may not be available in some browsers.
More options
You are using an out of date browser. It may not display this or other websites correctly.
You should upgrade or use an alternative browser.
You should upgrade or use an alternative browser.
Enclosure hand made beginnings
- Thread starter J.Bauer
- Start date


J.Bauer
Member
The first pic is the base. There's tracks for shelving and will be paneled around both sides and back. Double doors for the front and room for a drainage system.
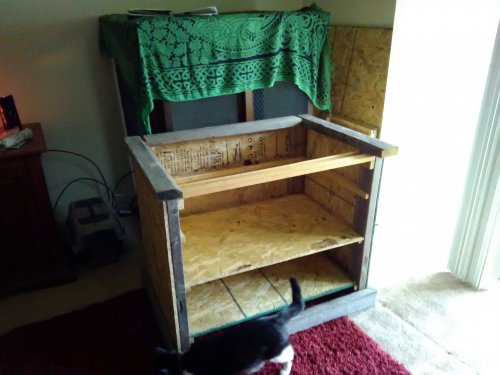
The next few are the construction of the habitat. It will be lined on the inside with thick plastic hex mesh and wrapped outside with aluminum screen.
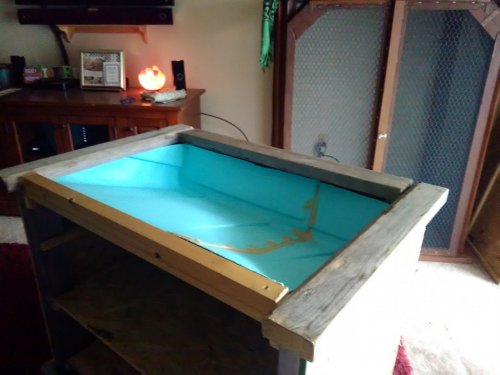
The 6th pic is the beginning of the double doors that will be the front of the enclosure. I will cut and add the strips in the center then cut the entire frame in half top and bottom.
Once inside, the 4'h x 3'w x 2'd enclosure will be mounted on the 2.75' h base to a total of almost 7' tall.
Hopefully, when finished, it will have hidden Reed or bamboo blinds that roll up into molding around the top.
The next few are the construction of the habitat. It will be lined on the inside with thick plastic hex mesh and wrapped outside with aluminum screen.
The 6th pic is the beginning of the double doors that will be the front of the enclosure. I will cut and add the strips in the center then cut the entire frame in half top and bottom.
Once inside, the 4'h x 3'w x 2'd enclosure will be mounted on the 2.75' h base to a total of almost 7' tall.
Hopefully, when finished, it will have hidden Reed or bamboo blinds that roll up into molding around the top.
J.Bauer
Member
Doors are framed, split into double doors and mounted on hinges. The entire enclosure frame and doors have been sanded and painted. Hopefully tomorrow the screen will be applied and door knobs attached.
Unfortunately there was a minor setback as a painter hired by our apartment complex broke part of the base the enclosure mounts on. Need to repair that.
More pics coming tomorrow while the sun is up.
Unfortunately there was a minor setback as a painter hired by our apartment complex broke part of the base the enclosure mounts on. Need to repair that.
More pics coming tomorrow while the sun is up.


I remember building my enclosure ") . Tons of fun and tons of work. Can't wait to watch your progress!
. Tons of fun and tons of work. Can't wait to watch your progress!
. Tons of fun and tons of work. Can't wait to watch your progress!J.Bauer
Member
It has been quite a bit of work. I have enjoyed the process and watching it take shape.I remember building my enclosure
J.Bauer
Member
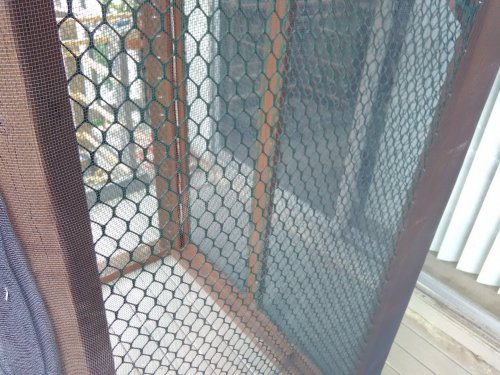
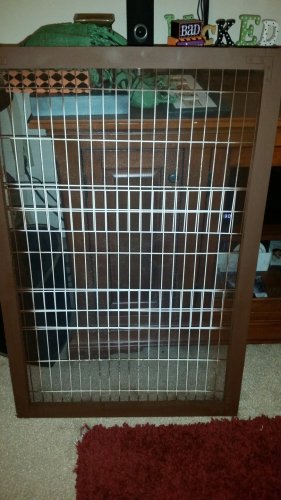
You can see, in the first few pics above, how the single door frame became double doors. I attached plastic hex fence all around the inside (except the back). Rolled the sharp cut edges towards the outside to prevent injury. Then wrapped aluminum screen around the outside to stop "dinner" from escaping his enclosure.
Rogue
Avid Member
We had to move the cage inside because of incoming storms. It BARELY fit through the patio door! One of the "upper management", Loki, checked it out and it passed inspection  All screens and knobs attached, now just time to finish the base. Due to its size and Proteus being a juvenile, we will have a learning curve to assist him in getting to his food. Per RB Barto, he already hunts but we will still need to work with Proteus until he gets adjusted to his new castle
We have a large vinyl base from my guinea pig, Skittles, who recently passed away from very old age (rest in paradise, baby girl ) that is moisture proof and we will be using that to protect the cables behind the cage. We will also be using some of the sides from her cage for the light fixtures to sit on. @J.Bauer is doing a killer job!


All screens and knobs attached, now just time to finish the base. Due to its size and Proteus being a juvenile, we will have a learning curve to assist him in getting to his food. Per RB Barto, he already hunts but we will still need to work with Proteus until he gets adjusted to his new castle We have a large vinyl base from my guinea pig, Skittles, who recently passed away from very old age (rest in paradise, baby girl
) that is moisture proof and we will be using that to protect the cables behind the cage. We will also be using some of the sides from her cage for the light fixtures to sit on. @J.Bauer is doing a killer job!


Rogue
Avid Member
Thank you. He won't be spoiled at allNice black and white CATmeleon you have there.
Seriously, nice job on the build out. I like the larger wire for climbing with the smaller mesh for keeping the feeders on the inside.
Can't wait to see it up on it's base and all decked out.
The CATmeleon approves haha!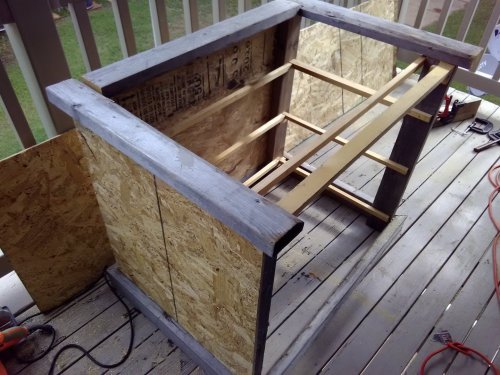


Rogue
Avid Member


Similar threads
- Replies
- 3
- Views
- 471