Ellron
Established Member
With my recent upgrade to 4-week cricket, my little ol' cricket keeper just wasn't big enough to house more than 50.
So I took action!
Materials Needed:
2' of 1'' SCH 40 PVC Pipe
2 1'' SCH 40 PVC Slip Covers
Plastic Container
Dremel or other Rotary Tool
Dremel Drill Bit
Dremel Sanding Bit
PVC Cutters
OPTIONAL:
Steel Wool Attachment for the Dremel, or loose steel wool, or a steal wool bottle brush (Do they make those?), or a regular bottle brush
--------------------------
Process:
Cut your PVC Pipe to desired length with the PVC Cutter.
Take the pipe and mark the outside width with a sharpie on your plastic container
Use the Dremel Drill Bit to cut a hole large enough to fit the Sanding/Grinding wheel attachment into the hole.
Grind/Sand away all plastic until desired width is met so that you can fit the tubes in diagonally.
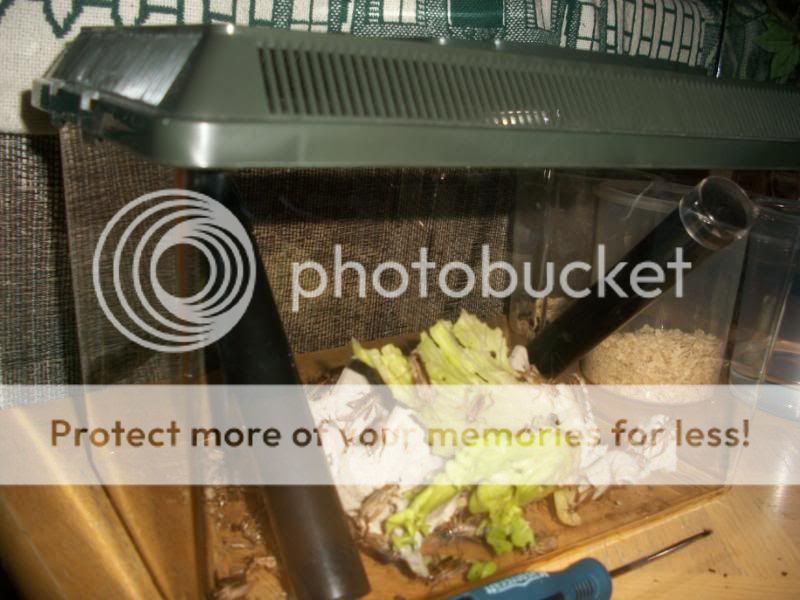
Place slip covers on the ends of the cut PVC tubes and insert them into the holes
Once they fit correctly, they should look like this:

That picture the tubes are a bit high, you can just hit them to lower them down.
Using the Dremel Drill Bit drill lots of air holes.
I drilled about 20 in the lid, and another 20 around the upper edge.
I just don't want any crickets dying from oxygen deprivation.
Here some pictures of the finished product.
If I make another one, I will make a picture by picture tutorial.
I will continue to edit this with any tips or tricks.
ADDED TIP:
If you are using the steel wool, this is going to be used for roughening up the inside of the tube so younger crickets can grip it and crawl up into it.
It is pretty self explanatory how to use it. After you've cut everything, you can roughen it with the steel wool. Just rub it inside the pipe. I think even a regular bottle brush would suffice in making small scratches.
This is the finished product:
This is the plethora of airholes in the lid
Thanks for reading,
Elliot
So I took action!
Materials Needed:
2' of 1'' SCH 40 PVC Pipe
2 1'' SCH 40 PVC Slip Covers
Plastic Container
Dremel or other Rotary Tool
Dremel Drill Bit
Dremel Sanding Bit
PVC Cutters
OPTIONAL:
Steel Wool Attachment for the Dremel, or loose steel wool, or a steal wool bottle brush (Do they make those?), or a regular bottle brush
--------------------------
Process:
Cut your PVC Pipe to desired length with the PVC Cutter.
Take the pipe and mark the outside width with a sharpie on your plastic container
Use the Dremel Drill Bit to cut a hole large enough to fit the Sanding/Grinding wheel attachment into the hole.
Grind/Sand away all plastic until desired width is met so that you can fit the tubes in diagonally.
Place slip covers on the ends of the cut PVC tubes and insert them into the holes
Once they fit correctly, they should look like this:

That picture the tubes are a bit high, you can just hit them to lower them down.
Using the Dremel Drill Bit drill lots of air holes.
I drilled about 20 in the lid, and another 20 around the upper edge.
I just don't want any crickets dying from oxygen deprivation.
Here some pictures of the finished product.
If I make another one, I will make a picture by picture tutorial.
I will continue to edit this with any tips or tricks.
ADDED TIP:
If you are using the steel wool, this is going to be used for roughening up the inside of the tube so younger crickets can grip it and crawl up into it.
It is pretty self explanatory how to use it. After you've cut everything, you can roughen it with the steel wool. Just rub it inside the pipe. I think even a regular bottle brush would suffice in making small scratches.
This is the finished product:

This is the plethora of airholes in the lid

Thanks for reading,
Elliot