TerryLund
Member
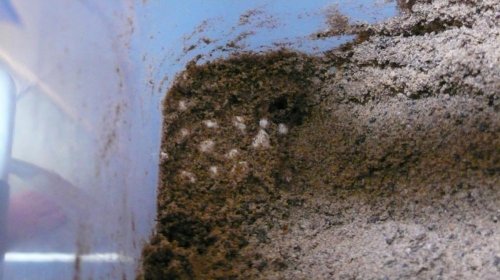
In Part 1 my female Graceful Chameleon was showing the signs of being gravid. This was the black coloration with yellow spots and stripes. I could even see the shape of eggs in her belly. She had gotten extremely big during this time. At this point I wanted to make sure I was going to be ready when she wanted to lay her eggs. I prepared her a private egg laying bucket with a sand/soil mixture. I used about a 50/50 mixture of play sand and organic potting soil. I added just enough water to allow the mixture to hold together. This will allow her to dig in the mixture without it collapsing in on her. It is also light enough to allow her to dig into it easily. I was able to find the container and soil/sand mixture at my local Home Depot store. The container was a Tupperware container with lid (12 x 10 x 9). I filled it just under ¾ of the way full to allow plenty of room for her to move around and to leave room for the displaced soil/sand mixture. I have live plants in her cage and when I caught her digging into the soil of the container plants I knew she was ready to move to her private container. I moved her that day after work since it was through the week. I did not worry about putting food in the container since I really do not think at that point she was interested in eating. I did not disturb her at all for the entire night. In the morning she was on top of the sand/soil mixture. At first I thought she had not laid any eggs. Thankfully, I made sure the container was see through and after a closer look I could see eggs in the bottom corner of the container. In one night she had laid all of her eggs and completely covered them up as well. At this point I put her back into her cage and made sure she had a variety of calcium food sources to eat. This included crickets, silk worms, super worms and flies. Also, she had access to plenty of water through the automated misting system. I had it mist about every 2 hours for about a 1.5 minutes each time.
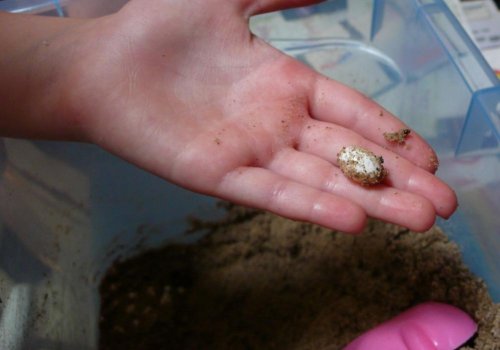
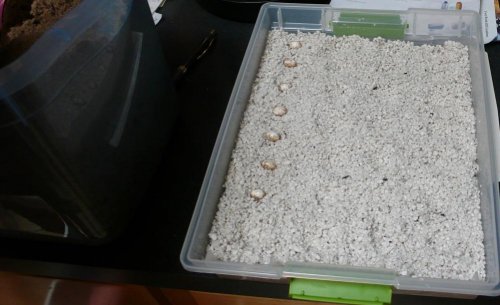
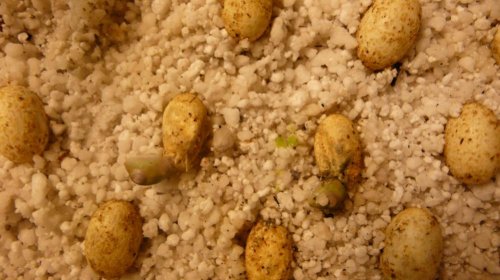
In addition to preparing the egg laying container I had at the same time prepared a food storage container. The one I used a 13 x 11 x 3 container with locking lid. The locking lid would give some stability to the container as it can get a little heavy with the water and you do not want it shifting the eggs a lot once they are placed in it. I drilled two holes in the lid at opposing corners. This would allow a small amount of air circulation. The substrate I used was perlite mixed with water to the point that you could just squeeze a little bit of water from it. This is about 6 parts water 10 parts vermiculite or perlite. I put the eggs in evenly spaced rows with the eggs being about an inch or more apart from each other. Before I would place the egg into the perlite I would make a slight indentation with my finger so that the egg would have a resting place and almost half of the egg would be submerged. When moving the eggs from the egg laying container to the incubation container I tried to not rotate or move them too much even though this is said to not matter as long as are not more then a few days old. The eggs were each about the size of a jelly bean. After I had all of the eggs moved to the incubation container I made sure to label it. I listed the hatch date, the parents, and the weight of the entire container including eggs. I also put the estimated hatching time. I was expecting an incubation period of approximately 9 months. The temperature range of my house in the summer was between 75F to 80F and in the winter it was about 5 degree cooler. About, once a month I would take the lid off and mist the inside of it and then put it back on. I never misted the eggs directly. I would also weight it every couple of months to make sure I had enough water in the mixture. Don’t forget that as you get into the later months that the eggs will start to weigh more as well and you should see the visible difference. My Graceful laid an amazing 61 eggs in total.
I will add more to this series as I get time. So stat posted.
Terry


")