So when I finally got frustrated that my cham wasn't drinking... I decided that the problem didn't lay in the amount or frequency that I was watering him, but the WAY I was watering him... So I decided to go with a method that creates rain... or rather it sprays in 360 degrees with a pressure just high enough to mimic rain... And the first time I used it, Stanley was lapping up the water like he had never seen it! So I thought I would share the wealth to those beginners like me frustrated that their cham won't drink.
DISCLAIMER: This system will flood your cage and spray everywhere if done wrong... A proper drainage system is ESSENTIAL to make this system successful.
Supplies
(1) 50ft roll 1/4 in Black Vinyl Microtubing ($4.27 at Home Depot)
(1) Pack Jet Sprayers on 10/32" thread Model#112B ($2.57 at Home Depot)
(1) Pack 1/4" Elbow Joints Model#H84B ($1.99 at Home Depot)
(1) Flo Master Garden Sprayer Model#1401P ($8.64 at Home Depot)
Something to hang it in the enclosure with.. I used fishing line...
Step 1: Pump and Extension
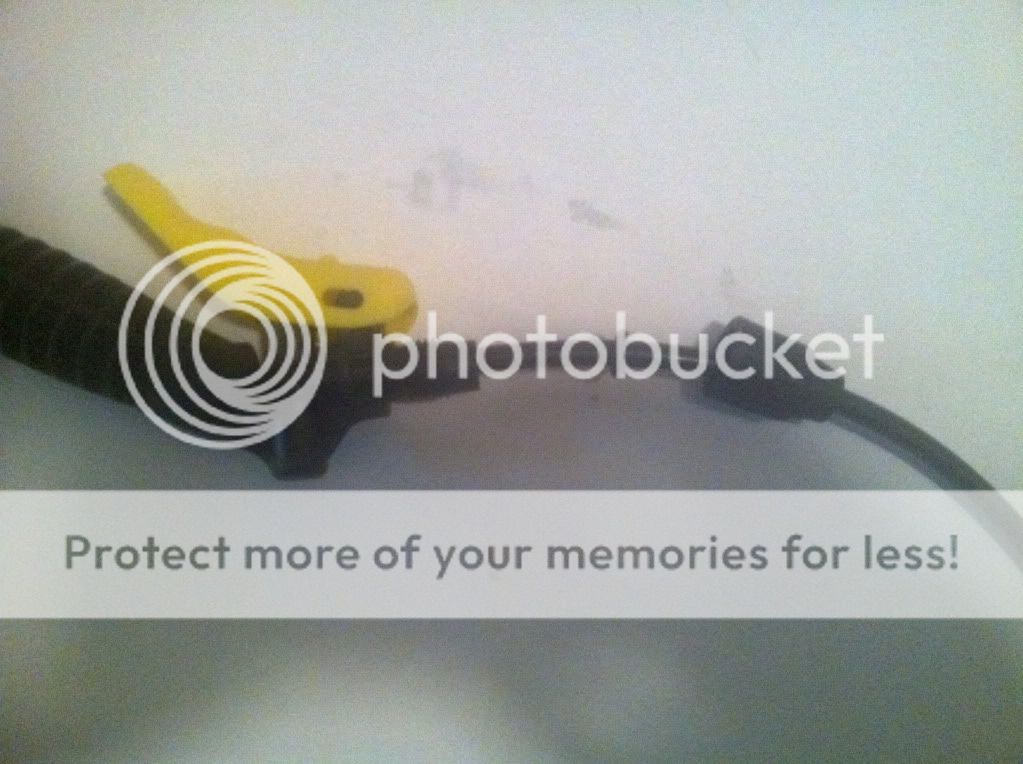
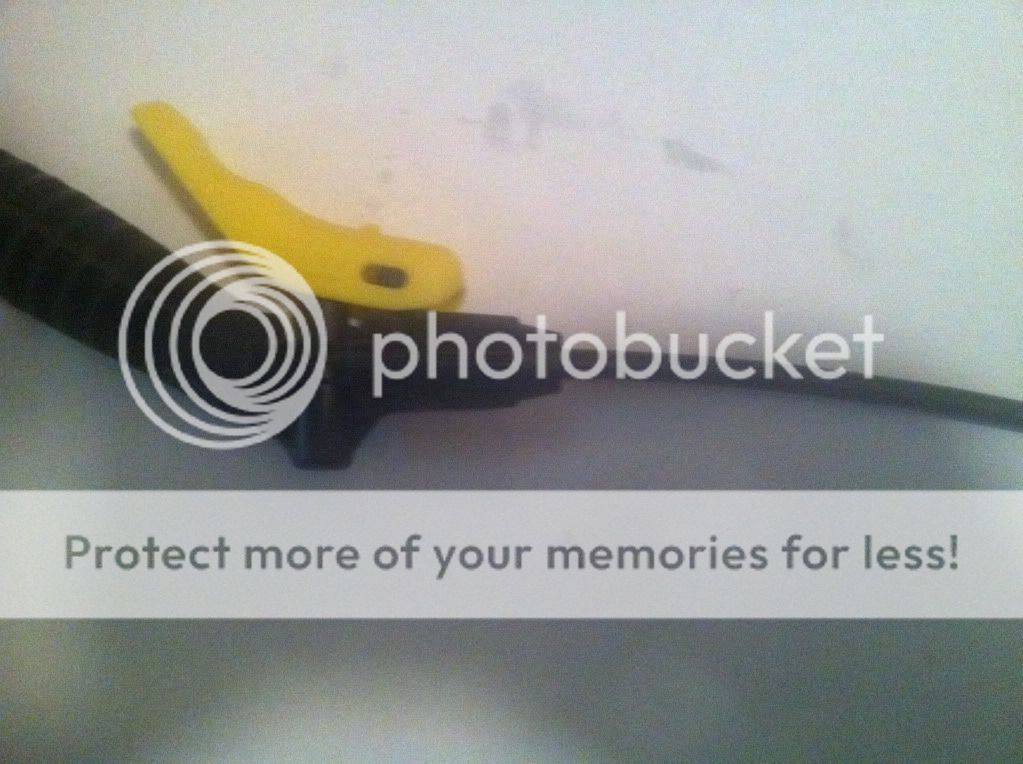
So first off there is some things on the pump/sprayer base you WILL need and some you wont... When you look at the point on the hose where the valve is (the handle that makes it spray) You will see at the very front of it is a removable connector... remove this but DONT LOSE THE "O" RING INSIDE! Next from this connector you will remove the tip of the sprayer which includes the nozzle... The piece of solid tube and the nozzle, you will not be needing...
 [/IMG]but keep the nozzle because it IS possible to use the mister but I chose not to as it is not as "sturdy" and is subject to sliding out of place. Anyways now you will need to take a length of tube about half the length of your cage (This will give some play once its set up). Take the end of the tube and place the connector you just removed from the valve and place it on the tube with the wider end facing the end of the tube... then place the "O" ring on the tube... it may feel loose but do not worry it will tighten.
Then take the end of the tube and place it inside the valve on the pump/sprayer once you feel it can't go any farther, move the connector all the way down, keeping the tube secure and screw on the connector... Once tightened the tube should have a great seal to the valve.
Now you can move on to step 2!
[/IMG]but keep the nozzle because it IS possible to use the mister but I chose not to as it is not as "sturdy" and is subject to sliding out of place. Anyways now you will need to take a length of tube about half the length of your cage (This will give some play once its set up). Take the end of the tube and place the connector you just removed from the valve and place it on the tube with the wider end facing the end of the tube... then place the "O" ring on the tube... it may feel loose but do not worry it will tighten.
Then take the end of the tube and place it inside the valve on the pump/sprayer once you feel it can't go any farther, move the connector all the way down, keeping the tube secure and screw on the connector... Once tightened the tube should have a great seal to the valve.
Now you can move on to step 2!
Step 2: The sprayer
This step is a little more free form so I will tell you how I did it... I will post some pics soon but unfortunately little Stanley is sleeping so I wont disturb his cage to snap a few pics of the set up... But I will do my best to describe it. What you need now is (3) Elbow joints, (2) 11 inch lengths of tube, (1) 3/4 inch length of tube, and (1) jet sprayer.. Obviously along with the means of tying it to the roof of the cage. First things first, create a hole in the very back corner of your cage JUST BIG ENOUGH FOR THE TUBE... I chose to punch it OUT of the cage to prevent possible snags for Stanley then take the finished base and place an elbow joint on the end of the tubing and set the other point of the joint in the created hole. Place one of the 11 inch lengths of tube inside the cage and attach it to the other end of the elbow joint connected to the base. Secure it to the roof. The place another elbow joint at the end of that tubing and point the other point at the front of the cage. Take the second 11 inch length and connect it to the elbow joint. Secure it to the roof. The take the final elbow joint and place on the tubing pointing the elbow down at the bottom of the cage. The take your 3/4 inch tubing and on one end place the jet sprayer, on the other connect it to the elbow joint. You now have a rain watering system set up. Now the hardest part is proper pressure...
Use
Every enclosure is different with different trees and different voids in space so these systems take some tinkering but for my system this is what I have found... To do a good test without blowing water everywhere follow these steps...
1. Put about two glasses of water (24 ounces) into the base
2. Put the handle/valve into its locked or continuous flow position (move it forward to lock)
3. Pump... You won't see water at first so pump again, slowly, after about 4 pumps you should hear a spitting sound. Pump it until you see the flow of water you want. You can leave it in its lock position and it will run until the water runs out. So do some tinkering and you can find the perfect time settings.
So there you have it... I have done some experimenting and have found ways to also turn this into a 10 point drip system that puts out 1 GPH... Message me and I will give you instructions... Enjoy and I hope I have helped...
DISCLAIMER: This system will flood your cage and spray everywhere if done wrong... A proper drainage system is ESSENTIAL to make this system successful.
Supplies
(1) 50ft roll 1/4 in Black Vinyl Microtubing ($4.27 at Home Depot)
(1) Pack Jet Sprayers on 10/32" thread Model#112B ($2.57 at Home Depot)
(1) Pack 1/4" Elbow Joints Model#H84B ($1.99 at Home Depot)
(1) Flo Master Garden Sprayer Model#1401P ($8.64 at Home Depot)
Something to hang it in the enclosure with.. I used fishing line...
Step 1: Pump and Extension
So first off there is some things on the pump/sprayer base you WILL need and some you wont... When you look at the point on the hose where the valve is (the handle that makes it spray) You will see at the very front of it is a removable connector... remove this but DONT LOSE THE "O" RING INSIDE! Next from this connector you will remove the tip of the sprayer which includes the nozzle... The piece of solid tube and the nozzle, you will not be needing...


Step 2: The sprayer
This step is a little more free form so I will tell you how I did it... I will post some pics soon but unfortunately little Stanley is sleeping so I wont disturb his cage to snap a few pics of the set up... But I will do my best to describe it. What you need now is (3) Elbow joints, (2) 11 inch lengths of tube, (1) 3/4 inch length of tube, and (1) jet sprayer.. Obviously along with the means of tying it to the roof of the cage. First things first, create a hole in the very back corner of your cage JUST BIG ENOUGH FOR THE TUBE... I chose to punch it OUT of the cage to prevent possible snags for Stanley then take the finished base and place an elbow joint on the end of the tubing and set the other point of the joint in the created hole. Place one of the 11 inch lengths of tube inside the cage and attach it to the other end of the elbow joint connected to the base. Secure it to the roof. The place another elbow joint at the end of that tubing and point the other point at the front of the cage. Take the second 11 inch length and connect it to the elbow joint. Secure it to the roof. The take the final elbow joint and place on the tubing pointing the elbow down at the bottom of the cage. The take your 3/4 inch tubing and on one end place the jet sprayer, on the other connect it to the elbow joint. You now have a rain watering system set up. Now the hardest part is proper pressure...
Use
Every enclosure is different with different trees and different voids in space so these systems take some tinkering but for my system this is what I have found... To do a good test without blowing water everywhere follow these steps...
1. Put about two glasses of water (24 ounces) into the base
2. Put the handle/valve into its locked or continuous flow position (move it forward to lock)
3. Pump... You won't see water at first so pump again, slowly, after about 4 pumps you should hear a spitting sound. Pump it until you see the flow of water you want. You can leave it in its lock position and it will run until the water runs out. So do some tinkering and you can find the perfect time settings.
So there you have it... I have done some experimenting and have found ways to also turn this into a 10 point drip system that puts out 1 GPH... Message me and I will give you instructions... Enjoy and I hope I have helped...