KRGEE21
Avid Member

I have been following the various threads on everyone's bioactive builds and decided to post a step by step thread on the process on the one I just completed. Any critiques or suggestions on how to improve it, or improve future builds are encouraged.
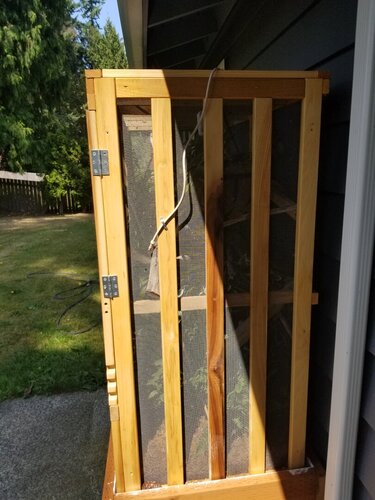
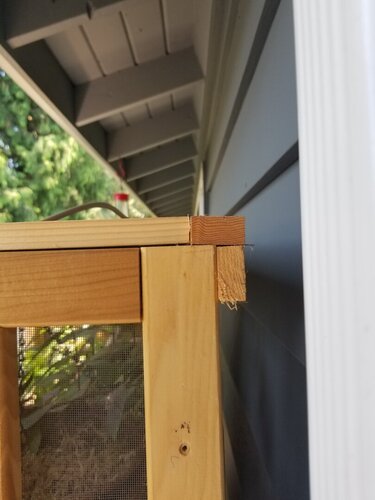
Step one: If you are modifying a current enclosure have a suitable alternative cage for long term home. I built an outdoor enclosure of similar size to his DS atrium, and used to opportunity to practice building the planter base. If you are doing a completely new build you're ahead of the game.

Step 2: Plan your base, drainage, and soil depth. Take height of the room into account and leave enough space for whatever light you are choosing to use. Measure 3 times before you cut to be sure dimensions are where you want them. I built this 1/2-3/4" big and added a lip on the inside of the planter for the cage to sit on. 23-3/4" depth, and 45" wide. The planter itself is framed using 2"x12" lumber, so roughly 11-1/2" of soil/drainage. Completely waterproof the inside with flex seal, or something similar. Allow at least 3-4 days for the flex seal to completely cure if you are putting it on thicker in areas for drainage. Then finish off the exterior of the base to make it look good if you feel the need. I am not 100% happy with my finish carpentry work.

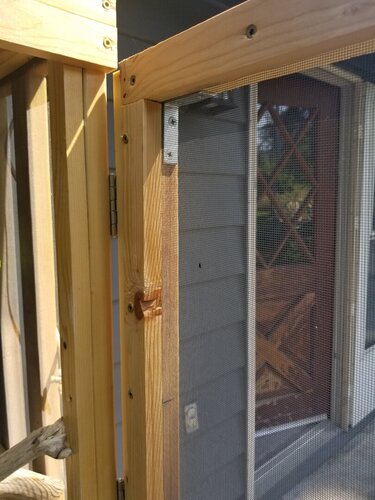
Step 3: If you are going to be adding living walls build them up at the same time. I chose to only do one wall for a couple reasons. 1. Expense 2. Size...you loose about 4-6" of cage space per side when attaching to the dragon ledges. I used light diffuser panels as the structure. You can get a 2 pack(2'x4') at Lowes for about $20. If using the dragon strand ledges plan on marking out where the ledges are before setting any of the pots, or branches so you aren't trying to attach through them. The great stuff pond and stone works awesome, but you have to use a little bit at a time, so it can cure properly. I set the post first. Then the branch stubs, and then coated the entire thing in phases. If using lightweight pots, or something similar stuff them with newspaper so they don't compress. Some people use little pieces of hose set into the bottom of the pots for drainage. I chose to just keep the bottoms open. Let is cure a couple days, then go back and start shaping the foam. Small hand saw, dremel tool, sanders all will work. For the covering I used a mix of tree fern, peat, and coconut fiber substrate and the silicone to adhere it. Again work in small areas so the silicone doesn't skin over before you get the cover mix into it. Cover the silicone heavily with the mix, and press it in. This will help some of the contours of the foam below show through. After you finish go back and touch up any areas that got missed. Give the silicone at least 6 days to completely gas off. The panel did curl a little bit when curing even though it was left completely flat. Placed some weight where it was curling up and left for a couple days, and it went back to flat.
Step 4: Move said cham to alternate house, move the base into it's spot and start the bio. Used 1.5-2" of the expanded clay pebbles for drainage. Cover the pebbles with a layer of window screen to hold the soil, and start filling it up. I used mostly the Sunshine #4 mix, and added 1 bag of ABG mix about every three inches.
Step 5: Set cage, and main branches in place before adding in the plants. Set plants and top off the soil then add your leaf litter, and CUC.
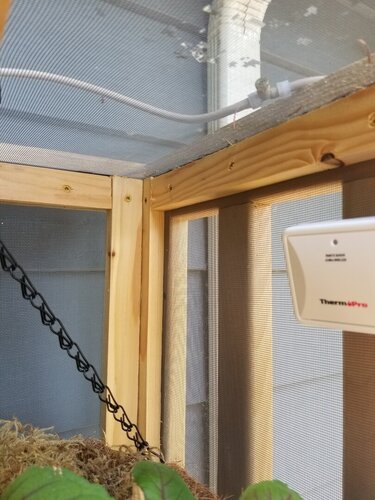
Step 6: Add the rest of the branches, and vines. Provide multiple pathways throughout the enclosure both vertical and horizontal. Also add any additional potted plants at this time. Get you lighting, and misters set. Ultimately you would want to monitor at this point for a few weeks to make sure temps, and humidity are where you want them. I was up against a time crunch, so only had a week.
Step 7: Add Cham and watch him enjoy new home.
Thanks for reading...Hope you all have a great day
Step one: If you are modifying a current enclosure have a suitable alternative cage for long term home. I built an outdoor enclosure of similar size to his DS atrium, and used to opportunity to practice building the planter base. If you are doing a completely new build you're ahead of the game.
Step 2: Plan your base, drainage, and soil depth. Take height of the room into account and leave enough space for whatever light you are choosing to use. Measure 3 times before you cut to be sure dimensions are where you want them. I built this 1/2-3/4" big and added a lip on the inside of the planter for the cage to sit on. 23-3/4" depth, and 45" wide. The planter itself is framed using 2"x12" lumber, so roughly 11-1/2" of soil/drainage. Completely waterproof the inside with flex seal, or something similar. Allow at least 3-4 days for the flex seal to completely cure if you are putting it on thicker in areas for drainage. Then finish off the exterior of the base to make it look good if you feel the need. I am not 100% happy with my finish carpentry work.
Step 3: If you are going to be adding living walls build them up at the same time. I chose to only do one wall for a couple reasons. 1. Expense 2. Size...you loose about 4-6" of cage space per side when attaching to the dragon ledges. I used light diffuser panels as the structure. You can get a 2 pack(2'x4') at Lowes for about $20. If using the dragon strand ledges plan on marking out where the ledges are before setting any of the pots, or branches so you aren't trying to attach through them. The great stuff pond and stone works awesome, but you have to use a little bit at a time, so it can cure properly. I set the post first. Then the branch stubs, and then coated the entire thing in phases. If using lightweight pots, or something similar stuff them with newspaper so they don't compress. Some people use little pieces of hose set into the bottom of the pots for drainage. I chose to just keep the bottoms open. Let is cure a couple days, then go back and start shaping the foam. Small hand saw, dremel tool, sanders all will work. For the covering I used a mix of tree fern, peat, and coconut fiber substrate and the silicone to adhere it. Again work in small areas so the silicone doesn't skin over before you get the cover mix into it. Cover the silicone heavily with the mix, and press it in. This will help some of the contours of the foam below show through. After you finish go back and touch up any areas that got missed. Give the silicone at least 6 days to completely gas off. The panel did curl a little bit when curing even though it was left completely flat. Placed some weight where it was curling up and left for a couple days, and it went back to flat.
Step 4: Move said cham to alternate house, move the base into it's spot and start the bio. Used 1.5-2" of the expanded clay pebbles for drainage. Cover the pebbles with a layer of window screen to hold the soil, and start filling it up. I used mostly the Sunshine #4 mix, and added 1 bag of ABG mix about every three inches.
Step 5: Set cage, and main branches in place before adding in the plants. Set plants and top off the soil then add your leaf litter, and CUC.
Step 6: Add the rest of the branches, and vines. Provide multiple pathways throughout the enclosure both vertical and horizontal. Also add any additional potted plants at this time. Get you lighting, and misters set. Ultimately you would want to monitor at this point for a few weeks to make sure temps, and humidity are where you want them. I was up against a time crunch, so only had a week.
Step 7: Add Cham and watch him enjoy new home.
Thanks for reading...Hope you all have a great day


") I want to build a 5 foot wide by 2 deep by 4 high for an indoor enclosure for Beman... I would not be going Bio active. But it would be helpful to see how you built the wood frame and added the screening
I want to build a 5 foot wide by 2 deep by 4 high for an indoor enclosure for Beman... I would not be going Bio active. But it would be helpful to see how you built the wood frame and added the screening 

 . It's helpful to know that when planning.