bbyoda
Chameleon Enthusiast
Yep. It just needs its own fixture and spot at the top of the cage.Can you use this along side the t5 and basking light? I’m assuming you can but just double checking before I buy one.
Follow along with the video below to see how to install our site as a web app on your home screen.
Note: This feature may not be available in some browsers.
Yep. It just needs its own fixture and spot at the top of the cage.Can you use this along side the t5 and basking light? I’m assuming you can but just double checking before I buy one.
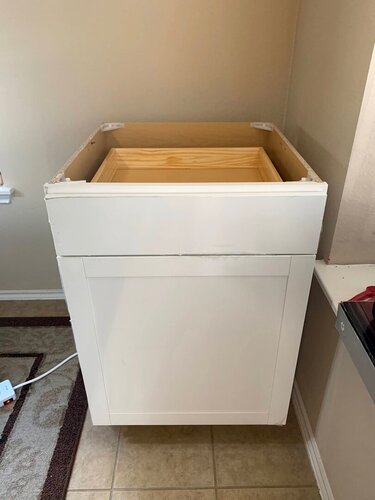
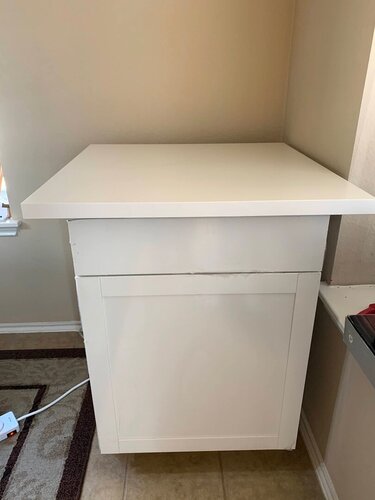
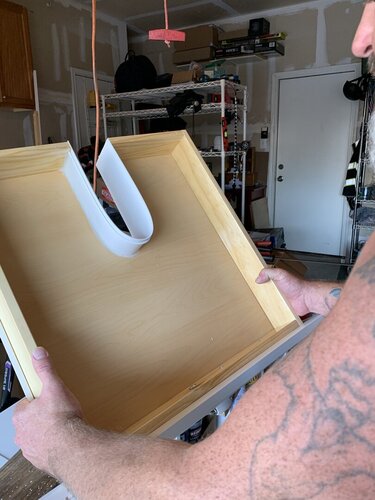
Do u have pics on how u made the cabinet drain? I'd like to do one for my chamWe bought a kitchen cabinet to go under the habitat, my husband cut the drawer and glued on a plastic strip to keep the integrity of the drawer and made a drain out of a shower drain running down into a water container with a water sensor detector glued/siliconed onto it, so it’ll let us know on our phones when it’s half full.
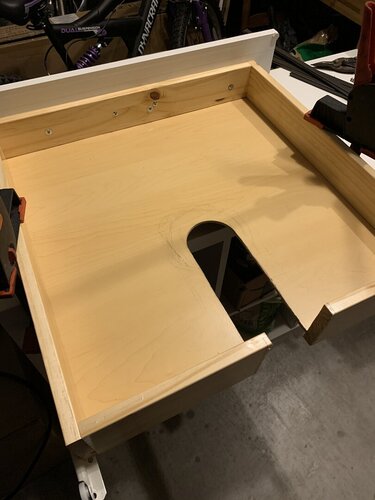
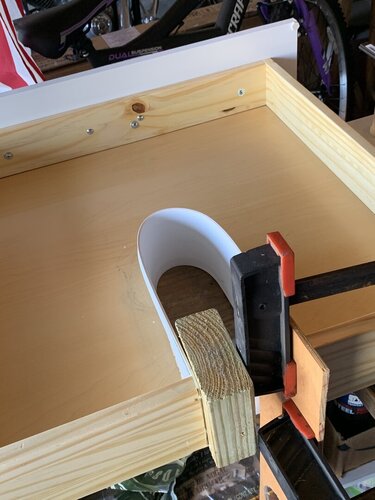
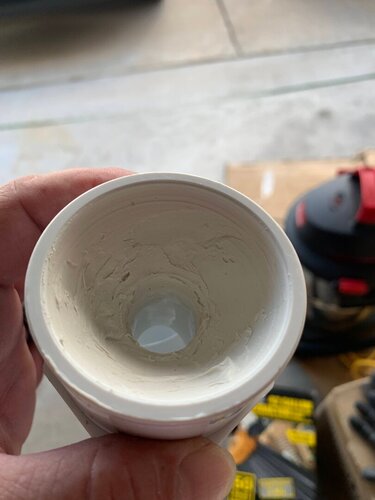
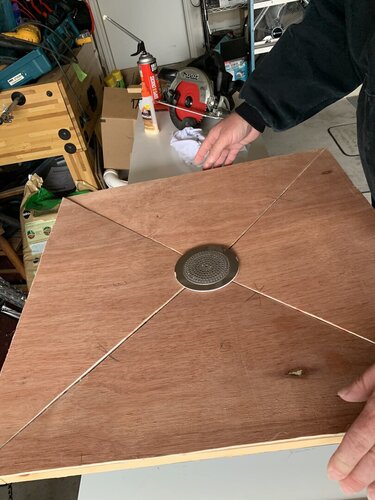
Here’s some of the build pictures and finished product. My husband has some better pictures that I can post later when he is available. They can show you more of a step-by-step of what we did. But we started by buying a plain white kitchen cabinet from Lowe’s-$144., it did not come with the top. There were cheaper ones that you can stain/paint, we just wanted the white one. We bought a desk top from ikea for about $30.00 then cut it in half, put a 3 inch hole in the center and filled in the parts we cut with great stuff and sealed with silicone. Unfortunately ikea makes their desk tops etc.... with cardboard support in the center, rather than a full piece of wood(guess that’s why it was so cheap)lol. And since it was really long, we can use the other half for another habitat. There’s a picture of a piece of plumbing that we used for the drain pipe, we had to fill it in with waterproof silicone so it would flow straight through the hole rather than get built up inside the pipe(since the plumbing piece had nooks inside.) I’m sure there are better ways to do it, that is what we came up with though.Do u have pics on how u made the cabinet drain? I'd like to do one for my cham
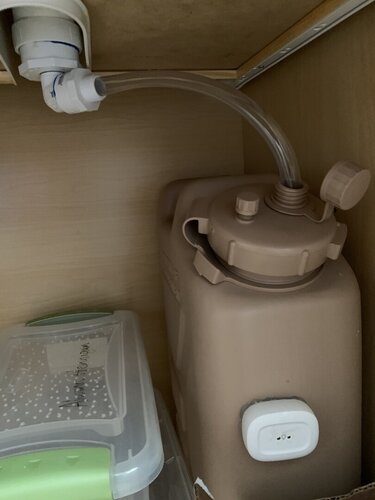
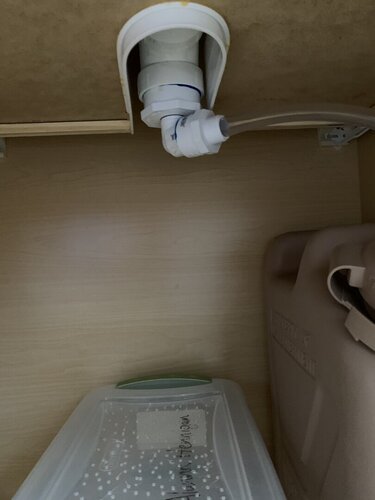
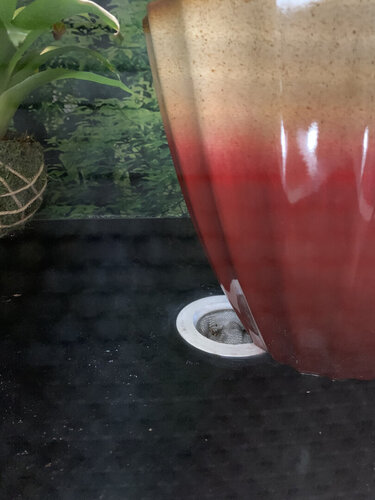
Didn’t want any water getting out of the habitat, it works really well. No water issues here.We also siliconed the edges of where the background connects to each other and to the floor.
Lol. I don’t know. We’ve seen some pretty nice setups on hereGeez, did you have to make it look so professional? You're putting some of us to shame!
")
Jungle Dawn spots are awesome and more affordable than a full linear light by them. I got mine from Lightyourreptile.comWhat type of plant light would you recommend?

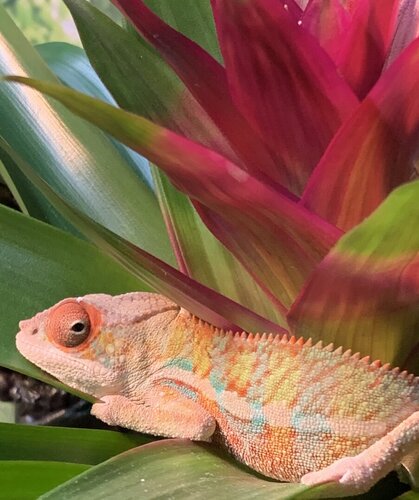
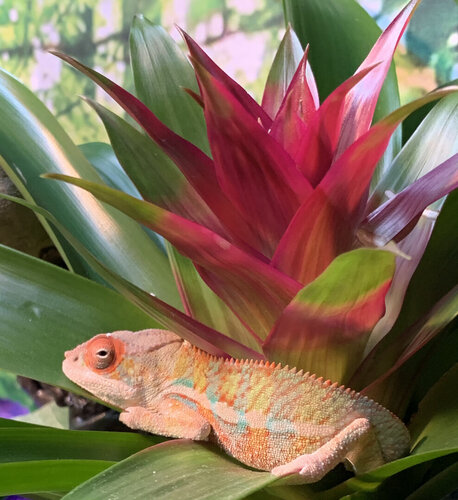
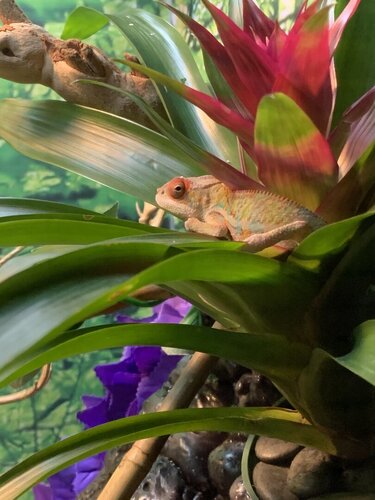
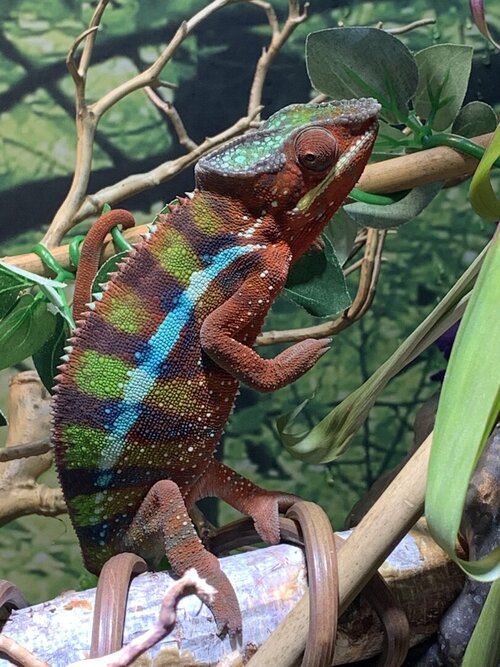
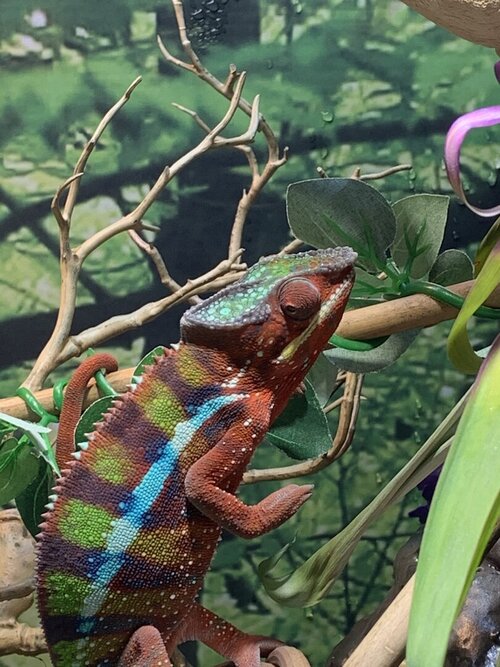
No more baby!!!He’s huge!! Seems to have picked out his permanent colors. Wonderful appetite