New cage in works

scooter4n

Established Member
Hello.
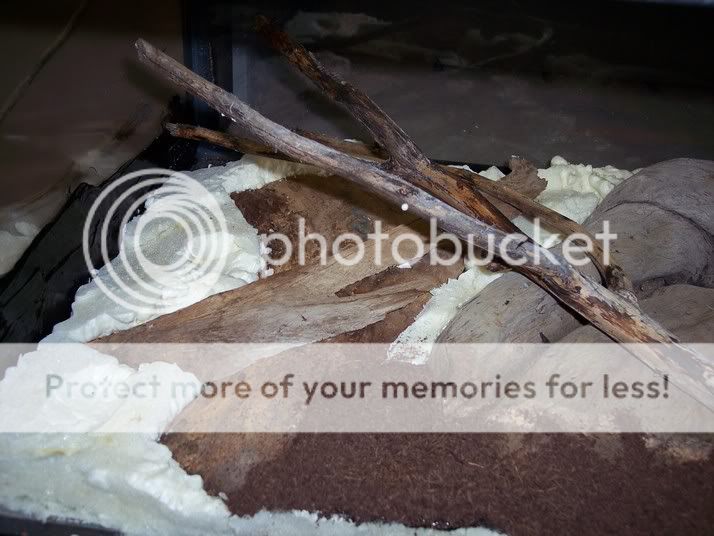
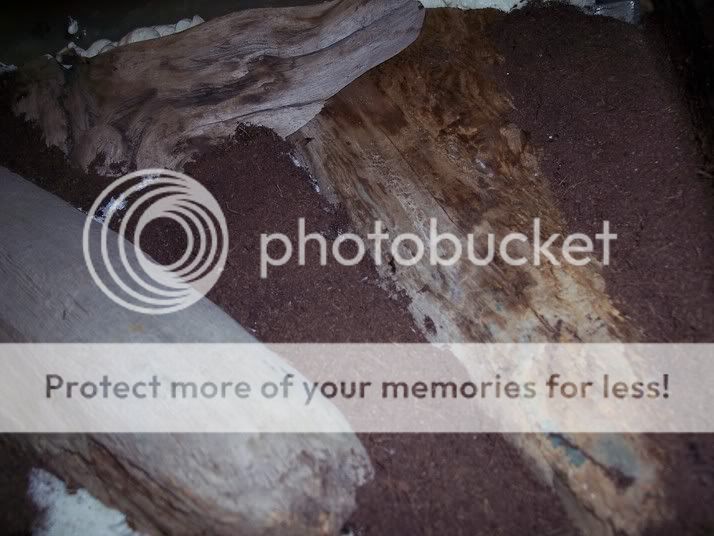
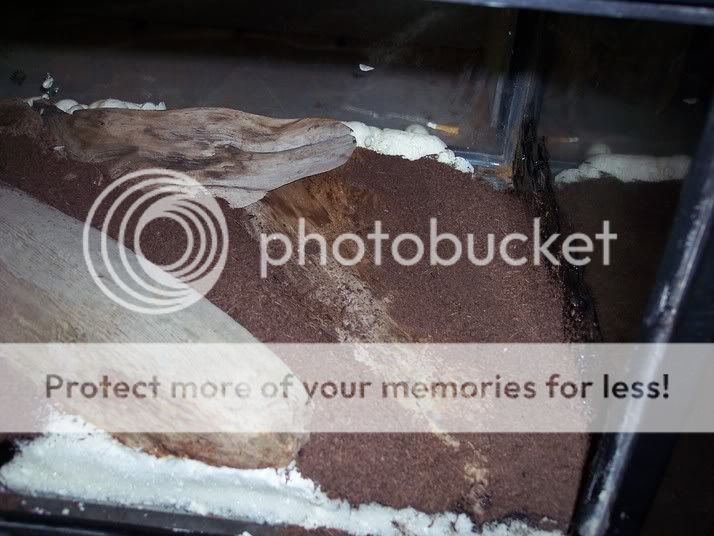
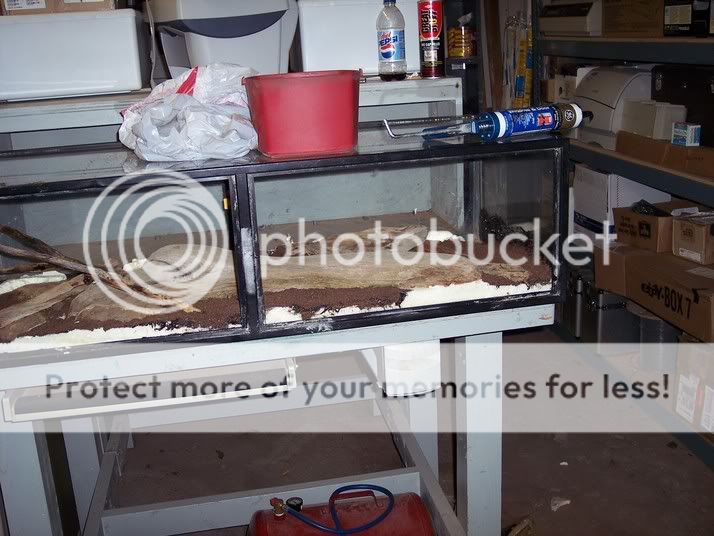
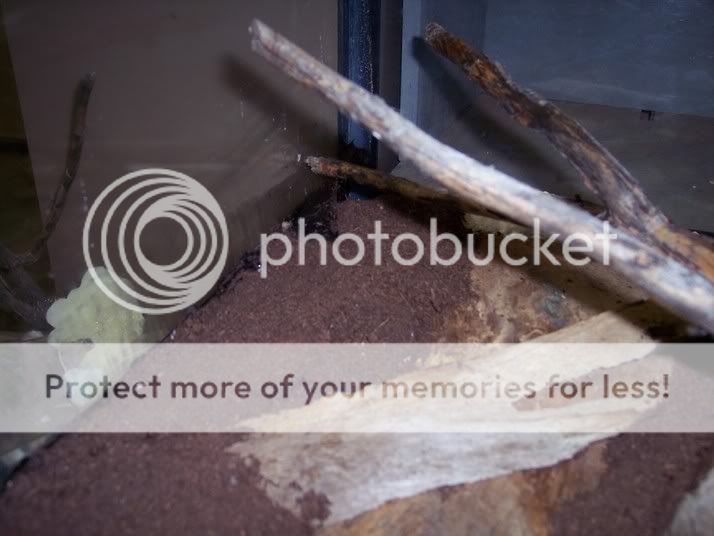
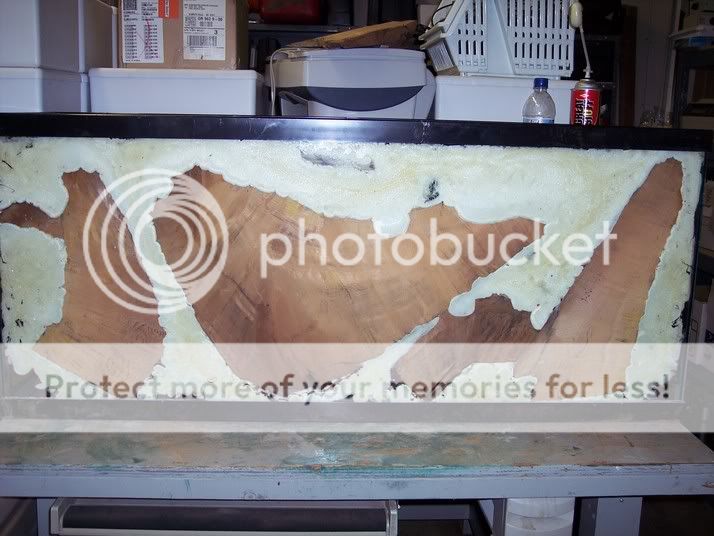
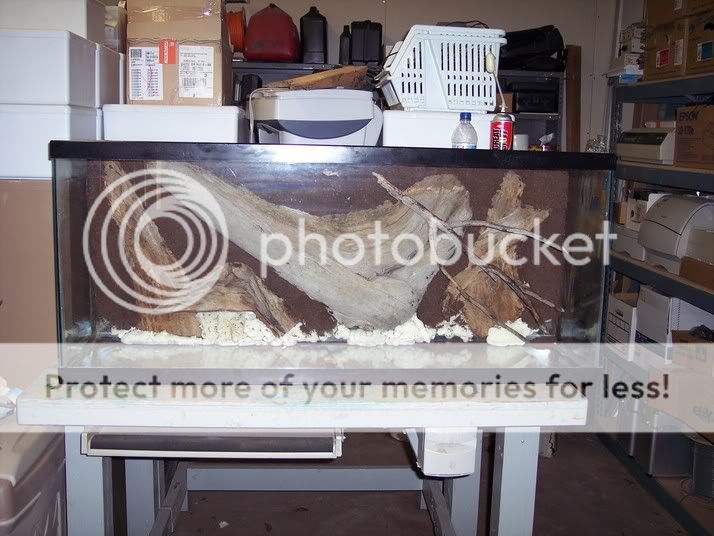
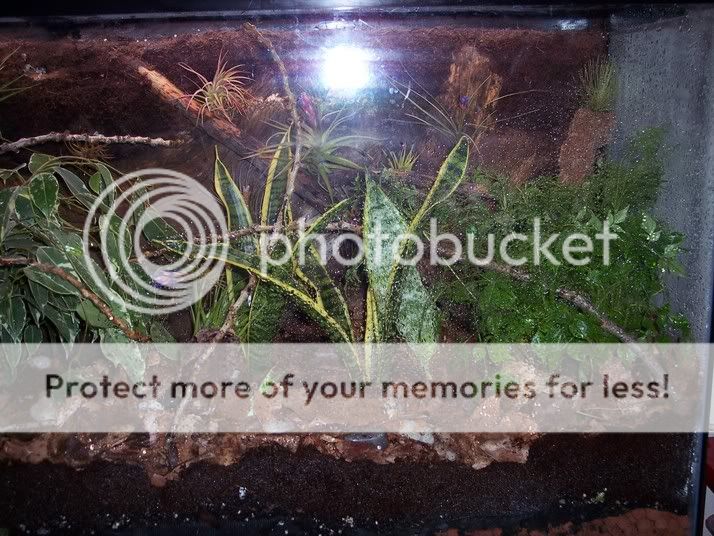
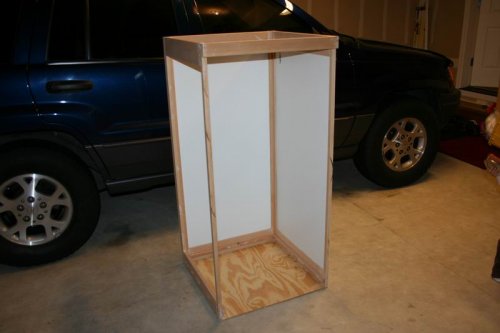
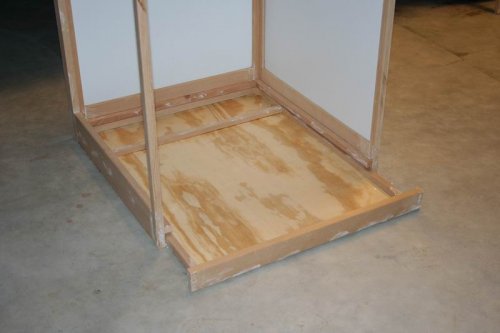
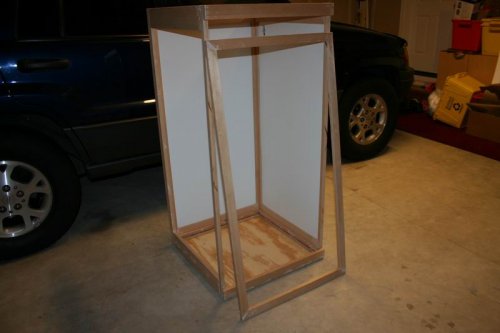
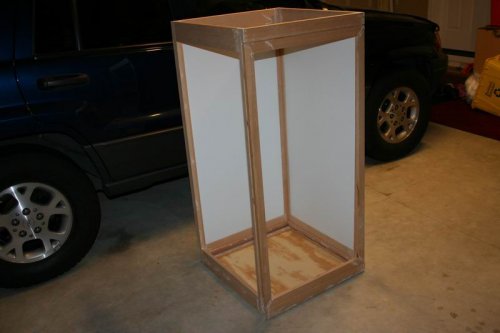
My best friend Dre, he is remodeler, he installs and makes in house cabinets and all that work. he told me and even started building me new cage for Rex. I was looking at allot of cages online, and after seating down with him, we got plan.
Cage will be 2'x2'x4'
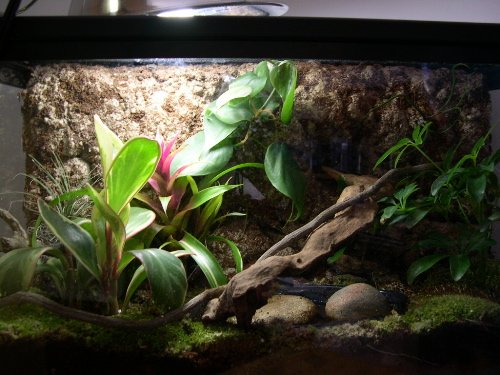
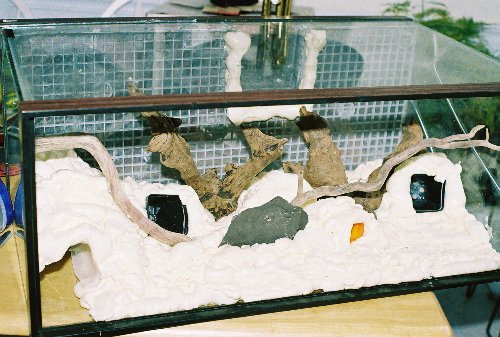
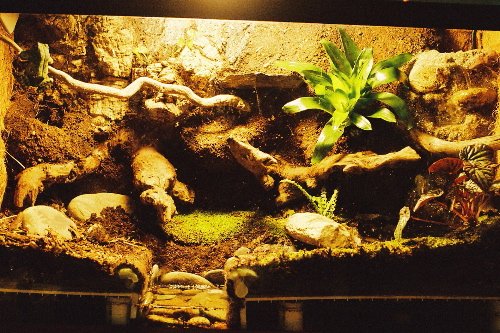
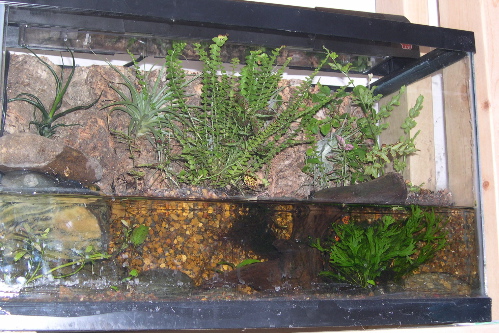
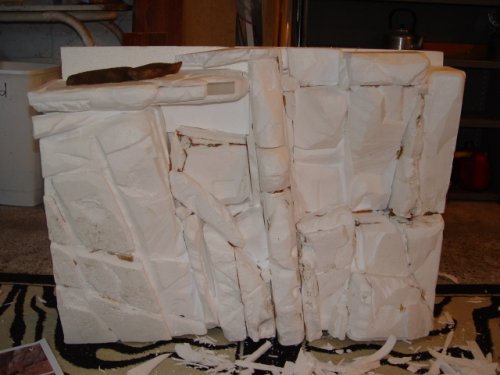
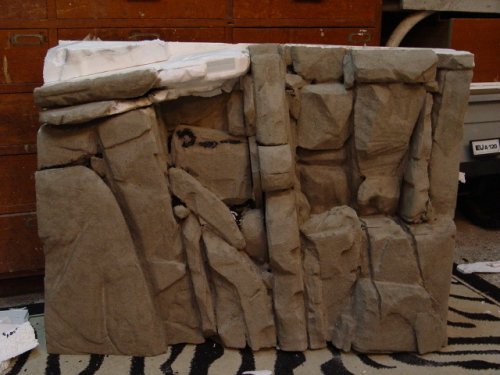
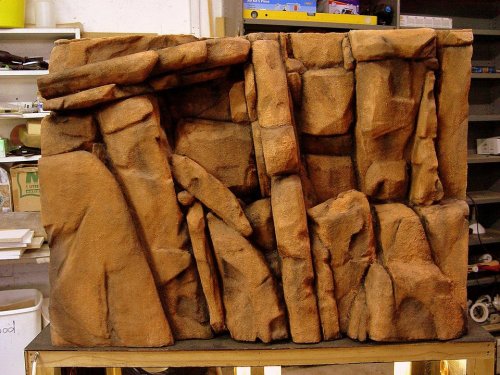
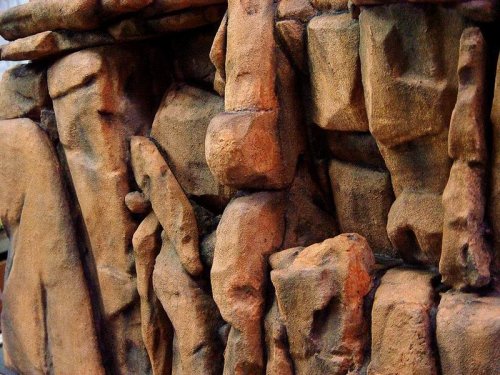
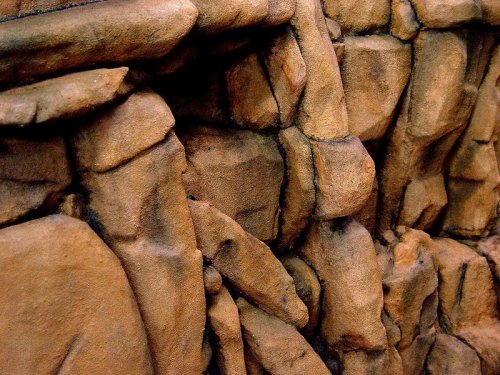
I'm looking in to very nice setups for inside of the cage. I'm thinking to make back wall like a rock wall, or something like it. Looking for ideas. If you seen something very interesting online, please post it. I want to make this cage look like part of the chameleon habitat, jungle like. Please bring it on.
Thanks
 
I will post a picture tomorrow of what I am talking about (have to get some batteries).

Expandable foam
Peat moss
Coco fiber
Black silicone
Sticks

You will want to practice this and see if you feel comfortable with the process first. If you are using wood I would suggest getting a peice of scrap wood and trying it on there first. The expandable foam sells for $3-8 a can. "Great Stuff" sells some. I like it. If not this brand get one that will expand 3x-10x form it's orginal form. This stuff is usually used for sealing cracks for insulation around wires, holes in bricks...etc. Will be in the home repair section of any chain store like Wal Mart, Home Depot, Lowe's...etc. You will have to work fast. Spray foam on the practice material. Add in some sticks. Now spread the peat moss over top of the whole area. Since this is a practice run you may choose to leave out the coco fiber to save some money. Be generous with the peat moss. Anything that does not stick can be knocked off and reused. Let it dry. Give it several hours or just leave it for the next day. You can spray the foam out in the garage and after an hour or two move it inside. If the temperature goes down to 60 I have had some problems with the foam contracting in the drying process. Now that it is dry place a bag or something to catch the loose peat moss (like a trash bag layed out). Knock off any excess that does not stick to the foam off. You will notice it did not stick every where and some white can be seen. Sometime you get lucky and get some good coverage sometimes you do not. Now comes in the silicone. I like to dab a nice size glob, take a good amount of peat moss in relation to the area that is showing white and smear it in there. You can push the silicone around a bit with the peat moss. This will save you some money on going over bord with the silicone. You will have to do this several different times to get everything covered well. Each time make sure you knock off excess so you can see areas that need to be dealt with and saving some money again. If you are going to try this on a larger scale thought into the placement of the branches will have to be a little more thought out. A variation that you may like is to secure a flower pot to the back wall and work the foam around it. This can give you flower pots mounted cleanly on the back wall. Spider plants and pothos look great like this.

One problem with this is drainage. You may get some run off. Moving the misting nozzles around or some ingeniuty can help or stop it all together. I believe Zerah used a similar methods in one of his enclosures. I do not have a chameleon in this type of cage. I have made a couple aquariums for friends using this method.

There are a couple of places that sell cork wood. I will have to do some digging around threw my links to find it but one site I have sells 2x4 pieces that are flat. They where kind of pricey if I remember correctly.
 
Last edited:
I have a 65 gallon brev tank that I used expandable foam with to make the background. There is a really good tutorial at Black Jungle explaining how to do this: http://www.blackjungle.com/gallery/talltank/page1.html

Here are some pictures of when I put mine together:

100_0408.jpg


000_0006.jpg


100_0409.jpg


100_0410.jpg


100_0418.jpg


100_0426.jpg


100_0428.jpg


100_0429.jpg


100_0430.jpg


100_0432.jpg

http://www.blackjungle.com/gallery/talltank/page1.html
 
I've made a few tanks for various herps...I've done cork bark siliconed to the back/side walls, great stuff/silicone/peat moss/coconut fiber, and great stuff/weldbond/peat moss/coconut fiber. The cork bark is definitely the least messy, but there will be holes in the gaps, and it's expensive, too. Fun part about the great stuff is that you can put rock ledges and sticks coming out of it, and the foam will hold them in place when it's dry. (You put them on the back of the tank BEFORE the foam...). I'll post a couple pics of some of my vivs. My brevs have a bark-backed enclosure with driftwood coming out of it, and a piece of shelf lichen (not that they sit on it or anything).

The first pic is a grey tree frog tank(bad experiment with Gorilla Glue). The then brev's tank, White's tree frog tank under construction, White's tank finished, then the fire-bellied newt's tank.
 

Attachments

  • bromil's tank.JPG
    bromil's tank.JPG
    123.2 KB · Views: 206
  • cham tank.JPG
    cham tank.JPG
    170.4 KB · Views: 214
  • Whitey's tank gs.JPG
    Whitey's tank gs.JPG
    142.2 KB · Views: 244
  • Whitey's tank finished.JPG
    Whitey's tank finished.JPG
    174.2 KB · Views: 195
  • Flames tank.JPG
    Flames tank.JPG
    142.2 KB · Views: 183
Grate stuff guys. This is what I'm talking about.
How is that back wall holding mold and moisture??? From the looks of it, it's perfect place for mold, and smell, how you deal with that?
I'm thinking fake rock wall mixed with some wood.

So I'll probably start with Styrofoam and make rock like background and then add some wood and other stuff to it.
what do you use to cover/protect Styrofoam, and then to paint it?
thanks
 
Im actually almost finished with my four first cham cages..........complete with fake rock for 3 sides. I dont like that crappy look of the tutorial linked above me but Im not entirely happy with this first gen of them so far.......maybe with the plants in them Ill be happier.

Anyways, you mix portland cement and tile grout and a lot of acrylic fortifier with a little water................brush on and let cure over 24 hours and recoat.

Im almost done, one complete cage left to do and then on more finish coat for all of them.

Ill put up some pics in a couple days.
 
I've never had mold, either; at least not on the walls. Only time one of my walls stayed too wet was when the waterfall wasn't flowing right (which is why it doesn't run now!). The great stuff does fine with water, but it can degrade if you expose it to UV light for a while; cover the back of the tank, where it's exposed through the glass, and make sure it's covered with silicone/peat moss or whatever covering you've chosen.

There are some folks with water monitors who do faux rock pretty well. Also some people who do elaborate vivaria who use epoxy to cover the styrofoam or expanding foam. They paint the surface, do two or three coats of epoxy, and throw sand at it when the last coat is wet. Only thing is, carving styrofoam or expanding foam is VERY MESSY! Wear a mask, don't do it indoors, and be prepared to clean your dremel with canned air when you're done!
 
I work in the composites industry...........I build carbon fiber parts.

That said..............great stuff will stand up to fiberglass resin, but most foam boards wont.

Epoxy wont melt any of the styrofoams..........and if you dont want to pay for epoxy, you can just paint some exterior latex flat paint over the foam for about 3 coats and use regular fiberglass polyester resin.

Just a tip for those working with stuff!
 
Here is what I got so far.
cage is getting there, ready for primer tomorrow.
Size is 2'x2'x50" with removable tray for the cleaning.
I'm working on the rock looking background
Will post some pics little later.
Enjoy
 

Attachments

  • IMG_0789.JPG
    IMG_0789.JPG
    45.3 KB · Views: 154
  • IMG_0790.JPG
    IMG_0790.JPG
    44.4 KB · Views: 178
  • IMG_0791.JPG
    IMG_0791.JPG
    45.1 KB · Views: 193
  • IMG_0792.JPG
    IMG_0792.JPG
    44.3 KB · Views: 149
Nice looking cage. I am surprised you didn't go with plastic for your floor. What do you intend to use on the wood to waterproof it? What are your walls made of?

Heika
 
I will prime it, then use water proof paint, and silicone all cracks and corners.
For thew walls i use 1/8" shower paneling, then after i get my fake rock panels done, they will glue on top of this panels.
This is just for support now.

now about UVB. because of the size of the cage I need more light. Should I stay with 18" 5.0 , 8.0 or 24" 5.0 or 8.0???
what you think????
 
My male panther's cage is a bit taller and wider than yours, and I still use a Reptisun 5.0 on it. I was using a 24", but switched to a 48" because I have two cages side by side. The 48" runs across the top of both cages. There are basking perches all along the top of the cage where the chameleon can access the UVB produced by the light. I am a strong believer in the theory that the chameleon will moderate its own intake of UVB... there is a study that observes this, and I have seen my own female panther seek out UVB light. I don't believe that more penetrating UVB bulbs are needed for a tall cage as long as access is provided for basking.

Heika
 
Nice work Scoot. Looks like it will turn out well. The removable tray in the bottom is interesting. How are you going to keep it from leaking at the false joint on the fake mullion? Will your drain be under the removable tray? Is this tray tilted front to back to push the water down to the bottom? As your slides swell have you accounted for clearance in the tray so they do not get stuck? Interesting concept.
 
Last edited:
Thanks guys.
I'll just remove tray out to get water out what ever water ends up in the tray. I have other plans for water to go to.
You ll see it when it's done.
18" 5.0 it is.
Thanks Heika
 
I like your door setup..............something Im really unhappy with on my stuff so far.

Next time I build doors I wont use 45 degree cuts for the "picture frame" look and I wont build the frame like I did.

I am actually going to build some molds for fake rock backgrounds..........that way you guys can just order some from me and put your epoxy or concrete on them and install.
 
Back
Top Bottom