New cage in works

That dude rocks the house with patience...........Mine isnt nearly that busy.......I left mine a pearl grey and really choppy.........didnt want to crowd the cages........but I really like his setup.

Anyways Ill be playing around with something and if it pans out Ill make a mold of it and be able to reproduce them super easily.
 
Primed:::::>
 

Attachments

  • IMG_0811.JPG
    IMG_0811.JPG
    48.3 KB · Views: 126
  • IMG_0812.JPG
    IMG_0812.JPG
    46.5 KB · Views: 165
Painted.
All I have to do is put screen and cut holes in the top lid for the lights and stuff
 

Attachments

  • IMG_0816.JPG
    IMG_0816.JPG
    75.1 KB · Views: 145
  • IMG_0817.JPG
    IMG_0817.JPG
    66.2 KB · Views: 116
  • IMG_0819.JPG
    IMG_0819.JPG
    47.8 KB · Views: 109
  • IMG_0820.JPG
    IMG_0820.JPG
    53.1 KB · Views: 184
  • IMG_0815.JPG
    IMG_0815.JPG
    41.1 KB · Views: 122
it's only getting better :)
so what you guys thing for the screen? small screen, or big and what color black, dark or silver/white???
I want it to be as less destruction is possible
 
like a window screen, right?
anyone seen one in silver? I think that lighter colors are better see trough, what you think?
 
Love the simplicity of your layout.

What did you use for the walls again? Was it the plastic sheeting for standup showers?

I just finished mine.........Not 100% happy with it but Im no finish carpenter and I so busy with the business.......this winter has been warm so the motorcycle stuff has been good to me still.

Im definetly going to redo my next gen of cages..........
 
Well, it's is almost done, little more decoration and it's all ready to go for tomorrow.
Here is pics of latest and greatest.
Let me know if you have any questions.
 

Attachments

  • IMG_0831.JPG
    IMG_0831.JPG
    41.5 KB · Views: 181
  • IMG_0839.JPG
    IMG_0839.JPG
    78.7 KB · Views: 119
  • IMG_0841.JPG
    IMG_0841.JPG
    75.7 KB · Views: 142
  • IMG_0845.JPG
    IMG_0845.JPG
    52.1 KB · Views: 135
  • IMG_0847.JPG
    IMG_0847.JPG
    87.7 KB · Views: 132
basking spot question.
I have temp sensor right at basking spot, and it shows about 98C, but if I [place my hand there it's burning hot, I can;t hold my hand there. like it's burning, is it alright? or to much
 
I would recommend moving the branch. Run a branch that goes across the cage corner to corner (or similar). This will put him between the UVB source and the heat source. This will ensure that he is getting good exposure to the UVB source as veileds like to lounge around under the basking lamp as they start to get older. I do not think 98 degrees will have any ill effects. Mine is at 102 degrees after switching to a higher wattage bulb because of the colder temperatures outside. The main worry with these guys would be if it gets close to 110 or if they can get directly under the bulb itself at close range. The head of an adult male can excede 4" from the mouth line to the top of the casque, add on the fact that they develop a black line that runs up it and a developing burn may not be caught as quicly as another species. I would take a couple measurements with the sensor in different spots varying around the basking branch to be safe. A fully flattened adult is about 5" off the branch if they are in the relaxed position. Secure something that can hold it there for an amount of time to get a good reading. I also set mine up with the idea that they like to lean in to warm up the other side sometimes. Same thing, secure it in a manner that it can be measured accurately. I do not really think there is a standard but I do not like mine to get over 105 degrees on a lean in measurement. This will give you a more accurate depiction of the heat in the basking area. Another thing I have noticed with the bulbs with the completely clear glass around them is that they are not as even with dispersing the heat with the dome reflector. I like using GE reveal light bulbs. They seem more white then yellow and I can see my chameleons in there cage better when I watch them as it seems to lit up the cage well. I do not think it is actually effecting my chameleons in any way but I can reconize the contrast in the coloration better from a distance.
 
Thanks Jordan for your input.
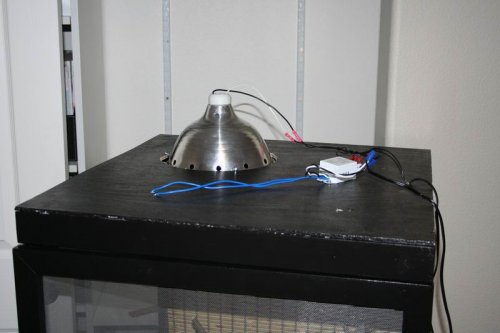
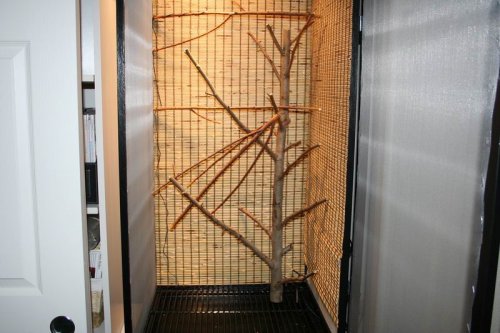
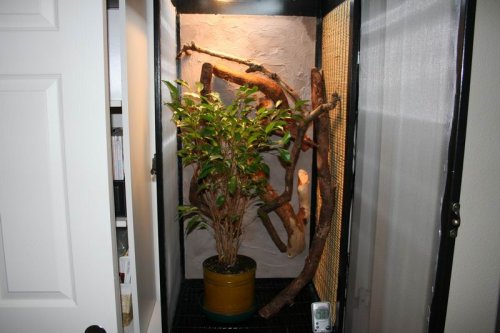
That top branch is actually going from one corner to the center of the other wall, so it is right under the light. I'll add one more soon across and little lower.
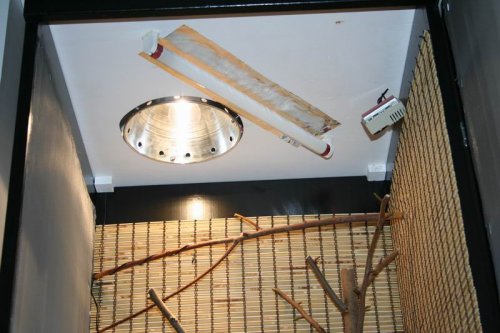
now talking about temps. With this cold temps outside, day time when no one home, my house thermostat drops down to 65C and when we get home it set to stay in 70-72C. SO with that temps in the cage are differentiate. Like when it's 65C in the house basking spot only gets up to 85-89C, when heater kicks in then tems are up to mid 90's. I can't do anything about that, if I put bigger bulb to get tems up during the day, then after heat kicks in it's to hot under the light. You know what I'm talking about? what should I do?
I don't think you can see, but my thermometer sensor, is wire that wrapped around top branch, and sensor on the end of that wire right at the hottest spot. I measured and remeasured temps many times, with different thermometers and I know what ever I get it's is accurate.
 
Well with the branch thing I meant run it at an angle like the flourescent light is. I assumed that, that was for UVB. I always like to make it to were they get a good dose of both at the same time.

As long as that is all it is fluctuating I do not think that is bad. Assuming he is not like right beside a vent that is causing a dramatic air draft. Temperature vary through the day outside. He should be able to adjust accordingly. If it were something a little more dramatic maybe then try to adjust. I do not think that will be a big deal. He will probably just spend a couple more minutes warming up and then go about his business.

Once that plant gets a little bigger and fuller it could help to insulate the heat in a little better too.

Sorry I cook for a living. I can not really feel my hands or arms so I could not really tell you if my light was to hot or not in that manner. I think that is why I am a little paranoid about them over heating and measured so many different ways. The spot I stand at when I am at work stays at 110-125 degrees ambient temperature.
 
Last edited:
Here is latest and greatest.
I went and got sheet of Styrofoam, and box of sanded grout. When you mix grout with water, make it thick, so it lives some texture on the wall, apply with brush, bigger is better. Put 2-3 layers of grout, about 2 days of drying between layers.
Silicone wood to the back wall, and done deal.
 

Attachments

  • IMG_0925.JPG
    IMG_0925.JPG
    73.3 KB · Views: 136
  • IMG_0927.JPG
    IMG_0927.JPG
    70.2 KB · Views: 162
  • IMG_0930.JPG
    IMG_0930.JPG
    82.9 KB · Views: 135
Back
Top Bottom