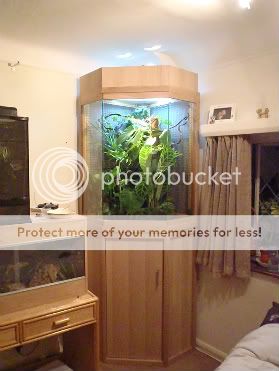
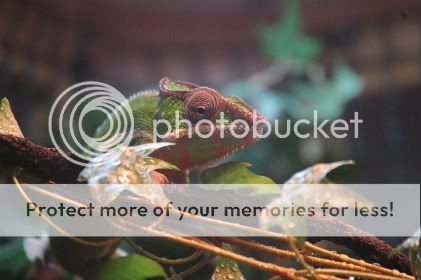
I have designed and built a corner unit style vivarium for “Darwin” our 6 month old Mitsio Panther Chameleon and I thought I would share this with you all for those that are interested.
First of all I would like to thank Nick, the carpenter who helped me build this new cage. Although I designed the unit I unfortunately am not blessed with the kind of skills required to complete the project to the standard that I was looking for. I do not think either I or Nick appreciated the amount of time this build would end up taking. We both anticipated around 18-27 man hours but in the end, it took up over 72 man hours! This was largely due to the angles involved with the corner design and the time consuming details I seeked to achieve.
Let’s get started….
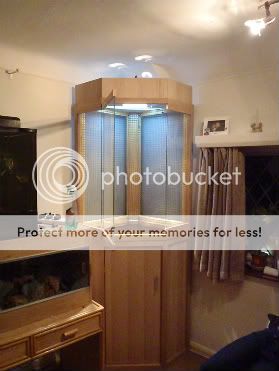
What I wanted from this build is a cage that not only exceeded Darwin’s requirements but one that could be easily maintained and would not look out of place in a family home. I also wanted Darwin’s environment to be as natural as possible.
I could have saved a lot of time and effort and gone with a Vivexotic or Flexarium type enclosure. Although these work well in their own right (usually with some tweaking) and look great in a reptile room for example, they tend to look out of place as a single unit in a living room.
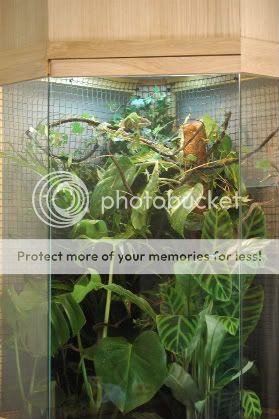
Furthermore I wanted to create uninterrupted views of Darwin in his enclosure. I often spend hours just watching him going about his daily business and I really didn’t want to look through mesh to do so. This then led me to choose a corner style cage.
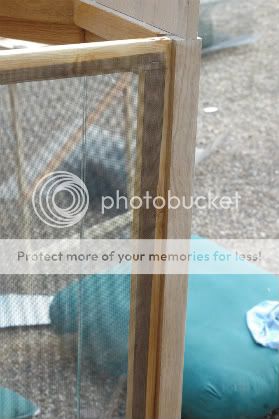
By having a corner unit it allows me to fix mesh to the sides of the enclosure that face the walls, and fit glass to the front. This then achieved the ventilation Darwin requires and the uninterrupted view of his environment that I was looking for.
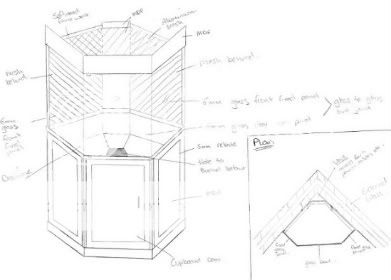
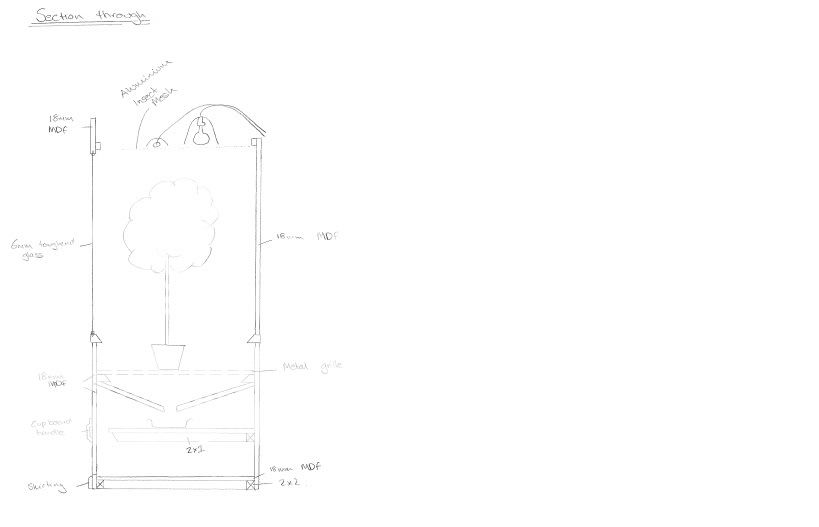
From this I drew up a quick sketch.

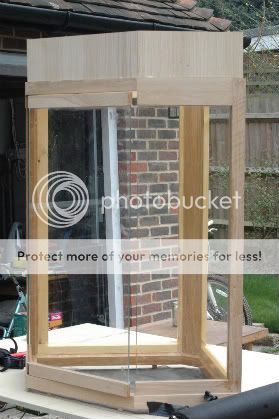
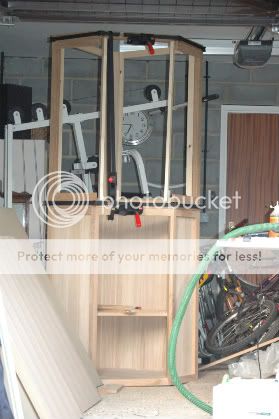
I wanted the cage to be as tall as possible to provide as much climbing space as I could for Darwin. The cage would be 2.5m high and therefore unmanageable as one single unit. After speaking with Nick we decided to make the upper and lower sections separate so that the cage could be moved easily into position and removed again when needed. I really did not want to break the cage down into bits when we next moved house!
The live plants that I am using will be kept in pots, I did not want see the plant pots so I made the base of the top section lower than the line of the glass, so that when you looked into the cage you would only see the plants and not the pots.
I wanted the view into Darwins cage to be as clear as possible. So I removed any vertical timber framing from the front face and left the glass to be butt jointed where they meet. This then left a problem of how I would hinge the door. I thought about using normal glass hinges but these are quite ugly and would have interrupted the view into Darwin’s enclosure. We decided to incorporate pivot type door hinges into the top and bottom tracks which hold the glass in place, more on this later.
When choosing the materials to use I decided to use 18mm Oak veneered MDF panels to form the sides and 50x50mm Oak to construct the framework. I could have used laminated panels however imo they never look as good and are not as durable as real oak. I want this cage to last a long time!
After more lengthy discussions with Nick we began the build….
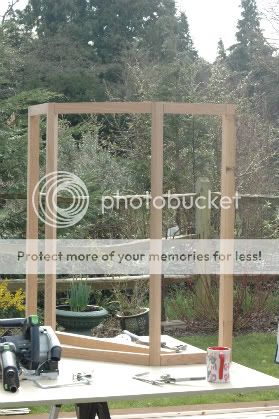
Day 1 – Start lower half of the cage
50x50mm Oak frame
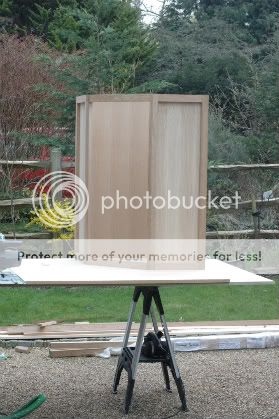
18mm Oak veneered MDF side panels fitted
Once we were happy with all of the joints and margins we completely dismantled the unit, and reassembled, gluing the joints as we went. We then braced the unit to allow the glue to set in the correct position.
Day 2 – Remove excess glue and sand down the joints from the lower section.
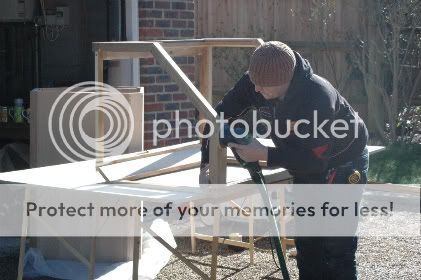
It decided to rain so Nick was set to work in the small amount of space we had in the garage.
We then started on the top half of the unit. All glued, braced and left to set.
Day 3 – Sand down top section
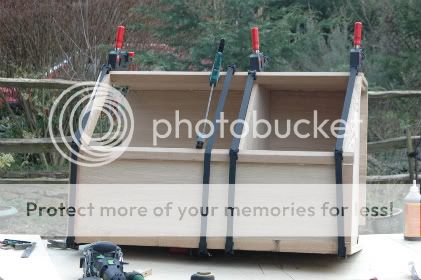
Begin the drainage system.
I need to mist the cage heavily at least twice a day; this creates a fair amount of water which needs to be drained. To achieve this, we fitted timber at an angle to the inside of the cage around the edge to form a funnel for the water to flow down into a bucket below. We then needed to form a base for the plant pots to sit on. The base is made from slats of timber to support the weight of the plant pots (see photo below) and covered in mesh to allow the water to drain into the white bucket. The mesh also acts a barrier to stop anything other than water passing through i.e Darwin or feeders.
After a very long day, the timber slats were cut, the drainage systems was complete and the cupboard door was fitted. This was all glued and left to set.
To aid the overall drainage of the enclosure we took the edge off of the timber framework where applicable to allow the water to drain down to the bottom of the enclosure and to stop the build-up of standing water.
First of all I would like to thank Nick, the carpenter who helped me build this new cage. Although I designed the unit I unfortunately am not blessed with the kind of skills required to complete the project to the standard that I was looking for. I do not think either I or Nick appreciated the amount of time this build would end up taking. We both anticipated around 18-27 man hours but in the end, it took up over 72 man hours! This was largely due to the angles involved with the corner design and the time consuming details I seeked to achieve.
Let’s get started….
What I wanted from this build is a cage that not only exceeded Darwin’s requirements but one that could be easily maintained and would not look out of place in a family home. I also wanted Darwin’s environment to be as natural as possible.
I could have saved a lot of time and effort and gone with a Vivexotic or Flexarium type enclosure. Although these work well in their own right (usually with some tweaking) and look great in a reptile room for example, they tend to look out of place as a single unit in a living room.
Furthermore I wanted to create uninterrupted views of Darwin in his enclosure. I often spend hours just watching him going about his daily business and I really didn’t want to look through mesh to do so. This then led me to choose a corner style cage.
By having a corner unit it allows me to fix mesh to the sides of the enclosure that face the walls, and fit glass to the front. This then achieved the ventilation Darwin requires and the uninterrupted view of his environment that I was looking for.
From this I drew up a quick sketch.
I wanted the cage to be as tall as possible to provide as much climbing space as I could for Darwin. The cage would be 2.5m high and therefore unmanageable as one single unit. After speaking with Nick we decided to make the upper and lower sections separate so that the cage could be moved easily into position and removed again when needed. I really did not want to break the cage down into bits when we next moved house!
The live plants that I am using will be kept in pots, I did not want see the plant pots so I made the base of the top section lower than the line of the glass, so that when you looked into the cage you would only see the plants and not the pots.
I wanted the view into Darwins cage to be as clear as possible. So I removed any vertical timber framing from the front face and left the glass to be butt jointed where they meet. This then left a problem of how I would hinge the door. I thought about using normal glass hinges but these are quite ugly and would have interrupted the view into Darwin’s enclosure. We decided to incorporate pivot type door hinges into the top and bottom tracks which hold the glass in place, more on this later.
When choosing the materials to use I decided to use 18mm Oak veneered MDF panels to form the sides and 50x50mm Oak to construct the framework. I could have used laminated panels however imo they never look as good and are not as durable as real oak. I want this cage to last a long time!
After more lengthy discussions with Nick we began the build….
Day 1 – Start lower half of the cage
50x50mm Oak frame
18mm Oak veneered MDF side panels fitted
Once we were happy with all of the joints and margins we completely dismantled the unit, and reassembled, gluing the joints as we went. We then braced the unit to allow the glue to set in the correct position.
Day 2 – Remove excess glue and sand down the joints from the lower section.
It decided to rain so Nick was set to work in the small amount of space we had in the garage.

We then started on the top half of the unit. All glued, braced and left to set.
Day 3 – Sand down top section
Begin the drainage system.
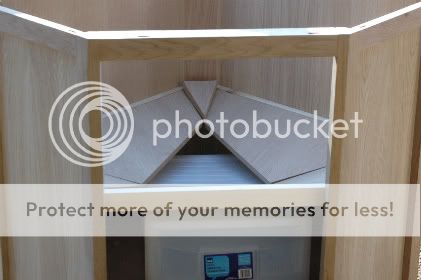
I need to mist the cage heavily at least twice a day; this creates a fair amount of water which needs to be drained. To achieve this, we fitted timber at an angle to the inside of the cage around the edge to form a funnel for the water to flow down into a bucket below. We then needed to form a base for the plant pots to sit on. The base is made from slats of timber to support the weight of the plant pots (see photo below) and covered in mesh to allow the water to drain into the white bucket. The mesh also acts a barrier to stop anything other than water passing through i.e Darwin or feeders.
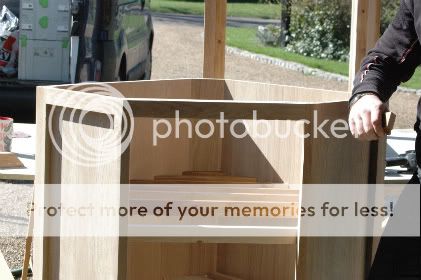
After a very long day, the timber slats were cut, the drainage systems was complete and the cupboard door was fitted. This was all glued and left to set.
To aid the overall drainage of the enclosure we took the edge off of the timber framework where applicable to allow the water to drain down to the bottom of the enclosure and to stop the build-up of standing water.