As requested I have been asked to share my method of building my cage for my chameleon. I will add some photos with some descriptions. If i miss out anything please leave a comment and I can add more detail!

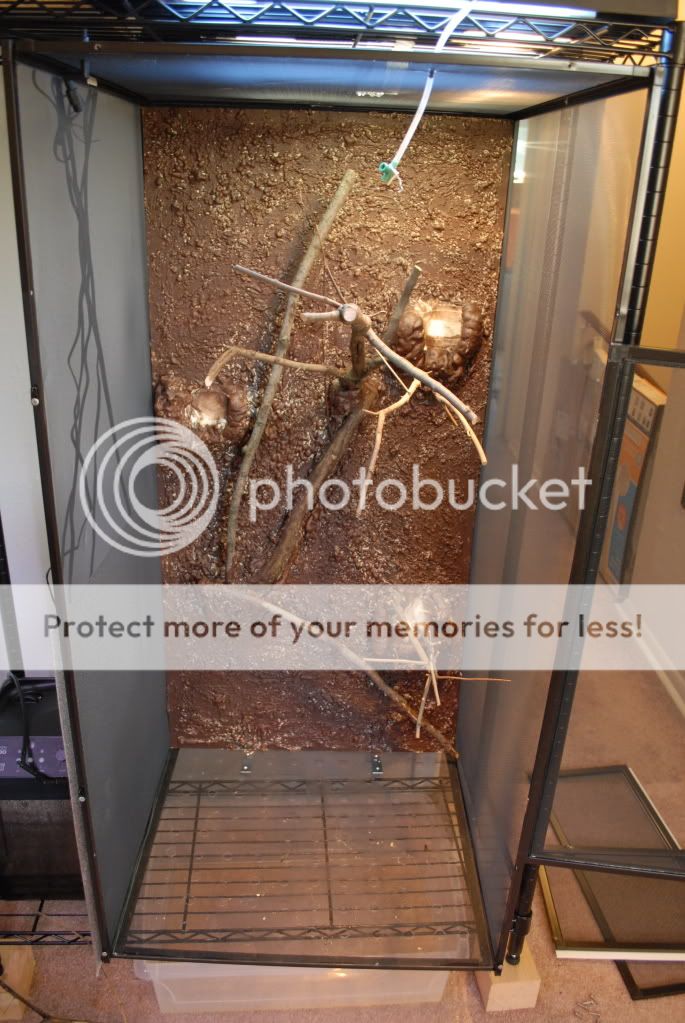
Raw Tank Setup (Fig. 1)
For Starters I got a piece of plywood cut to 23''x 47'' (1/4'' thick) from Lowe's to fit the inside of my LLLReptile screen cage. My screen cage is 24''x24''x48''. After this I needed a few supplies:
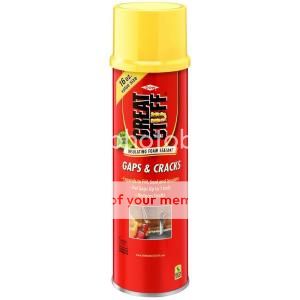
-GREAT STUFF 16 oz. Gaps and Cracks Insulating Foam Sealant $3.98
- Wood screws 3'' Long (10ct) Philips preferred
- 1'' wood screw (2ct)
- Drill bits
- Brown Acrylic Paint
- Paint brushes (wide and small)
- Plastic gloves
- Real wood branches
- Portable Drill
- Plastic plant cups
- Hot glue Gun + Glue
- Dremel / Hacksaw
- Zip ties
Great Stuff Insulating Foam (Fig. 2)
After getting the necessary supplies I decided where I wanted my plants to be located on my plywood setup. If you look at (Fig. 1) You will see three round places where I decided to place my plant's. First I drew a few lines where I wanted the plant pots to be located then placed two marks underneath the pots, to indicate where to drill my holes. These holes will later have 3'' screws hanging out acting as a support for the plant pots to sit on. After drilling all the holes and adding the screws I added a third screw to hold the pot in place. This screw is located at the top lip of the plastic pot, therefore preventing the pot from slipping out from its place. Next I gathered some branches from the great outdoors and cleaned them to my liking. Drilled a hole in the underside of the trunk on the wood branch. Next drilled a hold in my plywood then mounted the branch with a screw from behind the plywood, therefore having the wood branch coming towards me ( inside of the terrarium). Repeat as many times as you like to add more wood branches.
After all the plants have been temporarily mounted on the plywood sheet, next comes the Great Stuff Insulating Foam (Fig. 2). This foam will add a awesome texture to the back of the plywood, giving your terrarium a classic forest textured look. Prepare yourself with some disposable plastic gloves. This foam will stick to your skin for a long time! Place the pots ONLY in the fitting you just made with the screws. Make sure they are secure and not to loose. I made mine fit snugly between the wood screws. This way I could easily remove them easily if necessary. Now grab the insulation foam and start covering the plant pots you mounted with this foam, from side to side ( I did not cover the front only the sides and back of the pot, this allows me to replace the pot or plant if necessary at a later date). Be sure to lay down newspaper to catch your foam droppings. One note to remember is that this foam will expand like shaving cream does after it come out of the can. Even when it begins to dry it will expand more. So be sure to add it in small portions, it all depends how thick you want your background to look like. I decided to use a paper towel and spread the foam around the front of the plywood sheet. This allowed me to create a textured surface, but nothing to thick. Take a few breaks and allow the foam to dry so you may layer is up more around the plant pots if necessary. After you have covered your plywood let it dry and cure overnight.
Once the foam has had enough time to cure you may add more or begin painting! Remove the plant pots easily away from the foam. Now comes the painting process!! Grab your acrylic paint and your paintbrush. Begin painting all the foam that you applied the day before, this may take a few layers of painting. You may water down the acrylic paint to cover the foam easily at first, but later on I recommend using the paint right out of the tube.
After the paint completely covers that ugly yellow/ white foam you are ready to hot glue your plants to your foam! (Note, This process may be done inside the cage or when the plywood sheet is out of the cage.) The hot glue will hold the plants in place for sure, in case a certain chameleon decides to climb on and around the foliage. Lastly turn your plywood sheet to the backside and grab your Dremel or hacksaw and cut the ends of the screws off the backside of the plywood. This prevents damaging the inside of the screen cage. Once completed you are ready to place your plywood sheet inside your terrarium!
You may notice you are having a hard time keeping the sheet up and preventing ti from falling down. This is why we add a 90 degree angle bracket (framing bracket or anything similar to it) to the bottom of the plywood sheet. Use one or two screws to hold it in place. I mounted two of these brackets to the bottom of my plywood sheet as seen in (Fig. 1). This only takes care of keeping the bottom half from slipping, the next step is a screw on the top left or right of the cage. I drilled a hole in my plywood AND my metal cage and later added a shorter 1'' screw. This may be done in the top left and right side of the cage, I only needed one screw to hold the top of the plywood in place.
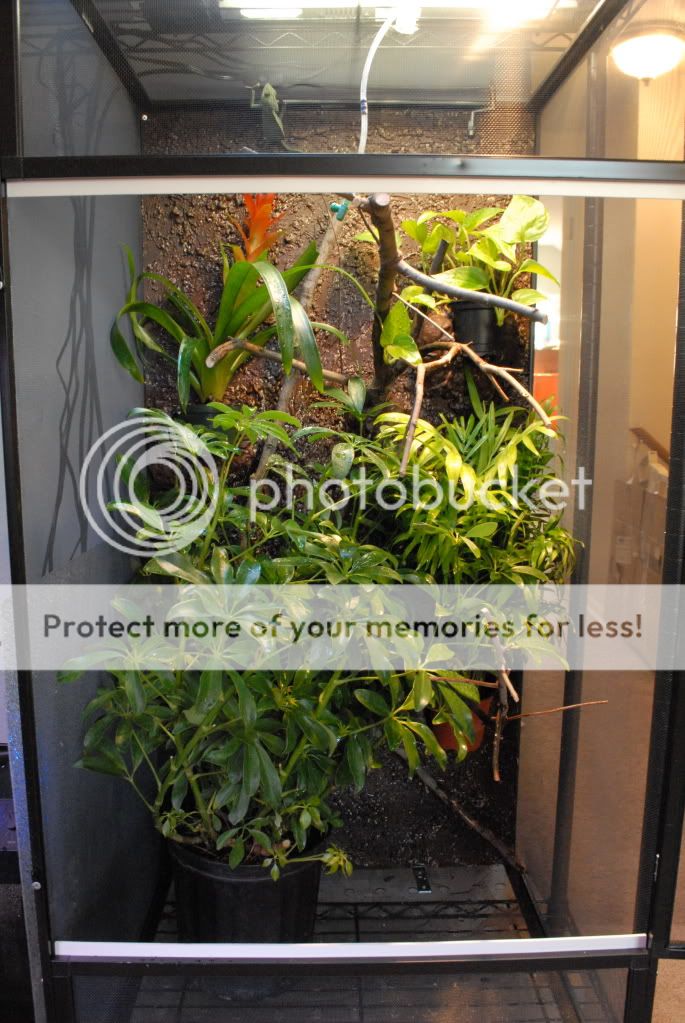
After all that hard work now comes the plants!! Add you plants to your pots and add your plants to the bottom of the cage. This is what mine looked like at this point. (Fig. 3) The next step is adding even more wood branches. I went out to the great outdoors yet again, and collected as many clean looking non-rotting wood branches (alive branches help) as I could. Keep in mid this terrarium is very high and larger then you may remember. Be sure to not cut the branches to much. Over the few months I have added even more branches and plants, so plenty more opportunities are available. Next comes the fun part of adding the branches to your terrarium. I already had a few branches screwed into my plywood so this game me something to tie my new branches to. I used many zip ties to secure my branches in place. Always start with big branches first! Remember that you chameleon will be growing so be sure to add thick branches and a few other sizes to get there muscles a workout.
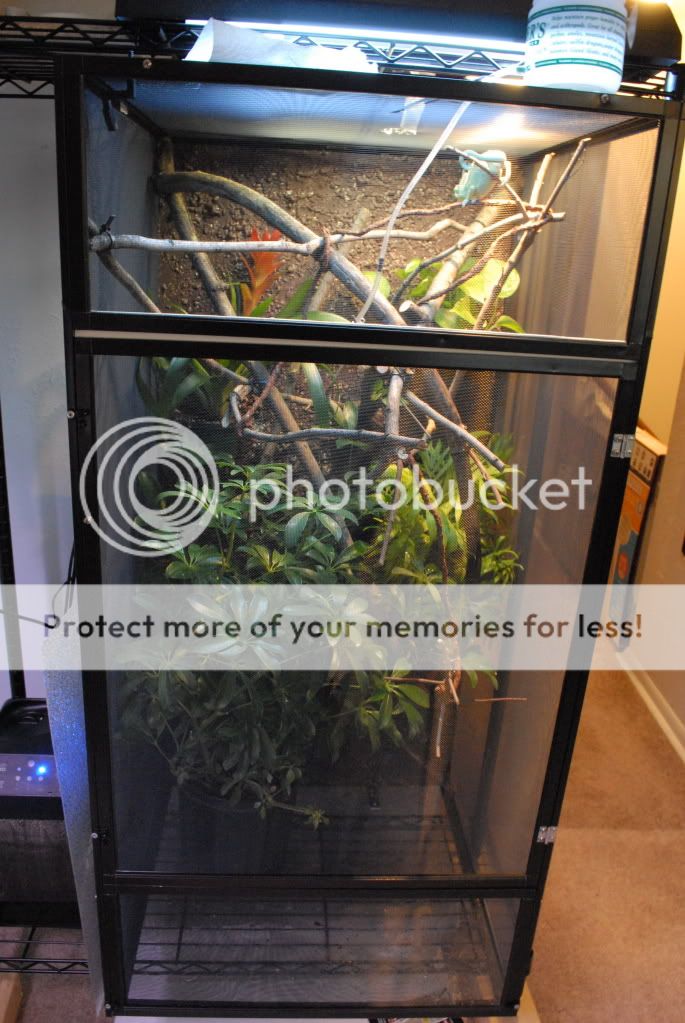
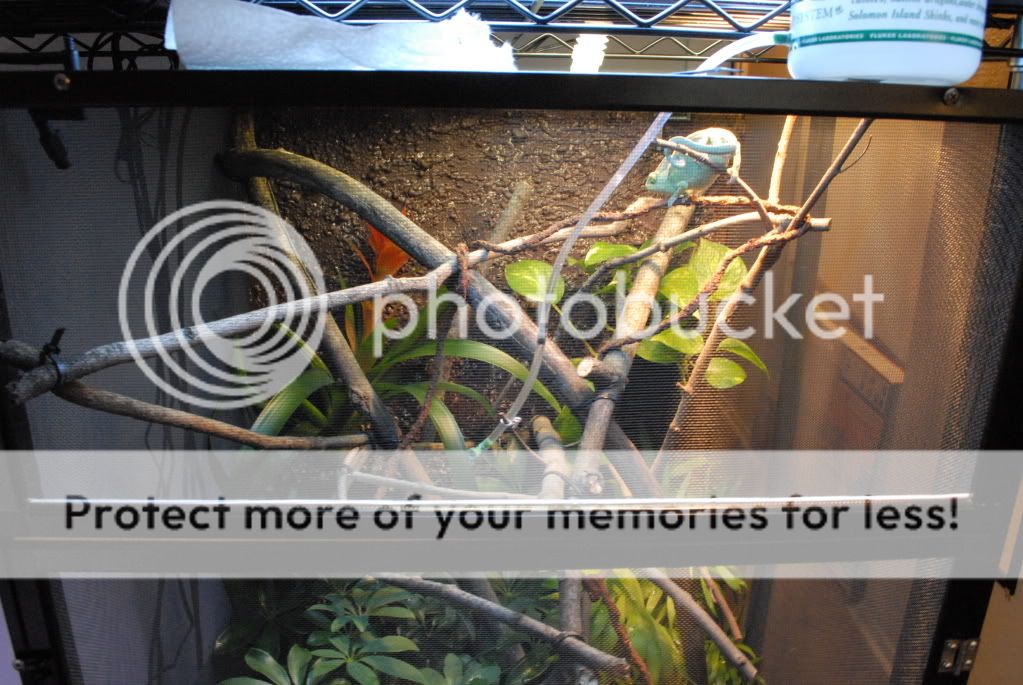
After adding all the branches and plants I came up with something like this. (Fig. 4)
Thanks for reading hope this helps inspire some of you chameleon owners to make your own terrarium better or give you newcomers a better idea of what a real terrarium should look like! Attached below is another updated picture of my same setup, but with more plants!
Raw Tank Setup (Fig. 1)
For Starters I got a piece of plywood cut to 23''x 47'' (1/4'' thick) from Lowe's to fit the inside of my LLLReptile screen cage. My screen cage is 24''x24''x48''. After this I needed a few supplies:
-GREAT STUFF 16 oz. Gaps and Cracks Insulating Foam Sealant $3.98
- Wood screws 3'' Long (10ct) Philips preferred
- 1'' wood screw (2ct)
- Drill bits
- Brown Acrylic Paint
- Paint brushes (wide and small)
- Plastic gloves
- Real wood branches
- Portable Drill
- Plastic plant cups
- Hot glue Gun + Glue
- Dremel / Hacksaw
- Zip ties
Great Stuff Insulating Foam (Fig. 2)
After getting the necessary supplies I decided where I wanted my plants to be located on my plywood setup. If you look at (Fig. 1) You will see three round places where I decided to place my plant's. First I drew a few lines where I wanted the plant pots to be located then placed two marks underneath the pots, to indicate where to drill my holes. These holes will later have 3'' screws hanging out acting as a support for the plant pots to sit on. After drilling all the holes and adding the screws I added a third screw to hold the pot in place. This screw is located at the top lip of the plastic pot, therefore preventing the pot from slipping out from its place. Next I gathered some branches from the great outdoors and cleaned them to my liking. Drilled a hole in the underside of the trunk on the wood branch. Next drilled a hold in my plywood then mounted the branch with a screw from behind the plywood, therefore having the wood branch coming towards me ( inside of the terrarium). Repeat as many times as you like to add more wood branches.
After all the plants have been temporarily mounted on the plywood sheet, next comes the Great Stuff Insulating Foam (Fig. 2). This foam will add a awesome texture to the back of the plywood, giving your terrarium a classic forest textured look. Prepare yourself with some disposable plastic gloves. This foam will stick to your skin for a long time! Place the pots ONLY in the fitting you just made with the screws. Make sure they are secure and not to loose. I made mine fit snugly between the wood screws. This way I could easily remove them easily if necessary. Now grab the insulation foam and start covering the plant pots you mounted with this foam, from side to side ( I did not cover the front only the sides and back of the pot, this allows me to replace the pot or plant if necessary at a later date). Be sure to lay down newspaper to catch your foam droppings. One note to remember is that this foam will expand like shaving cream does after it come out of the can. Even when it begins to dry it will expand more. So be sure to add it in small portions, it all depends how thick you want your background to look like. I decided to use a paper towel and spread the foam around the front of the plywood sheet. This allowed me to create a textured surface, but nothing to thick. Take a few breaks and allow the foam to dry so you may layer is up more around the plant pots if necessary. After you have covered your plywood let it dry and cure overnight.
Once the foam has had enough time to cure you may add more or begin painting! Remove the plant pots easily away from the foam. Now comes the painting process!! Grab your acrylic paint and your paintbrush. Begin painting all the foam that you applied the day before, this may take a few layers of painting. You may water down the acrylic paint to cover the foam easily at first, but later on I recommend using the paint right out of the tube.
After the paint completely covers that ugly yellow/ white foam you are ready to hot glue your plants to your foam! (Note, This process may be done inside the cage or when the plywood sheet is out of the cage.) The hot glue will hold the plants in place for sure, in case a certain chameleon decides to climb on and around the foliage. Lastly turn your plywood sheet to the backside and grab your Dremel or hacksaw and cut the ends of the screws off the backside of the plywood. This prevents damaging the inside of the screen cage. Once completed you are ready to place your plywood sheet inside your terrarium!
You may notice you are having a hard time keeping the sheet up and preventing ti from falling down. This is why we add a 90 degree angle bracket (framing bracket or anything similar to it) to the bottom of the plywood sheet. Use one or two screws to hold it in place. I mounted two of these brackets to the bottom of my plywood sheet as seen in (Fig. 1). This only takes care of keeping the bottom half from slipping, the next step is a screw on the top left or right of the cage. I drilled a hole in my plywood AND my metal cage and later added a shorter 1'' screw. This may be done in the top left and right side of the cage, I only needed one screw to hold the top of the plywood in place.
After all that hard work now comes the plants!! Add you plants to your pots and add your plants to the bottom of the cage. This is what mine looked like at this point. (Fig. 3) The next step is adding even more wood branches. I went out to the great outdoors yet again, and collected as many clean looking non-rotting wood branches (alive branches help) as I could. Keep in mid this terrarium is very high and larger then you may remember. Be sure to not cut the branches to much. Over the few months I have added even more branches and plants, so plenty more opportunities are available. Next comes the fun part of adding the branches to your terrarium. I already had a few branches screwed into my plywood so this game me something to tie my new branches to. I used many zip ties to secure my branches in place. Always start with big branches first! Remember that you chameleon will be growing so be sure to add thick branches and a few other sizes to get there muscles a workout.
After adding all the branches and plants I came up with something like this. (Fig. 4)
Thanks for reading hope this helps inspire some of you chameleon owners to make your own terrarium better or give you newcomers a better idea of what a real terrarium should look like! Attached below is another updated picture of my same setup, but with more plants!