new diy enclosure

Deo

New Member
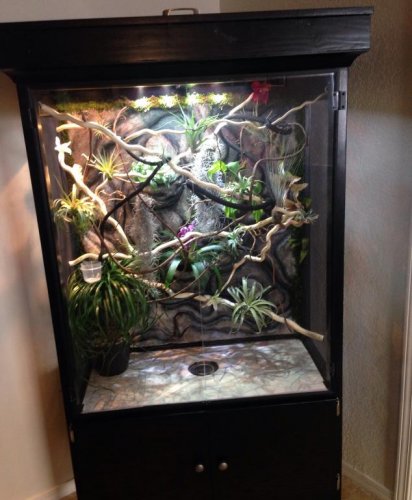
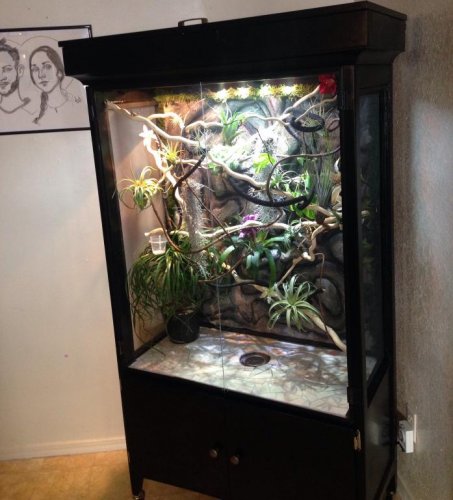
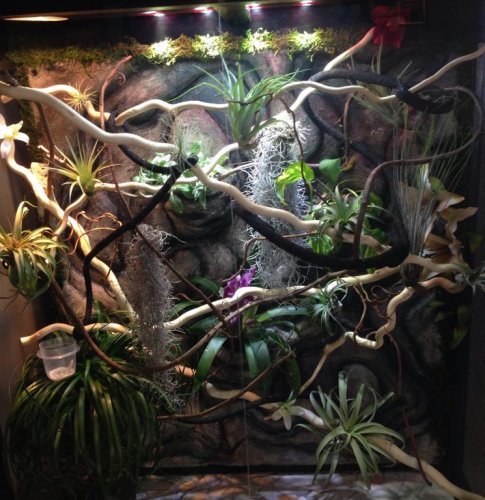
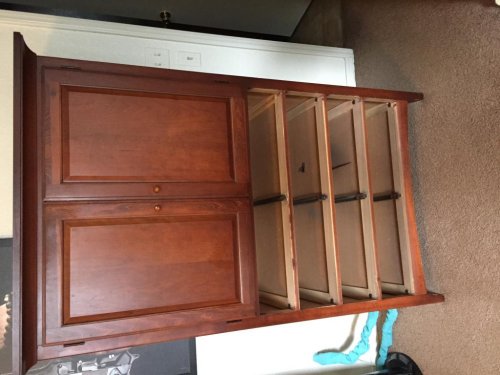
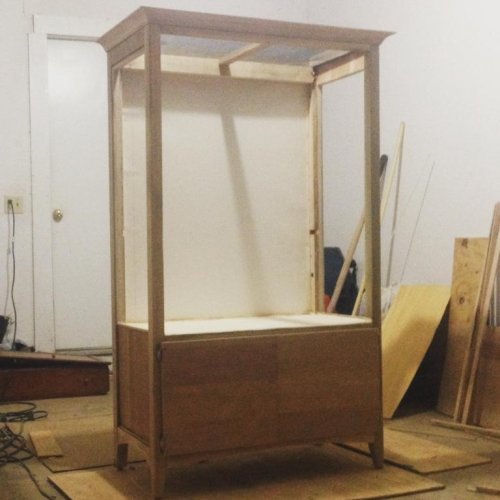
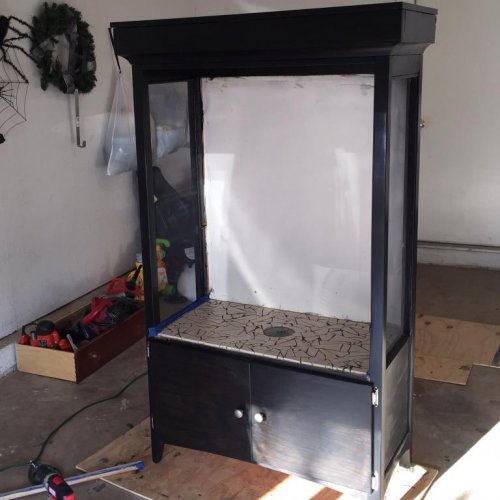
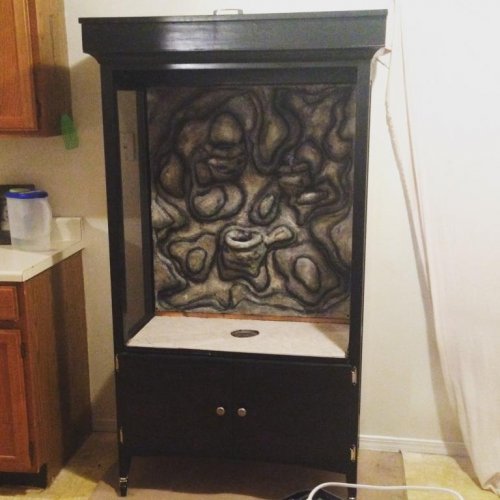
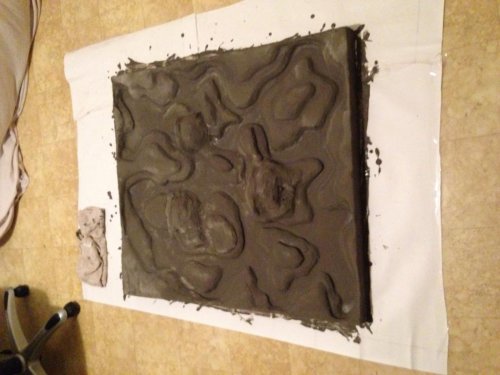
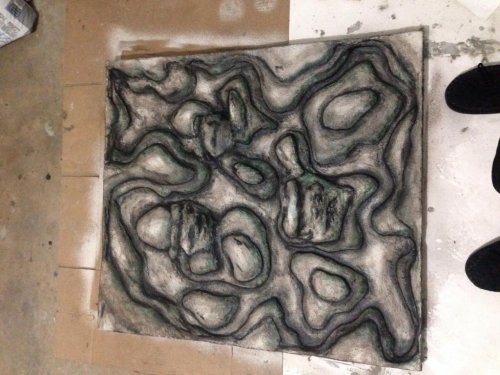
hello everyone, long time lurker, but new poster. I have been working on this enclosure for several months and finally finished it up this weekend and just wanted to share it. I converted it from a dresser/entertainment stand. It is aluminum screening on both sides and top, custom background and glass doors. if you have any questions let me know :) enjoy!
 

Attachments

  • IMG_1082.jpg
    IMG_1082.jpg
    68.4 KB · Views: 207
  • IMG_1084.jpg
    IMG_1084.jpg
    73.5 KB · Views: 228
  • IMG_1083.jpg
    IMG_1083.jpg
    108.5 KB · Views: 201
and here are some pictures of what it was like before redoing it and during the transformation process.
 

Attachments

  • IMG_0773.jpg
    IMG_0773.jpg
    92.1 KB · Views: 212
  • IMG_0833.jpg
    IMG_0833.jpg
    55.5 KB · Views: 149
  • IMG_0859.jpg
    IMG_0859.jpg
    57.2 KB · Views: 165
  • IMG_0946.jpg
    IMG_0946.jpg
    60.1 KB · Views: 211
Nice work! This thing is really classy,and I wouldn't think so but,are those hydra leds on top?
Well done work here very clean and attractive. Welcome to the forums,you made quite an entrance :)
 
No, they aren't. Sorry, I had to look that up. Wasn't even sure what hydras were. Those are for the plants photosynthesis. Not hydra lighting though. And thank you! That was my goal. To make it look like a piece of furniture rather than some unattractive cage lol.
 
No, they aren't. Sorry, I had to look that up. Wasn't even sure what hydras were. Those are for the plants photosynthesis. Not hydra lighting though. And thank you! That was my goal. To make it look like a piece of furniture rather than some unattractive cage lol.

No doubt,the hydra can easily grow plants,as you probably found they grow coral,but expensive for plant lights lol.
Yea that's how I wanted my enclosure to look,like furniture not just a cage with lots of wires and equipment hanging out.
 
No doubt,the hydra can easily grow plants,as you probably found they grow coral,but expensive for plant lights lol.
Yea that's how I wanted my enclosure to look,like furniture not just a cage with lots of wires and equipment hanging out.

Yeah, exactly. And I saw yours recently and liked it. Good work.
 
Another great looking enclosure. I'm feeling like a slacker. I wish I were more handy. What is the Back wall? Did you make that?
Are the plants live or plastic? Do you worry about the air plants getting to much water?
 
Another great looking enclosure. I'm feeling like a slacker. I wish I were more handy. What is the Back wall? Did you make that?
Are the plants live or plastic? Do you worry about the air plants getting to much water?

Thank you! Yes, I made the back wall, it's just made out of foam sheeting, some 100% silicone caulk, grout, paint and sealer. All of the plants except 1 small flower looking plant are real. And originally I was kind of worried about that, but I haven't had any problems with them staying too wet. I actually go in with a hand sprayer and spray down a couple of them that the mister doesn't hit directly. They are super easy to care for.
 
Pretty impressive transformation. Great work. Now understand I am a HUGE live plant nut, so go get yourself a nice big shefflera and cover up all that great work. Your cham will love and need more coverage to hide in and about in. Nice job.
 
Pretty impressive transformation. Great work. Now understand I am a HUGE live plant nut, so go get yourself a nice big shefflera and cover up all that great work. Your cham will love and need more coverage to hide in and about in. Nice job.

Thank you thank you! And yeah, I currently have 2 pothos in planters in there. But it will be a while before they grow and create enough coverage. I am planning on getting a large shefflera or something to sit in it until the plants fill out more.
 
That is beautiful! I love the floor of it, what is it?
It is porcelain tile. My boss re did the flooring in the bathrooms at work and had several large tile pieces left over that I decided to use. They were too big to put them in as is, so I decided to just take a hammer to a couple of them and create a mosaic look that would be sloped toward the drain so the water would run down the crevices. I just broke the tile up and laid down some thin set cement over the plywood bottom and then laid out all of the straight pieces for the edges (like a puzzle) and then just randomly placed all the other pieces in the middle until it was filled up. And then grouted it and sealed it all up real good!
 
I want a picture tutorial on that back wall. Any pictures of the process?

Sure! I took quite a few pictures of (most) everything I did turning it into her enclosure. I will look through and find them for you and can tell you the supplies and how to go about making one if you get serious about it.
 
Thank you. When I see the pictures I'll know if it's something I can do. Then I'll pick your brain.

Okay I went through my pictures and found them. Although I didn't take as many of the rock wall as I had thought. I didn't take pictures of the earlier stages carving the foam, but I did take pictures after grouting it and painting it and then the finished product. I'll post those for you. I'll also post a link to a YouTube video of a guy that explains step by step how he did it which is pretty similar to how I did it. There is only a few differences to how I did mine. I used a different paint and sealer (you can use whatever paint you want to but you shouldn't use the sealer he uses in the video because it's not meant to stand up to the water and moisture that is in a chameleon enclosure.) let me know if you decide to do it and I can give more detail. But basically I bought like 4 sheets of styrofoam (you can get at lowes or Home Depot cheap) and measured the back wall and then glued like three sheets together and then cut out the piece for the background. I then started cutting smaller pieces and shaping them like rocks and glued them down to the main piece. After getting it how I wanted it to look, I grouted the whole thing (I think I did 3 or 4 coats letting it dry overnight between each one) and then painted it to my liking (I used spray paint) and then sealed it with a water base sealer. I did 3 or 4 coats of this as well. And voila! If you have any questions let me know. It's really fairly easy. You do not have to be "handy" or anything. The more random it looks, the more natural it turns out. http://youtu.be/ShEOcrbi9F4
 

Attachments

  • image.jpg
    image.jpg
    80.5 KB · Views: 154
Thank you. When I see the pictures I'll know if it's something I can do. Then I'll pick your brain.

And here is after painting it. The final product is in the original post. Let me know of any questions you might have.
 

Attachments

  • image.jpg
    image.jpg
    118.2 KB · Views: 116
Back
Top Bottom