My Enclosure - A work in progress

k9monkey

New Member
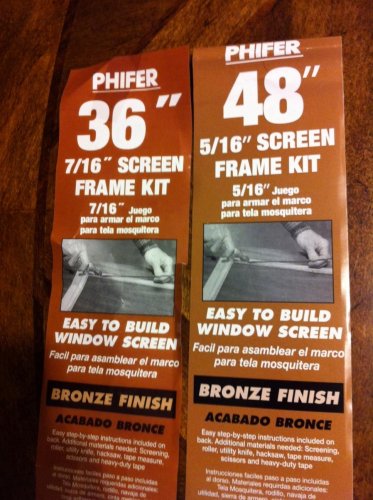
I thought I would start a thread where I will be posting my enclosure building process. I purchased an 18x18x30 screen setup about 8 months ago and I decided I wanted something a bit bigger and with more features.

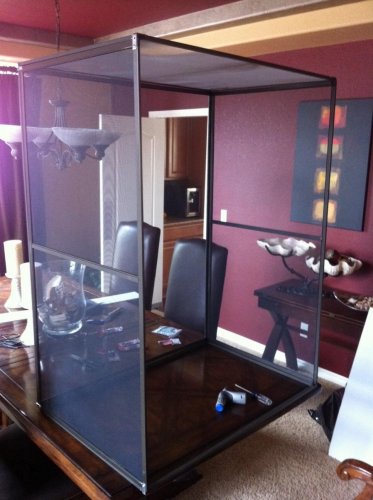
The plan is to build a 30"wide by 24" deep by 48" high enclosure for Jabba. There will be screen all the way around, with the sides covered by plexiglass outside the screen to help with keeping in the humidity. The back will be covered with Eco Carpet. There will be a drain built into the floor to flow into a bucket for ease of cleaning, and to keep water from pooling.

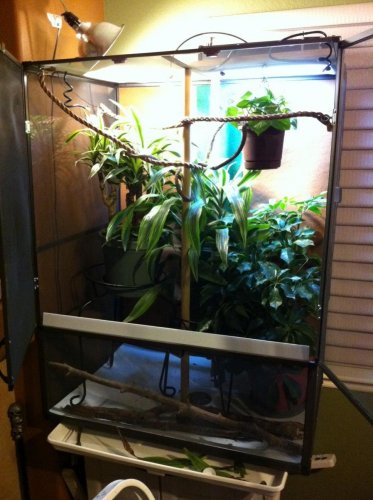
I am also going to try some new things with perches and vines. So if you are interested in seeing the potential coolness of this project stay tuned. It could also be a huge disaster. Either way it should be entertaining.

K9Monkey
 
Last night I stopped and picked up my frame building supplies. The plan is to construct a 48 tall be 24 deep by 36 wide house for my veiled chameleon. I have started with the following materials. 4 x 48 inch screen kits and 3 x 36 inch screen kits. See pictures below for type.

I picked up some sheet metal screws and some L brackets for hooking the sides together. You will notice the 36 inch pieces are thicker than the 48 inch. This is so the top and bottom are stronger since the are weight bearing for plants, lights, etc.

Make sure when you start building you lay out you pieces and make sure they are the same length. A couple of the 48 inch pieces were really only 47 inch and it would have been a nightmare if I had not caught that early on in the process. I split a few of the 48 inch bars in half with a hack saw to make the 24 inch pieces. I will post pictures of the assembled frames tonight. I am hoping to have the screening in them tonight as well.

More to come As we move to the fun stuff and get past the bland part.
 

Attachments

  • ImageUploadedByTapatalk1304621886.802338.jpg
    ImageUploadedByTapatalk1304621886.802338.jpg
    181.3 KB · Views: 228
  • ImageUploadedByTapatalk1304621994.520474.jpg
    ImageUploadedByTapatalk1304621994.520474.jpg
    39.6 KB · Views: 177
a6cd0b44-7dbd-b769.jpg
The frames are built and the screening will go in tonight. Once the screen is on I will attach the plexi on the sides to the top 18-20 inches of the enclosure. This should help with humidity while allowing for good air flow. I am still debating on what material to use for the bottom of the cage as I want to slope it for drainage, yet still have it be durable. More to come on that topic when I get there. My goal tonight is screen in the top and sides and attach the plexi.
 
So, I finally was allotted some time time to keep working on my new enclosure. Here is the structure of it. It is 48" tall 36" wide and 24" deep. I am going to screen the doors and attach them tonight. I need to trim the plastic I bought for the bottom and it wit the drain installed will fit right into the bottom.

I picked up Eco carpet at PetSmart yesterday and will hot glue it to the back screen for additional support and to help keep water in the enclosure. More pics as I get the rest of it hooked up.
 

Attachments

  • ImageUploadedByTapatalk1305564609.669331.jpg
    ImageUploadedByTapatalk1305564609.669331.jpg
    144.9 KB · Views: 235
Where were you able to find the spreader bars and clips? Ive checked home depot and lowes They dont seem to carry them.
 
WOW looks nice! Approx. how much did it cost you to build it and when are you making mine :D
 
The cross bars are just cut pieces of the standard screen framing. I just used an extra piece I had from the kits. In the section where you buy the screen kits they have small bags of 10 end clips. Ask if you cant find them. I just happened to see them and decide to us them for support.

As for cost, I would put it around $75 for the materials. I prolly spent more than that trying different ideas and such. If I do another one I will scale it back to 30 wide by 24 deep by 48 tall so it fits nicely in a washing machine drain pan. This one is a bit wider than the pan.

I have put plants in and moved Jabba over to his new home. I will post more pictures tonight when I get the watering system in place.
 
I make my own cages and buy everything from Lowes. I can build a 2x2x4 foot cage in about 1 hour give or take now. I don't buy the pre made kits as you need aluminum screen or your crix will eat through it. Building screen cages are only hard the first time IMO. Looks good. I have 1 framed up and waiting for screen and spline as we speak.
 
So, I finally was allotted some time time to keep working on my new enclosure. Here is the structure of it. It is 48" tall 36" wide and 24" deep. I am going to screen the doors and attach them tonight. I need to trim the plastic I bought for the bottom and it wit the drain installed will fit right into the bottom.

I picked up Eco carpet at PetSmart yesterday and will hot glue it to the back screen for additional support and to help keep water in the enclosure. More pics as I get the rest of it hooked up.

hey man i got that cage do u want to c how i did mine???
 
So here is the product with almost everything in place. You will see I have two .5 gallon per hour drippers in the top of the enclosure and two spray heads in the corners. This is all hooked to a pond pump sitting in a 5 gallon bucket under the enclosure. I run it for a couple of minutes in the morning and a few at night like a rain storm. Jabba comes right out and drinks from the drips or the spray.

I haven't found any large branches lately so I decided to try using nylon rope for walkways. I have it strung across in 4 foot runs and have one more to put in there. The plants have some growing to do and are on stands for right now. I am also swapping my 18" lights forma 24" version with UVB and a plant bulb in it. Might even go up to 36" can't decide.

The screen enclosure is not perfect, the doors don't align perfectly, etc. It was fun to build and Jabba is adjusting nicely. He
loves to go sit up in the pothos hanging at the top and look down over his kingdom.
 

Attachments

  • ImageUploadedByTapatalk1305785218.163685.jpg
    ImageUploadedByTapatalk1305785218.163685.jpg
    109.6 KB · Views: 243
  • ImageUploadedByTapatalk1305785249.844762.jpg
    ImageUploadedByTapatalk1305785249.844762.jpg
    159.8 KB · Views: 226
  • ImageUploadedByTapatalk1305785272.559826.jpg
    ImageUploadedByTapatalk1305785272.559826.jpg
    176.1 KB · Views: 233
Back
Top Bottom