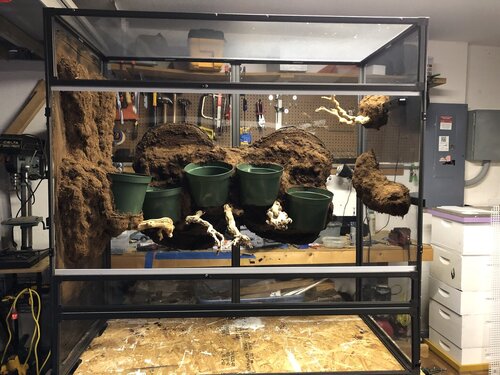
As promised, I've put together a blog post about how to set up a Large Clearside Dragonstrand Cage. This was our third cage and we finally got things where we'd like them. We live in Florida, and are fortunate enough to have a house with a garage that we could use to complete this project - it took us about 2 months, though you could probably cut that time down to a couple of weeks.
The first step is to gather your supplies. You will need:
One 2 ft x 4ft sheet of egg crate (light diffuser) plus scraps I had around. I purchased at a local Box hardware store. They have smaller pieces available for use in aquariums on Amazon for smaller projects. Search egg crate light diffuser.
Eight cans of Great Stuff Foam. Some use the Black Pond Foam (more expensive), but the new Great Stuff smart dispenser nozzles are worth the price. They make it so you don't have to use an entire can at a time. I use the Great Stuff line Gaps and Cracks because I am not looking for a huge volume.
Over 15 tubes of GE II Black Silicone caulk (Amazon has a good price) use black and or brown in case any is uncovered it will blend into the coco bark.
Exo terra or eco earth coco husk- I bought three dried bricks and had plenty left over. I found the bricks have the best consistency for these projects. Rehydrate the bricks slowly using just barely enough water. The material should not be damp when you adhere it. A little bit of moisture helps keep the dust down and helps for good adherence. If it is at all wet it does not sick as well. A good way to do this is to dump it into a plastic bin/tote, or a wheelbarrow if you have one you won't be using.
20 or so cheap craft chip brushes (not foam brushes)
Small pair of wire cutters for cutting egg crate (but almost anything can be used)
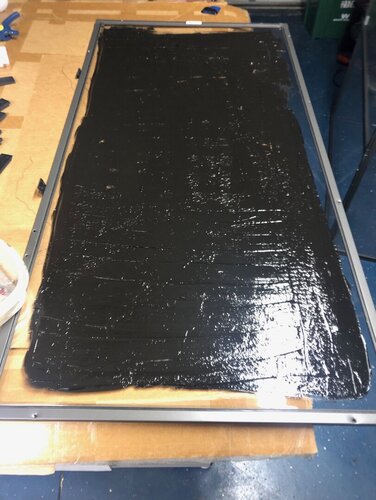
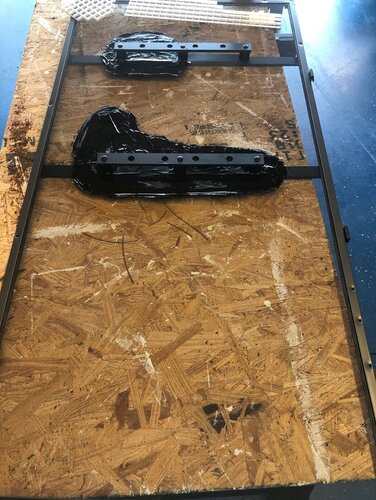
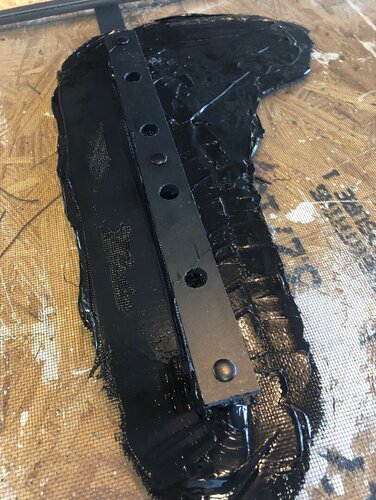
The first step we covered 1 side panel with black silicone. This step was only necessary for us due to the placement of the cage in our reptile room. This cage will have it's side facing 2 other cages, so instead of doing a moveable barrier I didn't want to have to worry about that and instead we just covered it with silicone. Don't worry, that's not how it will look in the end. Maybe this wasn't the smartest move, but what's done is done, right? The next step that we do is to figure out where we want pots for plants, and the Dragon Ledges. We attached the Dragon Ledges, then placed silicone around them for a more natural look. This is shown in the 2nd and 3rd pictures below.


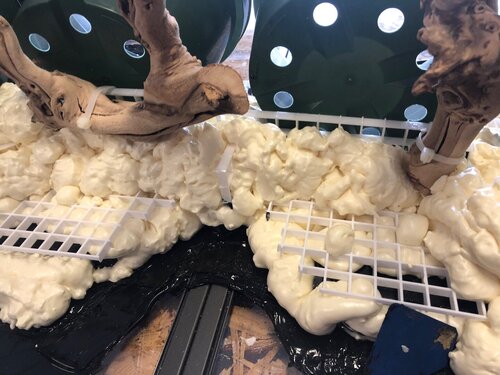
Decide if you will have a branch or pot for a planter on this piece. Secure those to the egg crate. Use horizontal pieces of egg crate zip tied to the vertical egg crate to create ledges for pots or dimension to the structure. Now it's time for the expanding foam. Put down a base layer of foam under the egg crate. Seriously one thin layer at a time DO NOT put more foam on top of a layer of foam until it is fully cured. If you do not, the foam will have no place to expand and break out the back of the cage. If the egg crate is not properly held down, weight it down to prevent the edges from pushing up from the foam.


We like adding grapevine directly into the expanding foam for extra stability. Again, zip tie the pieces to hold them into place then foam after snipping the ends of the zip ties. When you are doing the layers of foam add it ONE LAYER OF FOAM AT A TIME, letting it dry completely between layers.


Carve down any bumps you don't like and add some foam to any holes (foam is cheaper than silicone). Liberally squeeze the silicone onto the foam. Work in smallish areas never applying more than one tube of silicone at time. Then scoop and pack your not completely dry coco husk and pack it with your hands.


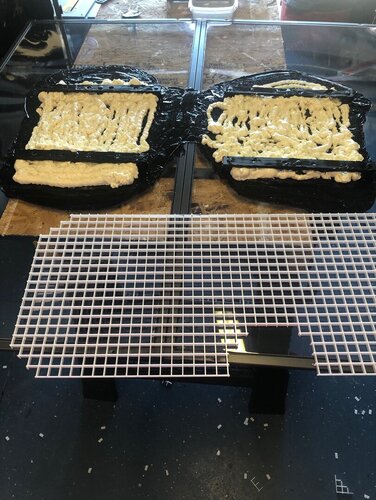
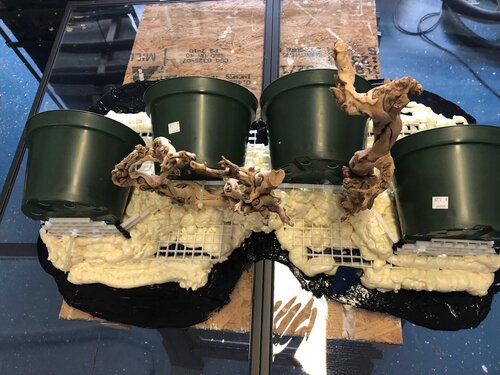
These are the 2 back panels of the cage. We only work on 1 side panel, or the 2 back panels at a time both for space and to not go crazy.


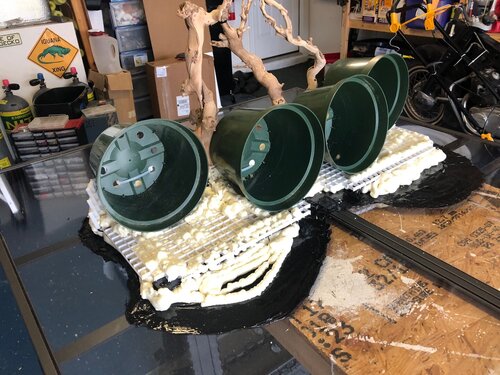
On the back we are placing 4 pots. I use the 8" plastic pots and foam them into place. My plants are in other 8" pots so I can slide them in and out as needed. I have tried using smaller pots and was disappointed. By using 8" pots you can grow a nicely sized pothos or spider plant (my 2 go-to plants) or it will hold a dracaena nicely as well. We are also using some of the egg crate as a support as shown in photo 3 in this section.


These are the pots in place to be foamed in, and the second picture are some of the supplies you will need as described above.


This is another shot of the pots as well as more grapevine that is foamed in. After the cage is done I will use bendy vines to connect the grapevine branches and will also drape pothos over them to create small hideaways for the chameleon.


I hope this helps and please feel free to PM me with any questions you may have!
The first step is to gather your supplies. You will need:
One 2 ft x 4ft sheet of egg crate (light diffuser) plus scraps I had around. I purchased at a local Box hardware store. They have smaller pieces available for use in aquariums on Amazon for smaller projects. Search egg crate light diffuser.
Eight cans of Great Stuff Foam. Some use the Black Pond Foam (more expensive), but the new Great Stuff smart dispenser nozzles are worth the price. They make it so you don't have to use an entire can at a time. I use the Great Stuff line Gaps and Cracks because I am not looking for a huge volume.
Over 15 tubes of GE II Black Silicone caulk (Amazon has a good price) use black and or brown in case any is uncovered it will blend into the coco bark.
Exo terra or eco earth coco husk- I bought three dried bricks and had plenty left over. I found the bricks have the best consistency for these projects. Rehydrate the bricks slowly using just barely enough water. The material should not be damp when you adhere it. A little bit of moisture helps keep the dust down and helps for good adherence. If it is at all wet it does not sick as well. A good way to do this is to dump it into a plastic bin/tote, or a wheelbarrow if you have one you won't be using.
20 or so cheap craft chip brushes (not foam brushes)
Small pair of wire cutters for cutting egg crate (but almost anything can be used)
The first step we covered 1 side panel with black silicone. This step was only necessary for us due to the placement of the cage in our reptile room. This cage will have it's side facing 2 other cages, so instead of doing a moveable barrier I didn't want to have to worry about that and instead we just covered it with silicone. Don't worry, that's not how it will look in the end. Maybe this wasn't the smartest move, but what's done is done, right? The next step that we do is to figure out where we want pots for plants, and the Dragon Ledges. We attached the Dragon Ledges, then placed silicone around them for a more natural look. This is shown in the 2nd and 3rd pictures below.
Decide if you will have a branch or pot for a planter on this piece. Secure those to the egg crate. Use horizontal pieces of egg crate zip tied to the vertical egg crate to create ledges for pots or dimension to the structure. Now it's time for the expanding foam. Put down a base layer of foam under the egg crate. Seriously one thin layer at a time DO NOT put more foam on top of a layer of foam until it is fully cured. If you do not, the foam will have no place to expand and break out the back of the cage. If the egg crate is not properly held down, weight it down to prevent the edges from pushing up from the foam.
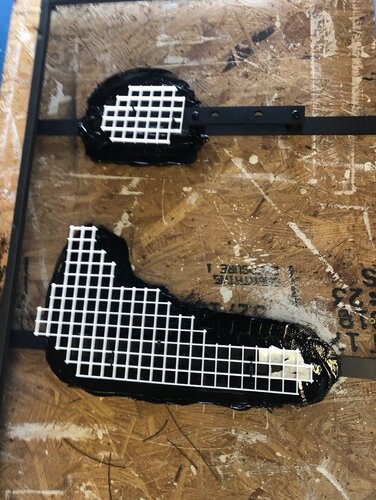
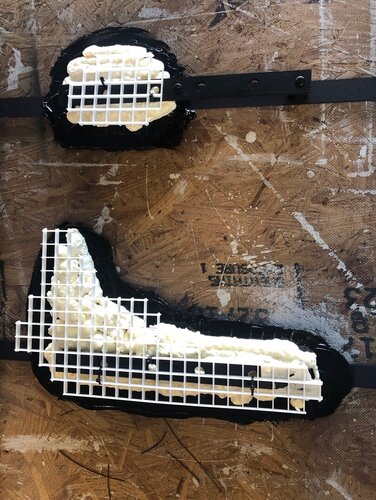
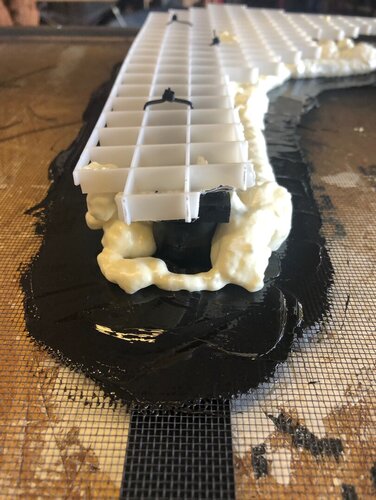
We like adding grapevine directly into the expanding foam for extra stability. Again, zip tie the pieces to hold them into place then foam after snipping the ends of the zip ties. When you are doing the layers of foam add it ONE LAYER OF FOAM AT A TIME, letting it dry completely between layers.
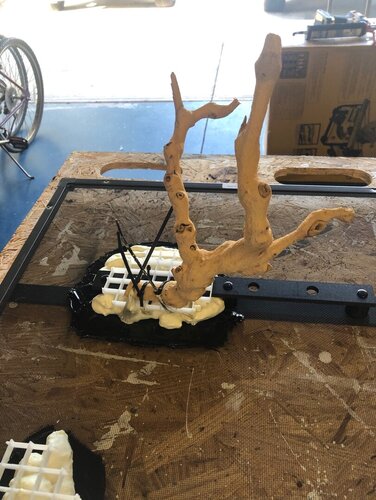
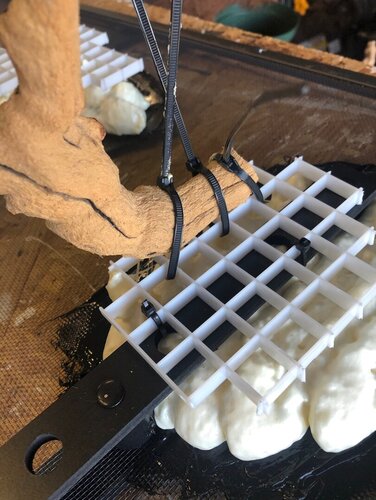
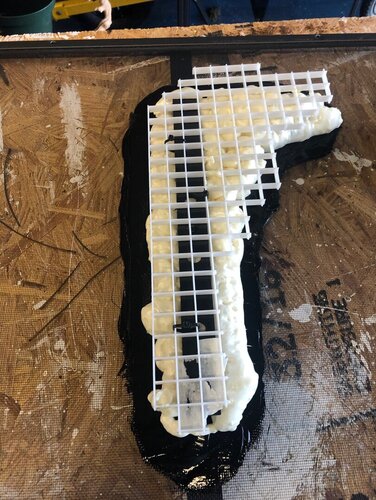
Carve down any bumps you don't like and add some foam to any holes (foam is cheaper than silicone). Liberally squeeze the silicone onto the foam. Work in smallish areas never applying more than one tube of silicone at time. Then scoop and pack your not completely dry coco husk and pack it with your hands.
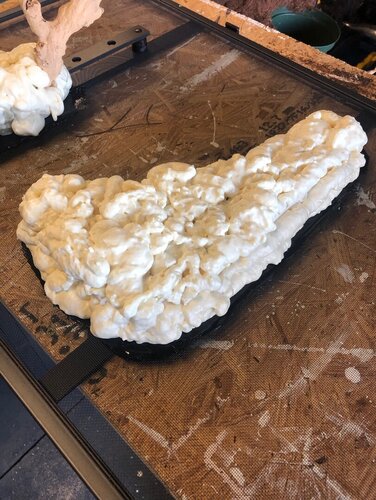
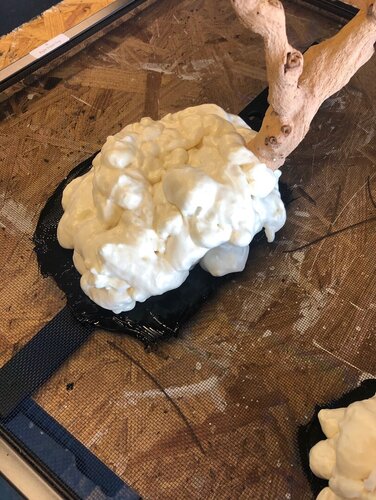
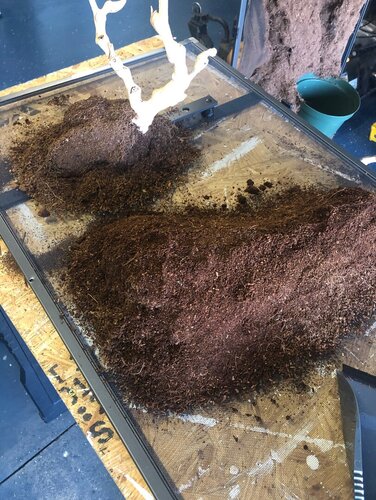
These are the 2 back panels of the cage. We only work on 1 side panel, or the 2 back panels at a time both for space and to not go crazy.
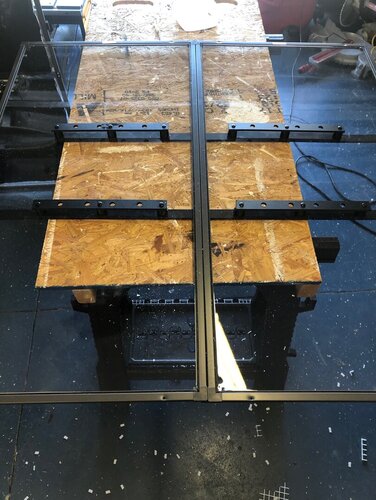
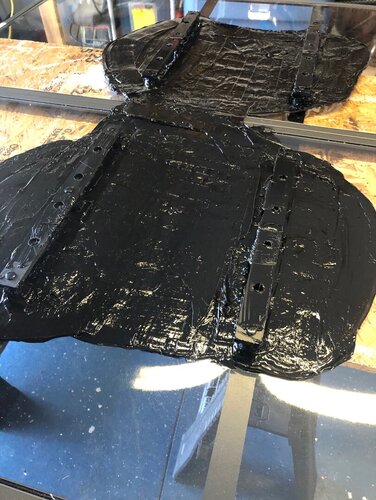
On the back we are placing 4 pots. I use the 8" plastic pots and foam them into place. My plants are in other 8" pots so I can slide them in and out as needed. I have tried using smaller pots and was disappointed. By using 8" pots you can grow a nicely sized pothos or spider plant (my 2 go-to plants) or it will hold a dracaena nicely as well. We are also using some of the egg crate as a support as shown in photo 3 in this section.
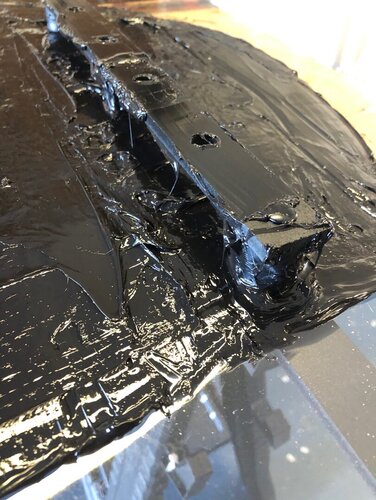
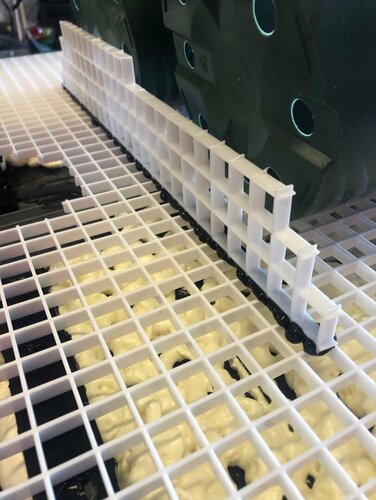
These are the pots in place to be foamed in, and the second picture are some of the supplies you will need as described above.
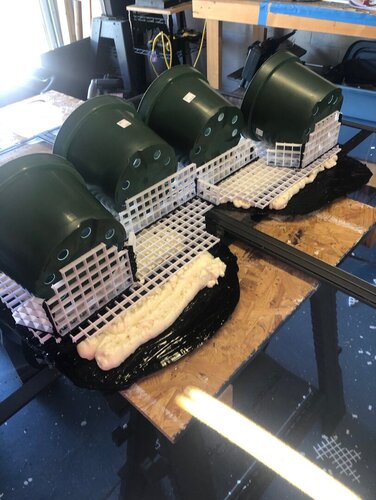
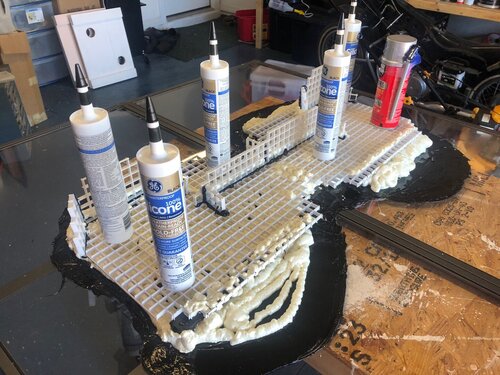
This is another shot of the pots as well as more grapevine that is foamed in. After the cage is done I will use bendy vines to connect the grapevine branches and will also drape pothos over them to create small hideaways for the chameleon.
I hope this helps and please feel free to PM me with any questions you may have!
