JonRich
New Member
Where do i start... Well for the past year or so i have been weaning off of the larger screened cages that i own. I mainly wanted to only keep animals that can be kept in glass enclosures. My plan was to build a rack system that would hold various sized terrariums/vented terrariums to house anything from Geckos, to Dart Frogs, to the smaller species of Chams.
Well i was thrown a curve-ball when i invested in some Bradypodion in the upcoming import with Paul (ShowJet). The more i researched them the more it became a reality that i could/should NOT keep them in glass because they were veryyyy prone to Eye and Respiratory infections.
I like the fact of having at least a glass front, even if the rest of the enclosure was screen. That left me with basically two options (Pen Plax and the new DIY display cages). The Pen Plax eliminated itself when the smallest size was 18x18x20 tall, with the next size up being 18x18x36. It was just too small and then too large..
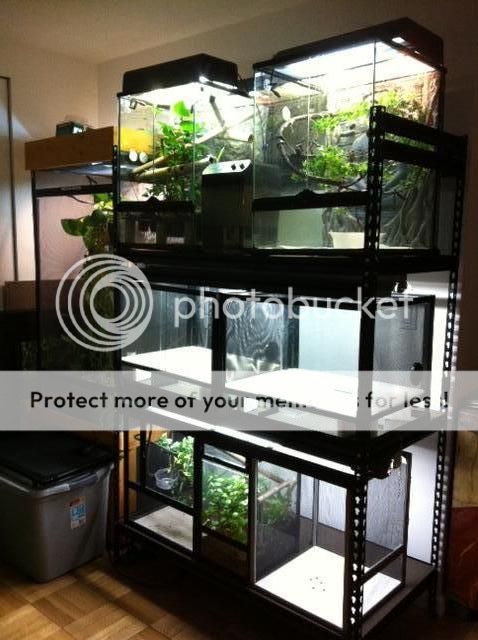
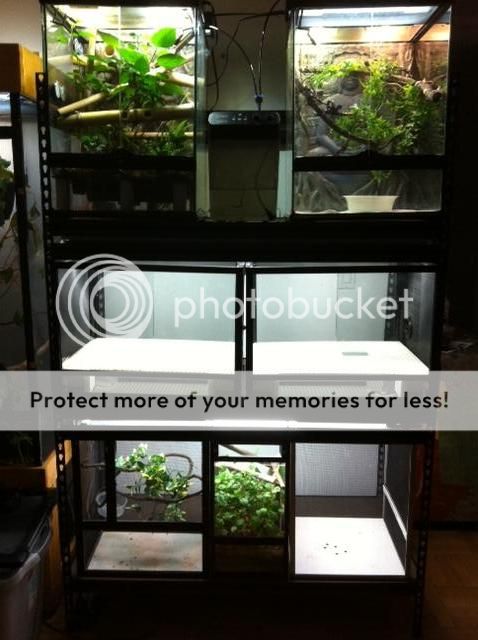
So on to the DIY Display Cages. They come in two sizes which both work for what i wanted . I have a 48" wide rack, so i was looking for something at least 24" wide so i can fit two side by side per shelf.
I need 4 total. But didn't want to chance ordering 4 of an item i was unsure about. I ended up just ordering two of the 18x24x18 and they came in yesterday..
Pixxx, because who doesn't like pix???
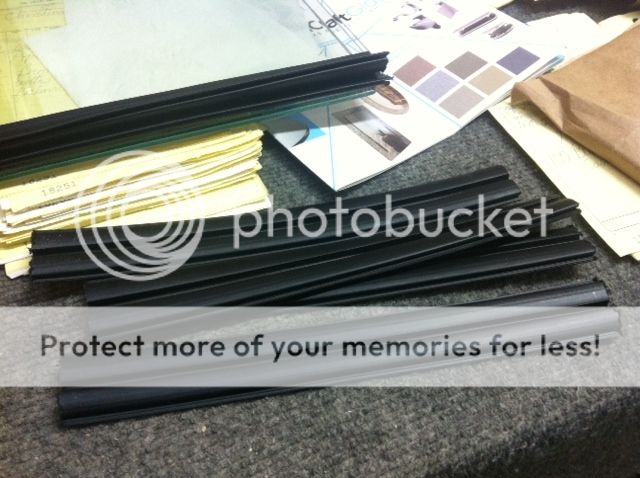
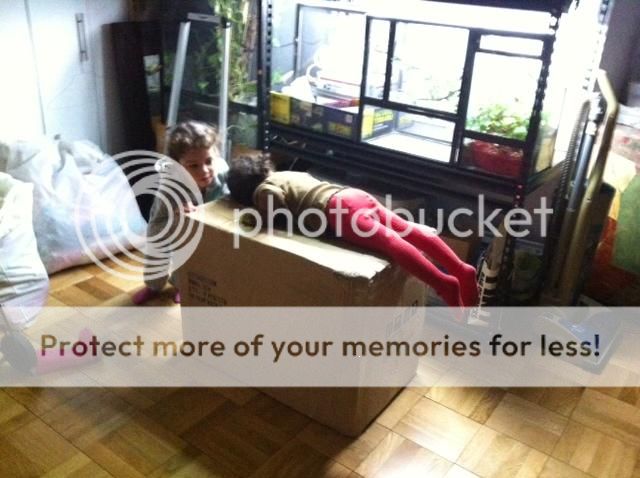
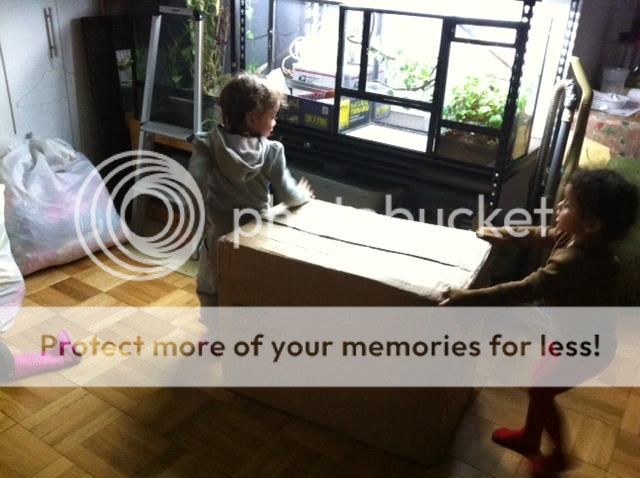
Box came in wellll packed.. 56lbs, bit heavy but they kids didn't care. Kids love boxes!!

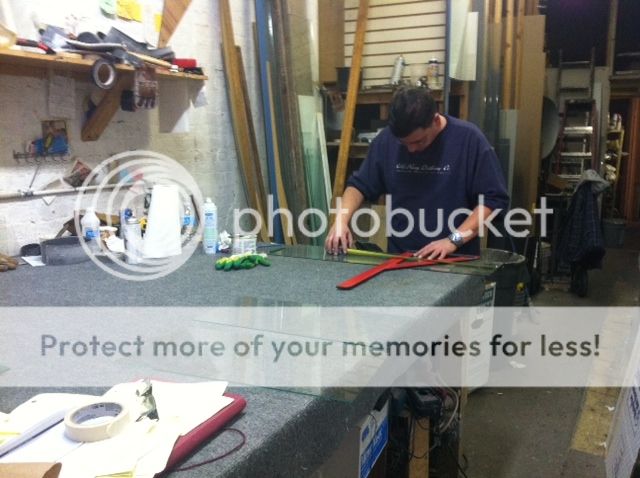
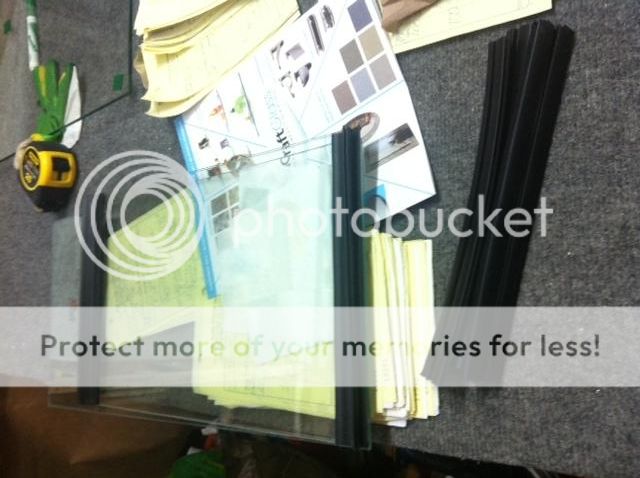
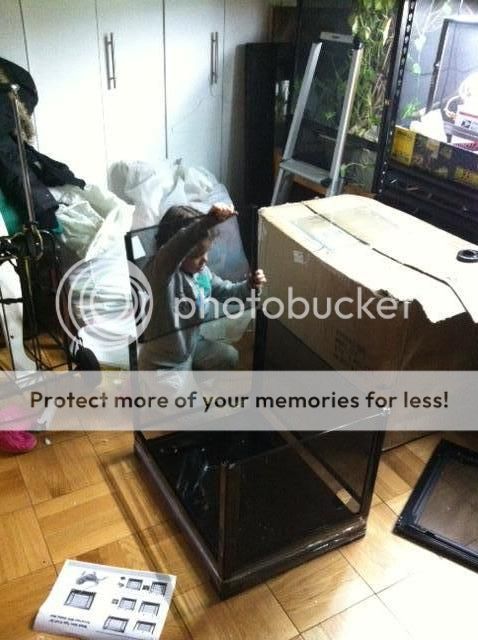
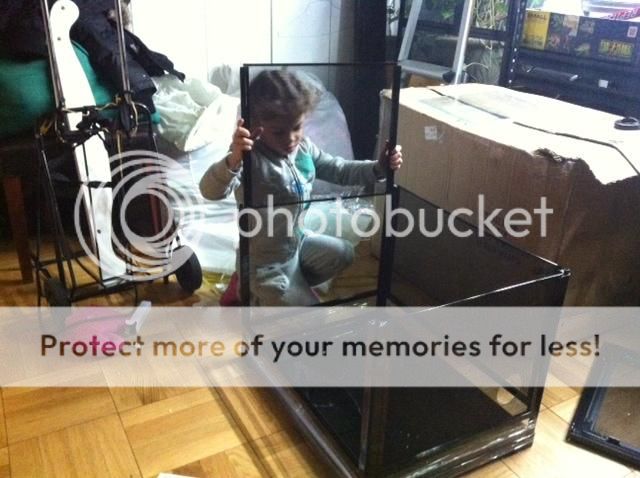
Build time. They were really easy to assemble. So easy even a kid can build one. My 4 year old literally built this one by herself. I just hepled her with the glass doors. (only tool needed was a philipshead screwdriver)
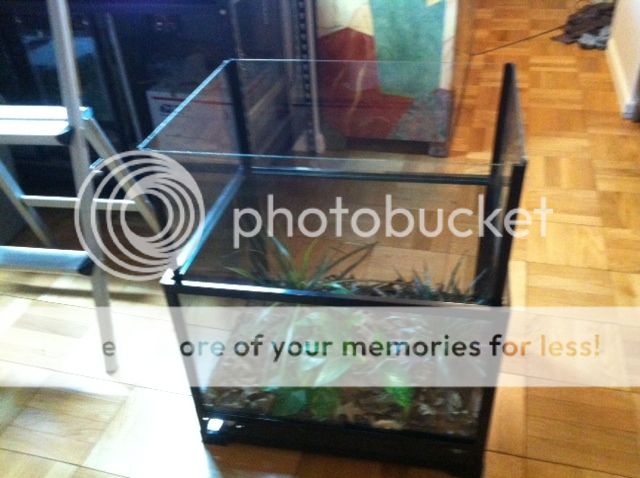
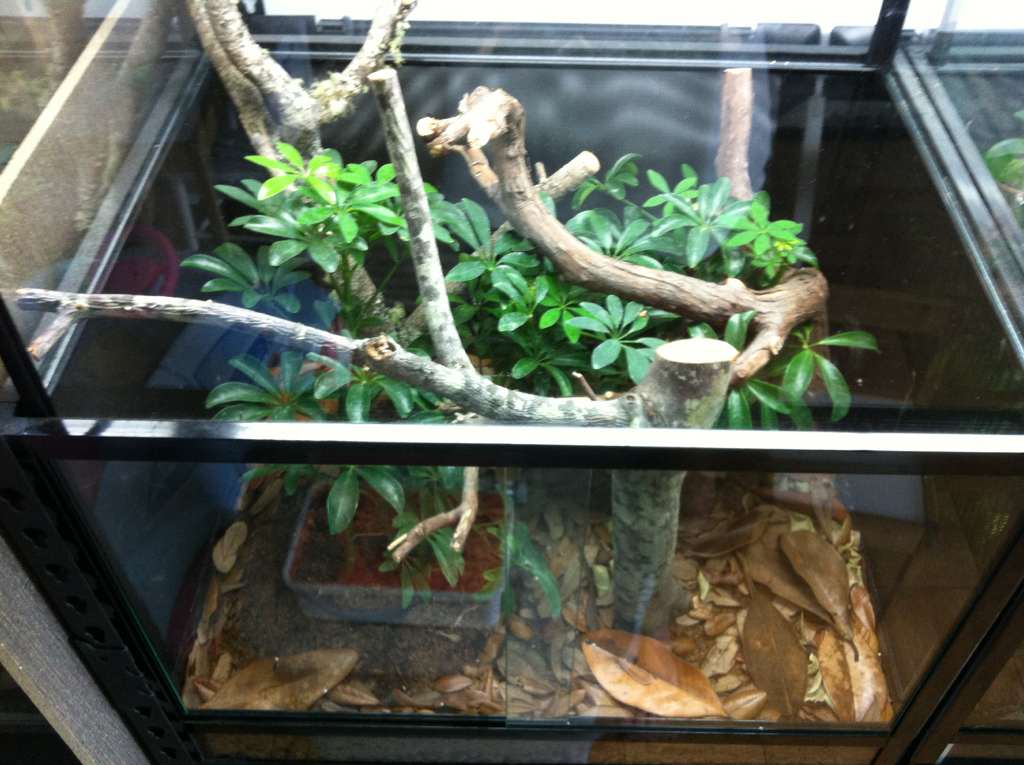
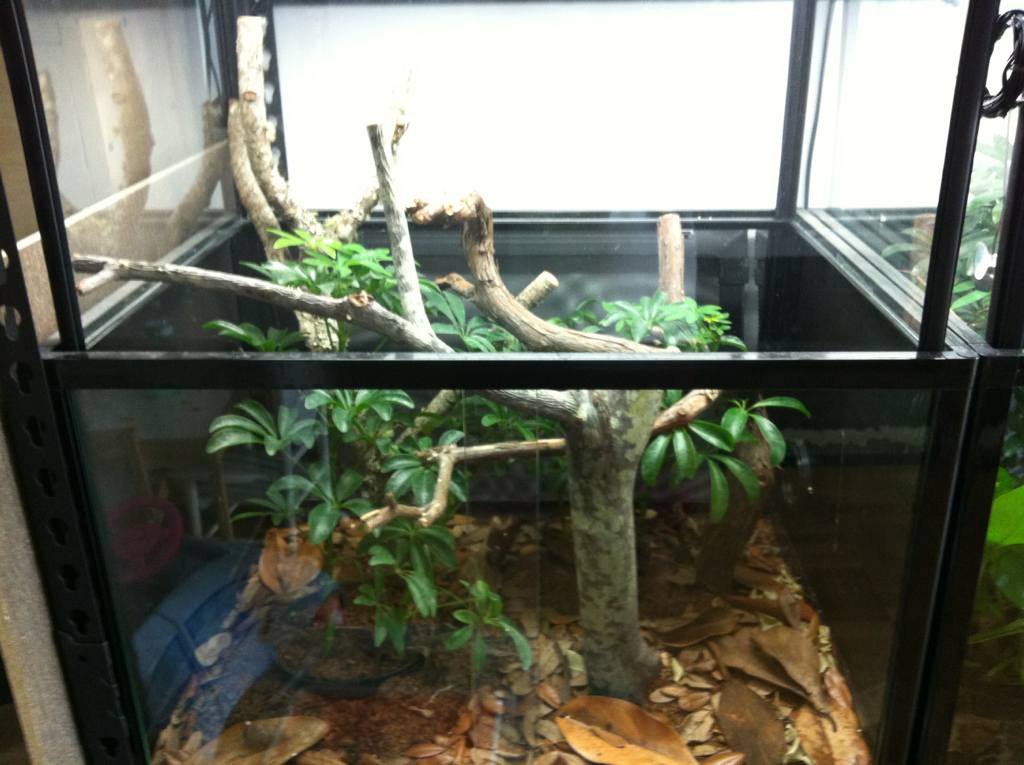
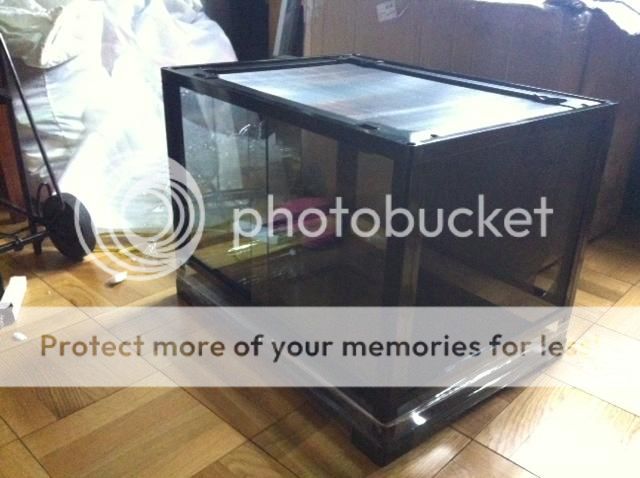
Done and extreamly sturdy. I am beyond impressed with the quality of the materials used on these things. The doors open and close very smooth.
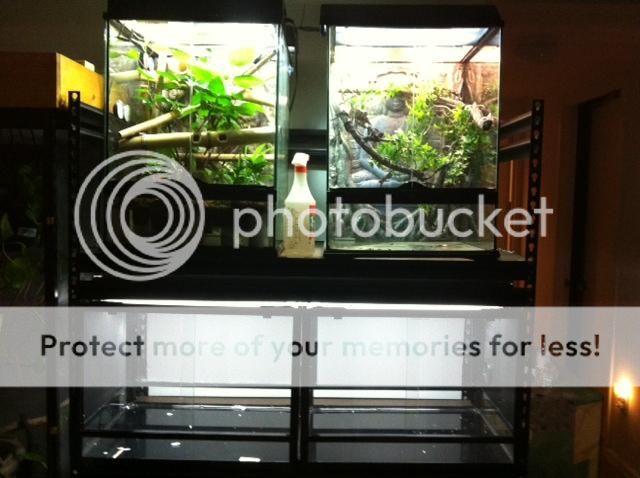
That being said, i have to be honest here. The ONLY thing i did not like was that the screen used was soo thick and black and i chalk it up to quality. But the problem that i have with this is getting lighting through it. I may have to either paint the top screen silver or remove it if possible for something a bit thinner. I think with the screen all painted (even the sides and back) it wont have the cage as dark. I may even have to go up to a 10.0 UVB to get some UVB through the heavy screen.
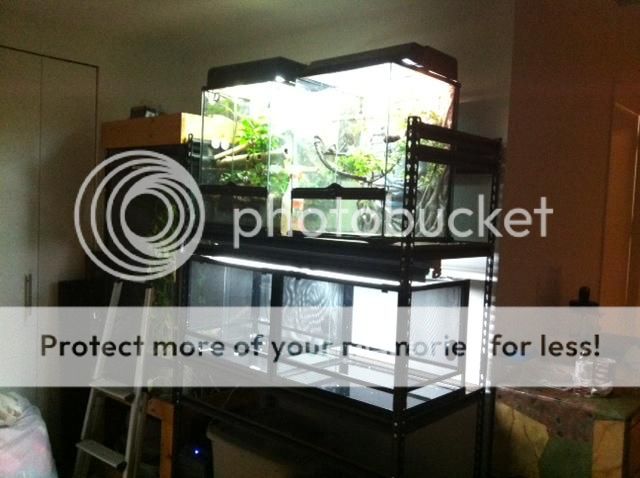
The hole spacing doesn't seem to be any larger/smaller than standard screen, just in a diamond shape.
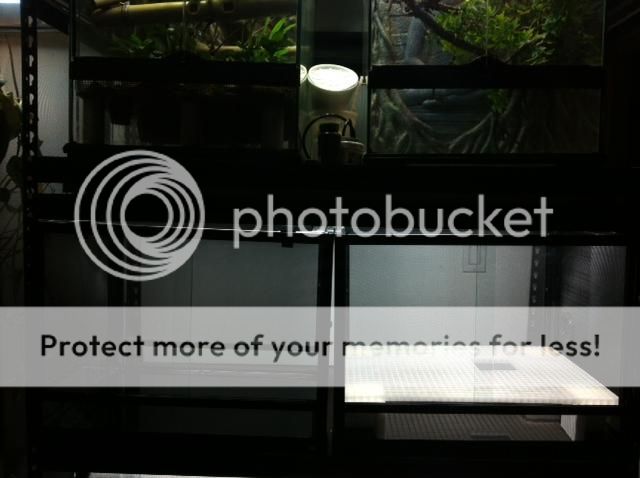
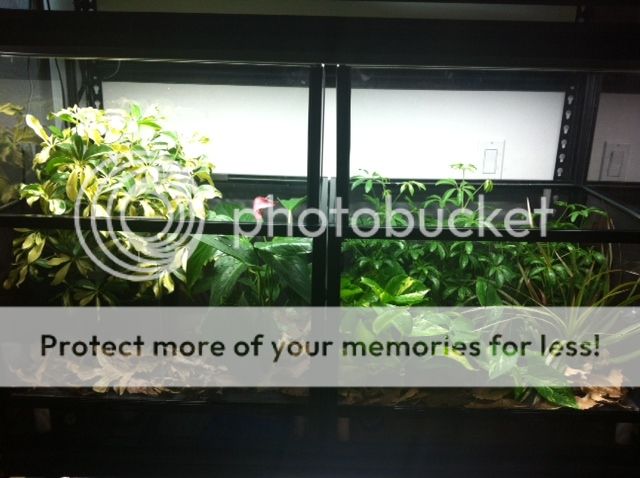
On the rack and under two 48" 6500k bulbs.
I will be doing some painting and modding of these cages in the next few days and if it works out i'll order the other 2 i need. These will be the larger 24x24x18 versions.
Overall i was really impressed with them, and if the screen was to be thinner it would be PERFECT!! these also have a 3" waterproof bottom section. I will be fully planting them soon and i will have updated pix.
Well i was thrown a curve-ball when i invested in some Bradypodion in the upcoming import with Paul (ShowJet). The more i researched them the more it became a reality that i could/should NOT keep them in glass because they were veryyyy prone to Eye and Respiratory infections.
I like the fact of having at least a glass front, even if the rest of the enclosure was screen. That left me with basically two options (Pen Plax and the new DIY display cages). The Pen Plax eliminated itself when the smallest size was 18x18x20 tall, with the next size up being 18x18x36. It was just too small and then too large..
So on to the DIY Display Cages. They come in two sizes which both work for what i wanted . I have a 48" wide rack, so i was looking for something at least 24" wide so i can fit two side by side per shelf.
I need 4 total. But didn't want to chance ordering 4 of an item i was unsure about. I ended up just ordering two of the 18x24x18 and they came in yesterday..
Pixxx, because who doesn't like pix???
Box came in wellll packed.. 56lbs, bit heavy but they kids didn't care. Kids love boxes!!
Build time. They were really easy to assemble. So easy even a kid can build one. My 4 year old literally built this one by herself. I just hepled her with the glass doors. (only tool needed was a philipshead screwdriver)
Done and extreamly sturdy. I am beyond impressed with the quality of the materials used on these things. The doors open and close very smooth.
That being said, i have to be honest here. The ONLY thing i did not like was that the screen used was soo thick and black and i chalk it up to quality. But the problem that i have with this is getting lighting through it. I may have to either paint the top screen silver or remove it if possible for something a bit thinner. I think with the screen all painted (even the sides and back) it wont have the cage as dark. I may even have to go up to a 10.0 UVB to get some UVB through the heavy screen.
The hole spacing doesn't seem to be any larger/smaller than standard screen, just in a diamond shape.
On the rack and under two 48" 6500k bulbs.
I will be doing some painting and modding of these cages in the next few days and if it works out i'll order the other 2 i need. These will be the larger 24x24x18 versions.
Overall i was really impressed with them, and if the screen was to be thinner it would be PERFECT!! these also have a 3" waterproof bottom section. I will be fully planting them soon and i will have updated pix.
Last edited:
")
 Hahah.. nah kids are ninjas.

") I also think I would have already ordered some of these if the back wasn't screen. Having the misting go out the back just seems to be a disaster for the wall, shelving....whatever. Can't wait to see it all completed
I also think I would have already ordered some of these if the back wasn't screen. Having the misting go out the back just seems to be a disaster for the wall, shelving....whatever. Can't wait to see it all completed