Miss Lily
Chameleon Enthusiast


When I got Tommy he had a makeshift dripper in his cage. It was made from a plastic bottle with a sports cap and a length of thick tube pushed onto the cap. The tube was filthy and looked like it had never been washed, so I set about making Tommy a new dripper. Once his cage has a screen top I will make a bigger dripper for him, but this one works great for now! It's basically the same as a normal dripper, just on a smaller scale.
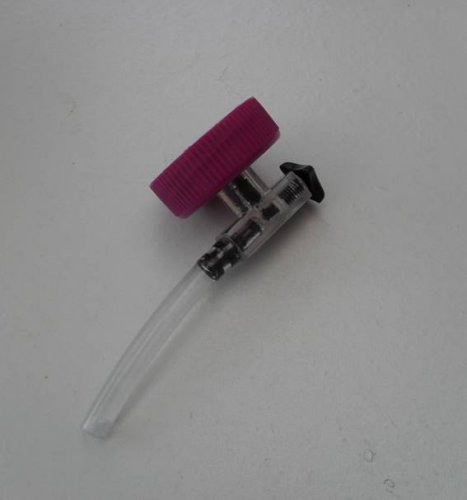
I took a clean plastic drink bottle, removed the cap and made a small hole in the cap, which I then widened by pushing a screwdriver through. This made the hole slightly smaller than the valve nozzle. I then inserted the nozzle into the hole in the cap making sure that it was a tight fit. Then I cut a short length of aquarium tube onto the remaining nozzle. Finally I made a pin prick hole in the bottom of the bottle, filled it with water and adjusted the valve to make it drip at the required speed.
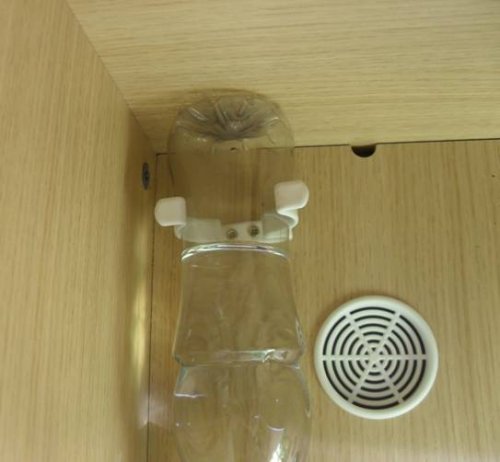
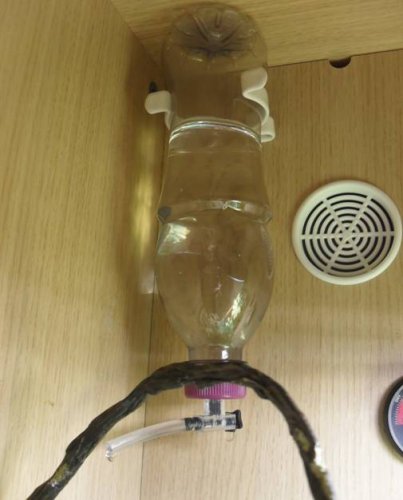
Here's some pics of what I did and how the bottle fixes into the cage. I suppose this design would work without the valve and tube too, but I haven't tried it that way yet.
I took a clean plastic drink bottle, removed the cap and made a small hole in the cap, which I then widened by pushing a screwdriver through. This made the hole slightly smaller than the valve nozzle. I then inserted the nozzle into the hole in the cap making sure that it was a tight fit. Then I cut a short length of aquarium tube onto the remaining nozzle. Finally I made a pin prick hole in the bottom of the bottle, filled it with water and adjusted the valve to make it drip at the required speed.
Here's some pics of what I did and how the bottle fixes into the cage. I suppose this design would work without the valve and tube too, but I haven't tried it that way yet.

")