NorCalAnthony
Avid Member
I've been working on a big boy home for my 10 month old ambilobe, Loki, for the last few months and am almost finished so I thought I'd share some pics. The only thing I'm still waiting to get are the screens that are being built by my brother-in-laws window screen company and then I can finish setting up the branches and the rest of the plants. This is my second cage that I've built and only my second wood working project but I think it turned out pretty good. I used a lot of the same methods as the last cage build so in case I skip any steps they're probably in the last build thread I did https://www.chameleonforums.com/my-first-cage-build-84441/. Anywho here's what I got so far...
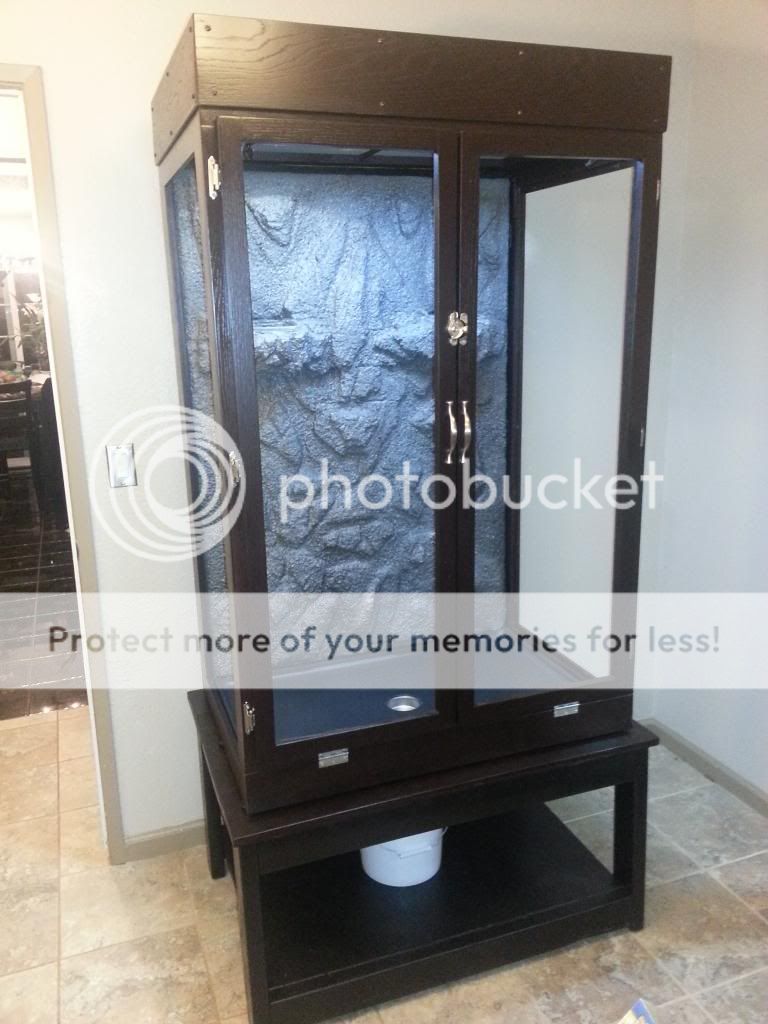
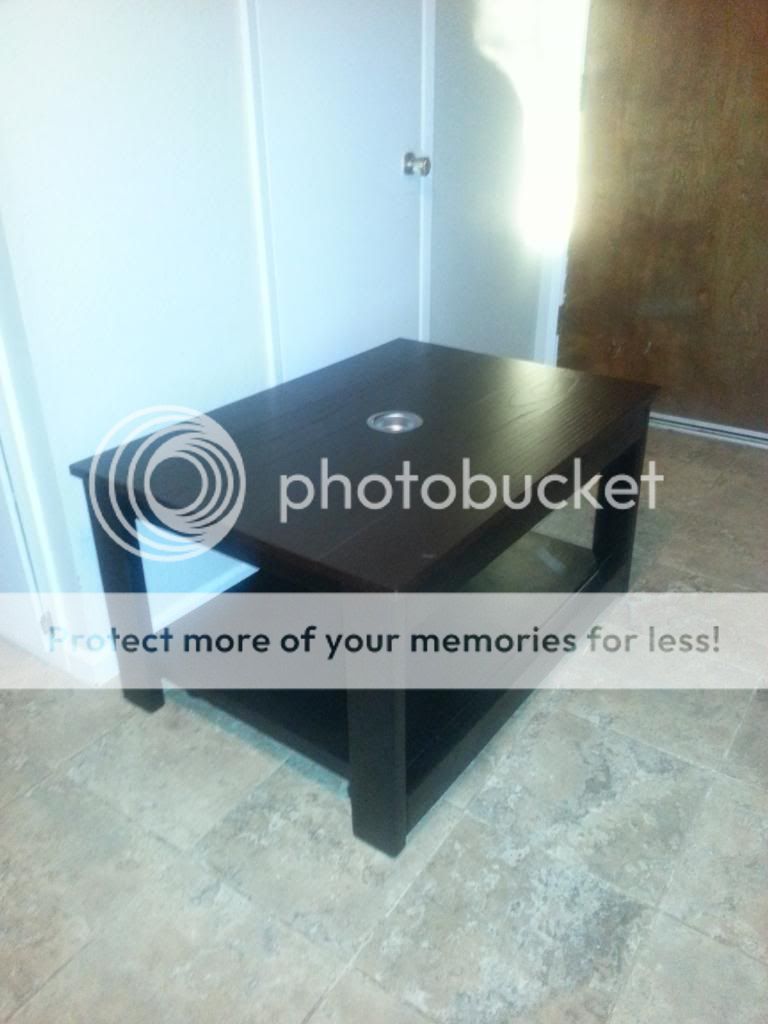
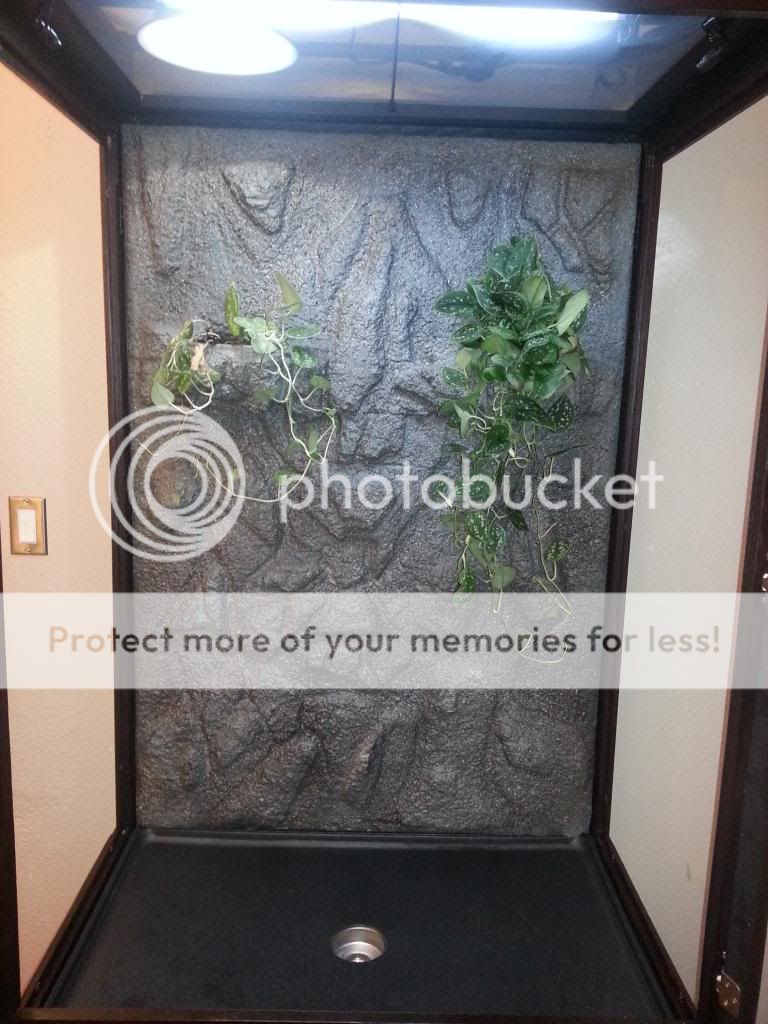
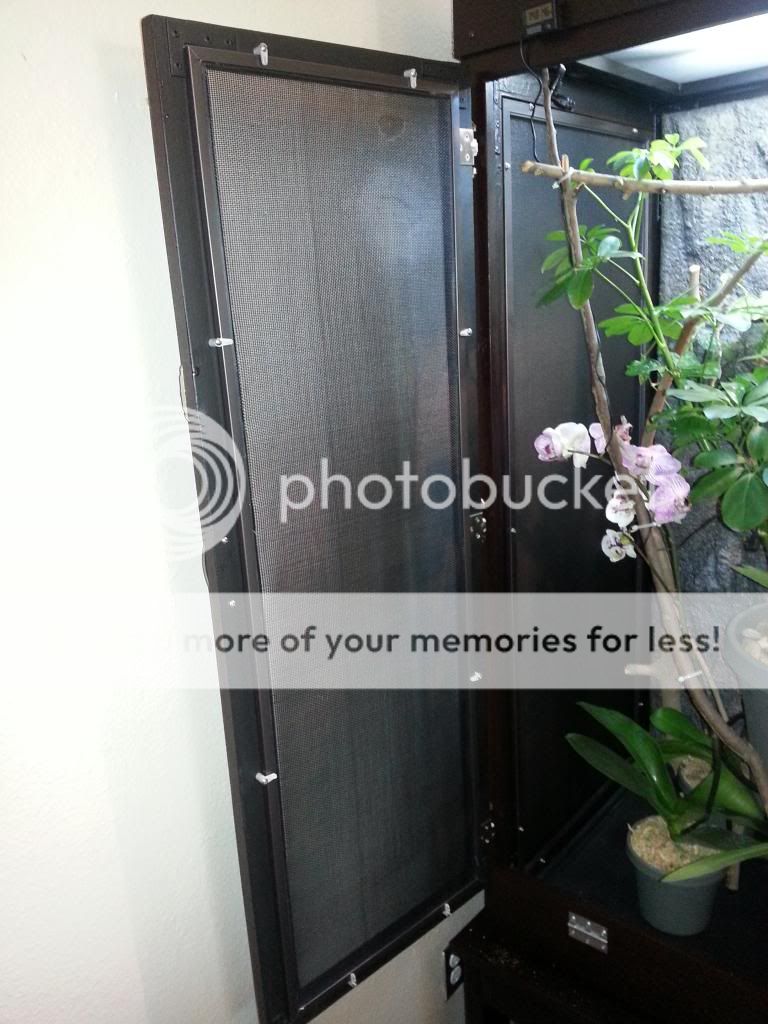
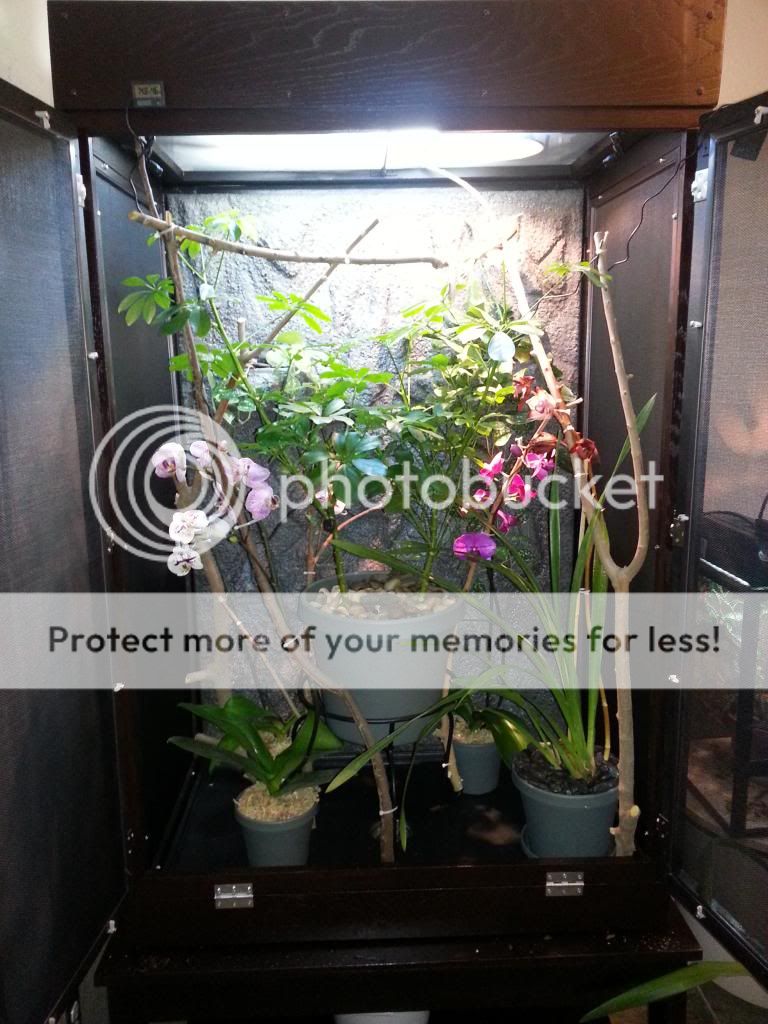
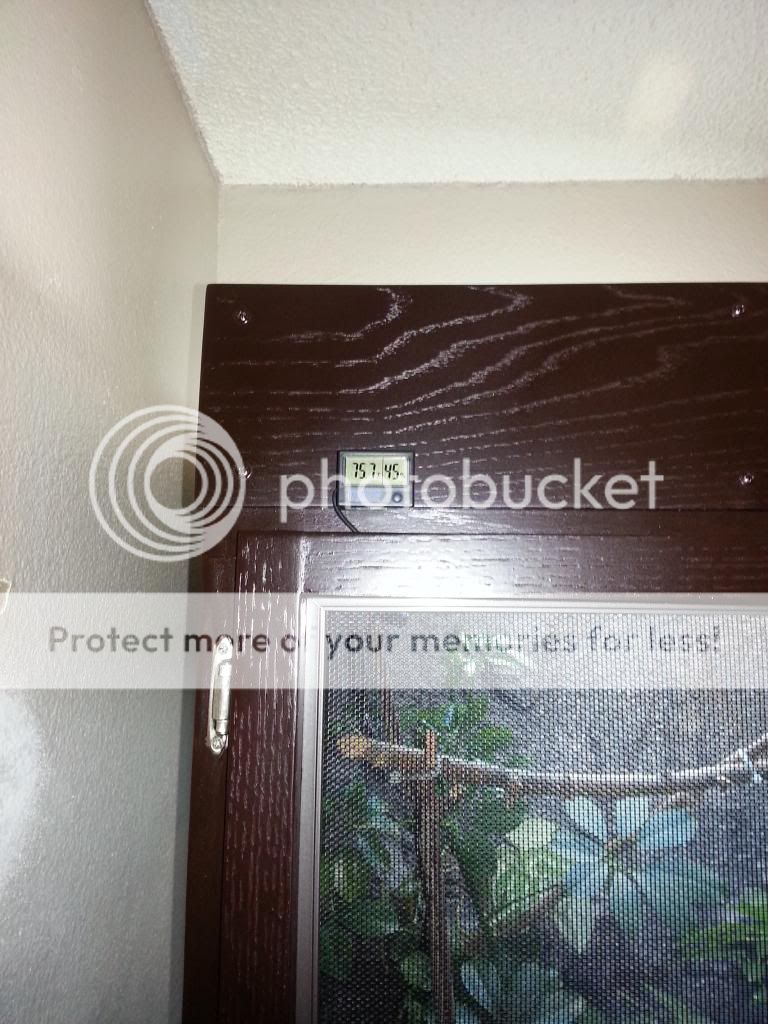
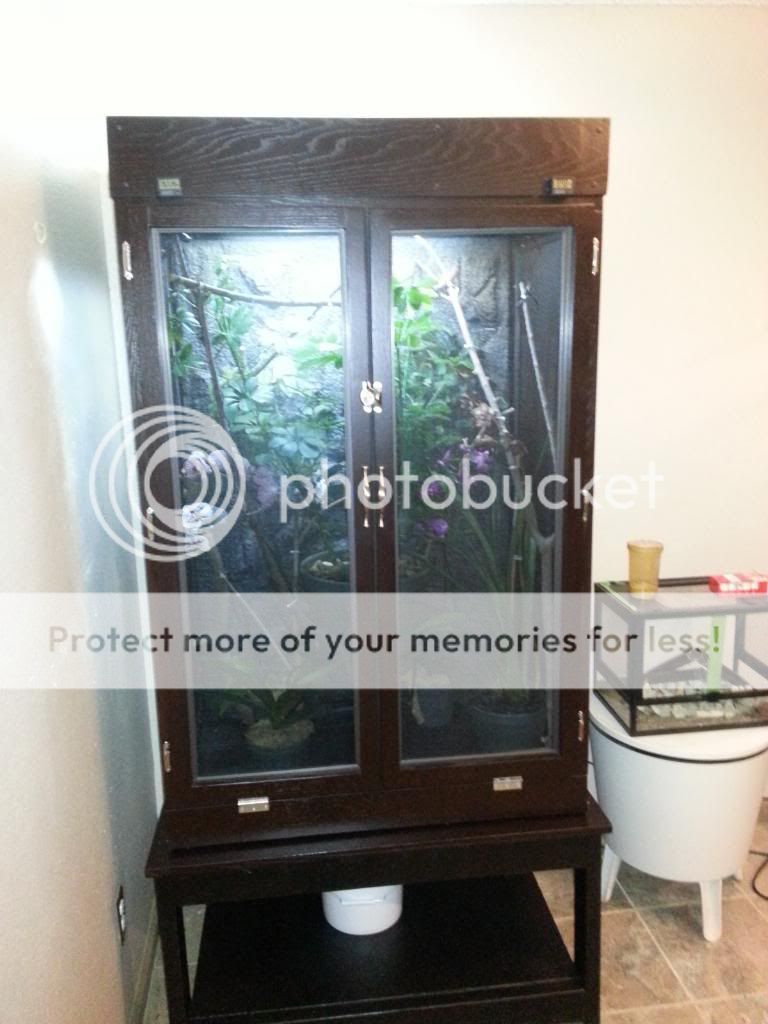
I built it in four major pieces, a stand, the cage itself, the fake rock back wall, and a canopy. I tried to build it so that the major pieces could be taken apart later on for thorough cleanings. The overall dimension are 80"T x 40"W x 28"D and the cage interior dimensions are 54"T x 36"W x 24"D. I built it mainly as a hobby in my spare time but also because I wanted the cage to look like a piece of furniture that matched the rest of the house instead of a clunky cage with all the hoses and wires coming off the top like the store bought ones I have. It's made mostly from red oak 1x2's and 1x3's and was put together with cabinet hardware. It's finished with a black cherry stain and satin polyurethane coating and satin nickel hinges, handles, and sash lock. The screens on the sides and doors are custom made with aluminum rails and fiberglass screens. I have two Mist King nozzles in the cage for water/mistings and I have a sink drain installed in the floor of the cage that drains in to a small bucket in the stand.
Here's what it looks like so far:

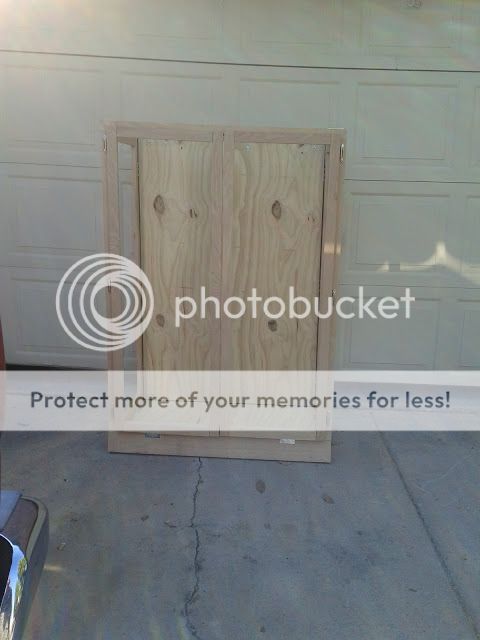
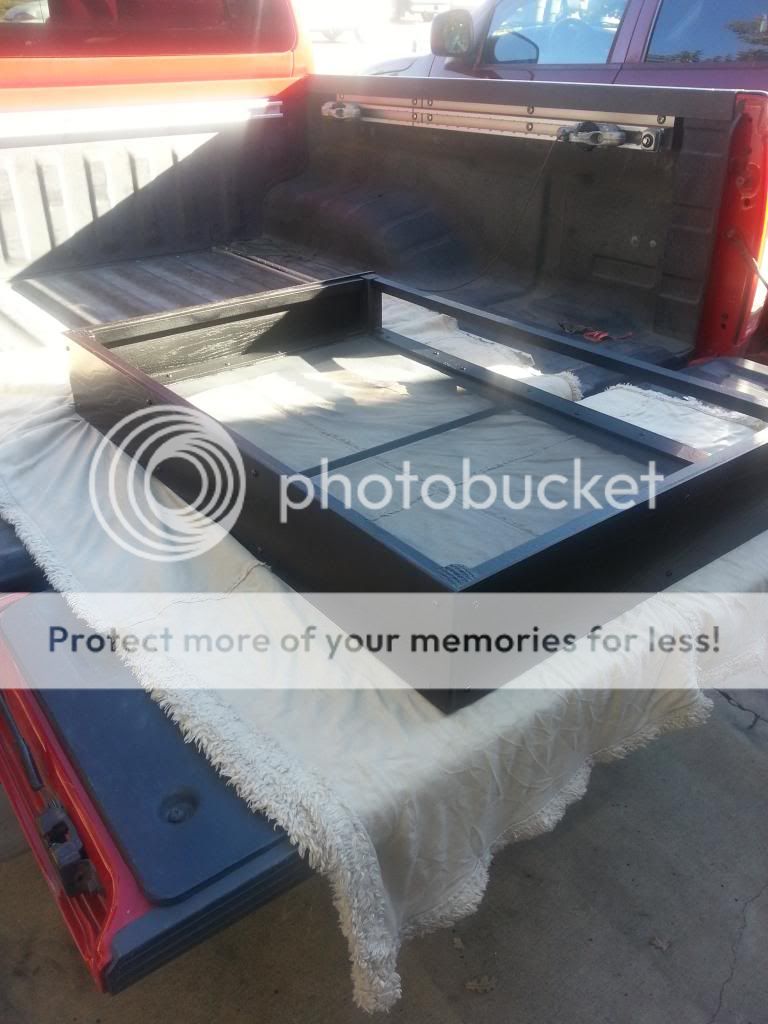
Here's the cage before it was finished:
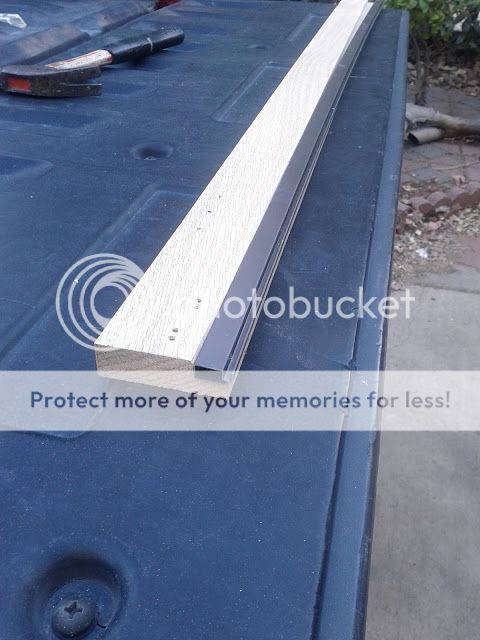
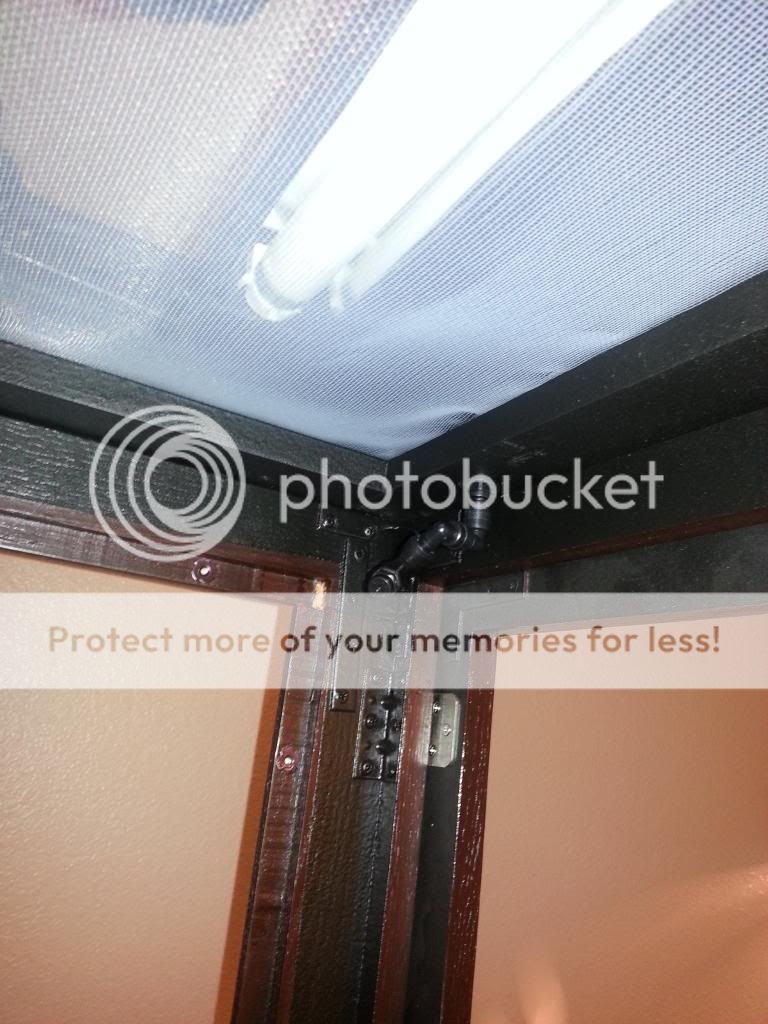
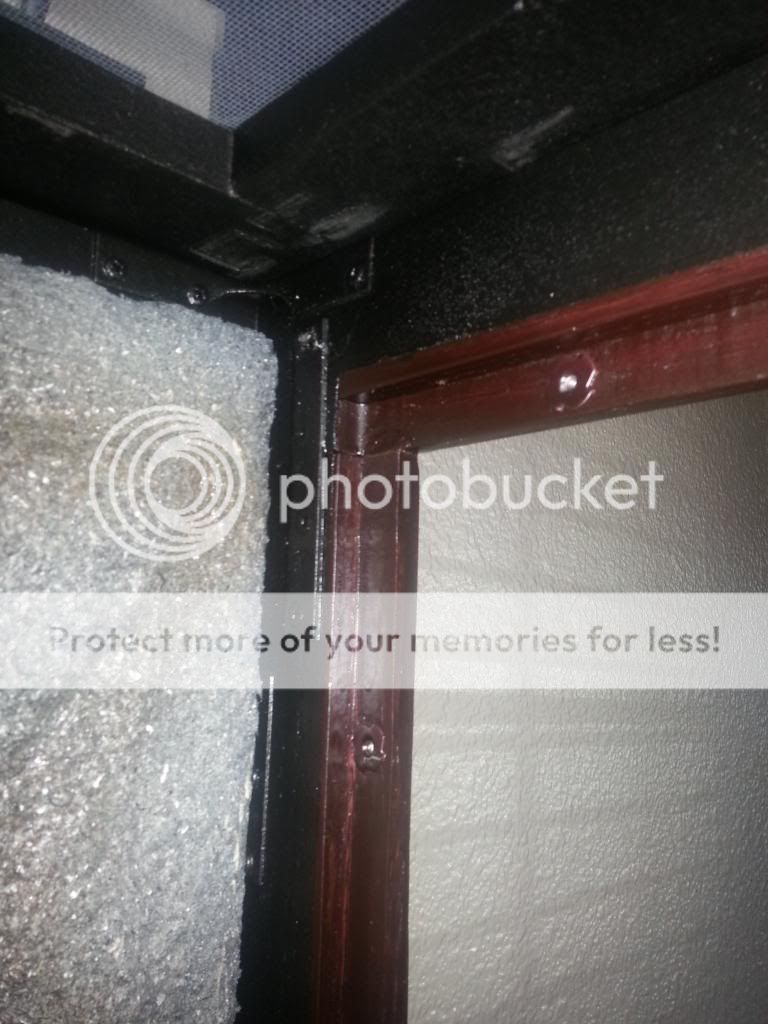
For the screen on the sides I routered a channel for the screen rails are recessed in the wood and sit flush with the rest of the cage:
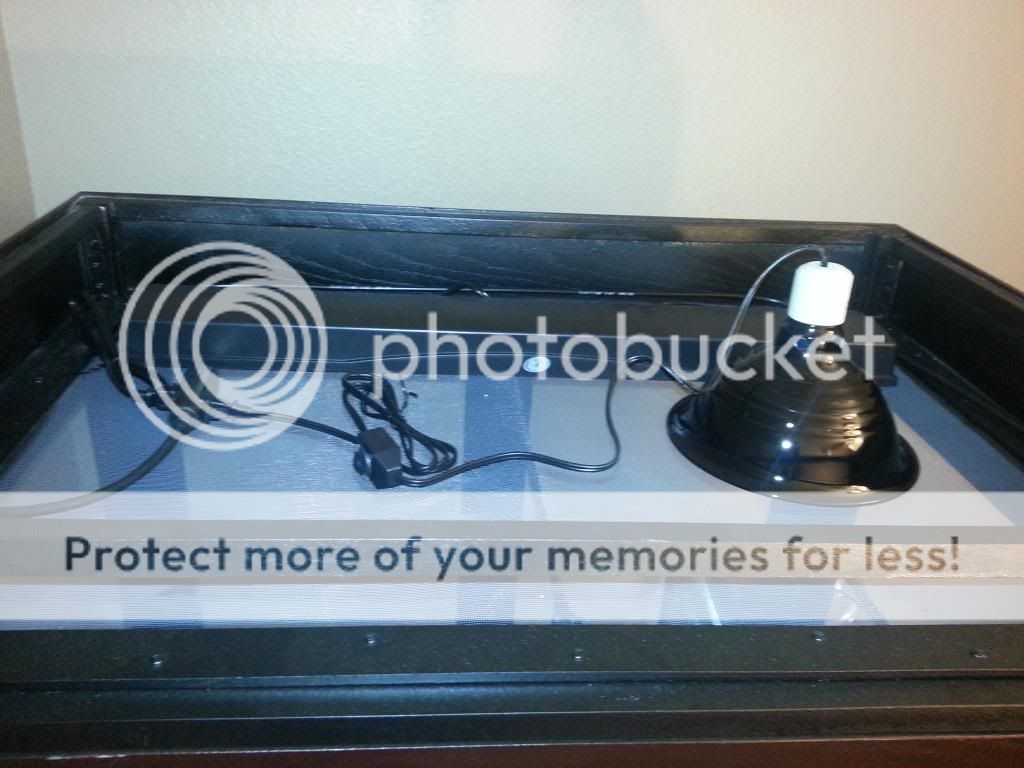
The canopy was made with a pine frame and red oak 1/2" x 6" sides. There's charcoal aluminum screen that stapled down at the sides with an aluminum bar that runs down the middle to hold up the screen once the lights are put on.
I also have recessed holes at each front corner for the mist king nozzles to attach to.
All of the hoses and wires are hidden in the canopy and run down the back side of the cage so they're out of sight when looking at the cage. I also found a 15' three outlet extension cord that is mounted to the canopy and all of the lights are plugged in to that so there's only one long cord coming out of the back instead of several short ones.
The stand was made from 2" x 4" framing studs with red oak 1" x 6"s. The stand was painted satin black except for the oak top that was stained black cherry to match the rest of the cage. I also built it with heavy duty casters on the base so it just rolls around when I need to move it. I also counter sunk all of the screws and filled in the holes with wood putty to hide everything and make it look a little cleaner.
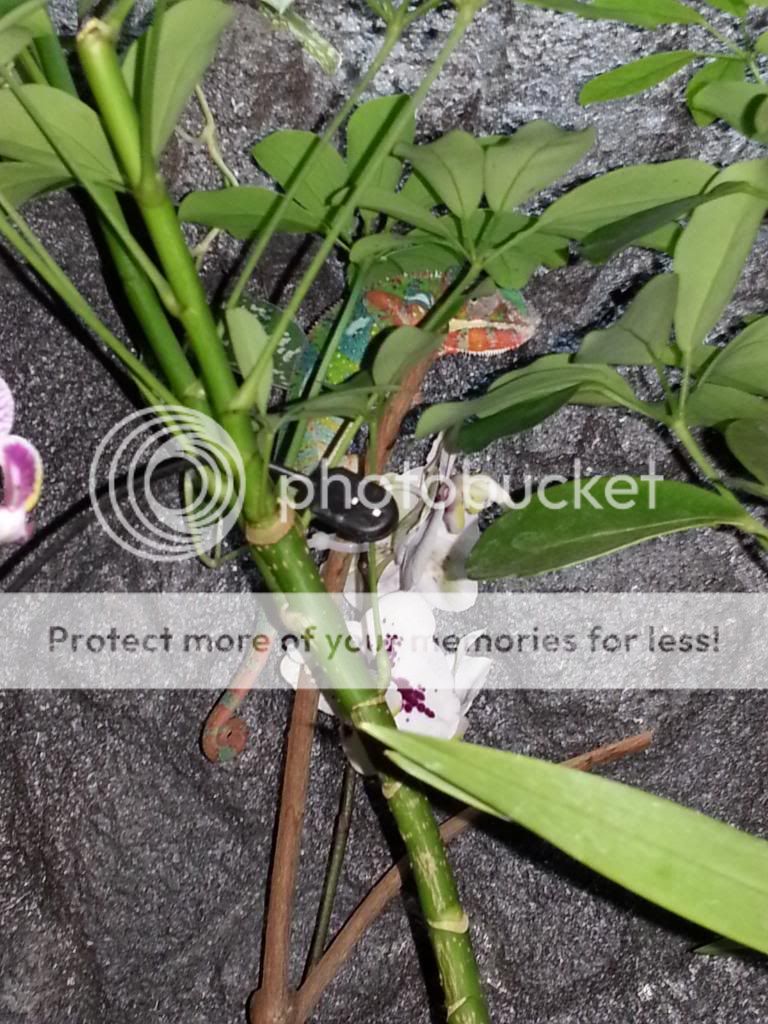
The back wall was made from a 1/2" styrofoam sheet with a 1/2" plywood backing for strength. It has two planters built in to it with pothos planted in each one.
I'm hoping to get the screens sometime in the next week so that I can get schefflera, branches, and orchids all set up in the cage. I'll take some more pictures of everything once it's completely finished.
What do you guys think so far? Feel free to give me suggestions for what it might be missing or ask any questions about how I built it.
I built it in four major pieces, a stand, the cage itself, the fake rock back wall, and a canopy. I tried to build it so that the major pieces could be taken apart later on for thorough cleanings. The overall dimension are 80"T x 40"W x 28"D and the cage interior dimensions are 54"T x 36"W x 24"D. I built it mainly as a hobby in my spare time but also because I wanted the cage to look like a piece of furniture that matched the rest of the house instead of a clunky cage with all the hoses and wires coming off the top like the store bought ones I have. It's made mostly from red oak 1x2's and 1x3's and was put together with cabinet hardware. It's finished with a black cherry stain and satin polyurethane coating and satin nickel hinges, handles, and sash lock. The screens on the sides and doors are custom made with aluminum rails and fiberglass screens. I have two Mist King nozzles in the cage for water/mistings and I have a sink drain installed in the floor of the cage that drains in to a small bucket in the stand.
Here's what it looks like so far:
Here's the cage before it was finished:
For the screen on the sides I routered a channel for the screen rails are recessed in the wood and sit flush with the rest of the cage:
The canopy was made with a pine frame and red oak 1/2" x 6" sides. There's charcoal aluminum screen that stapled down at the sides with an aluminum bar that runs down the middle to hold up the screen once the lights are put on.
I also have recessed holes at each front corner for the mist king nozzles to attach to.
All of the hoses and wires are hidden in the canopy and run down the back side of the cage so they're out of sight when looking at the cage. I also found a 15' three outlet extension cord that is mounted to the canopy and all of the lights are plugged in to that so there's only one long cord coming out of the back instead of several short ones.
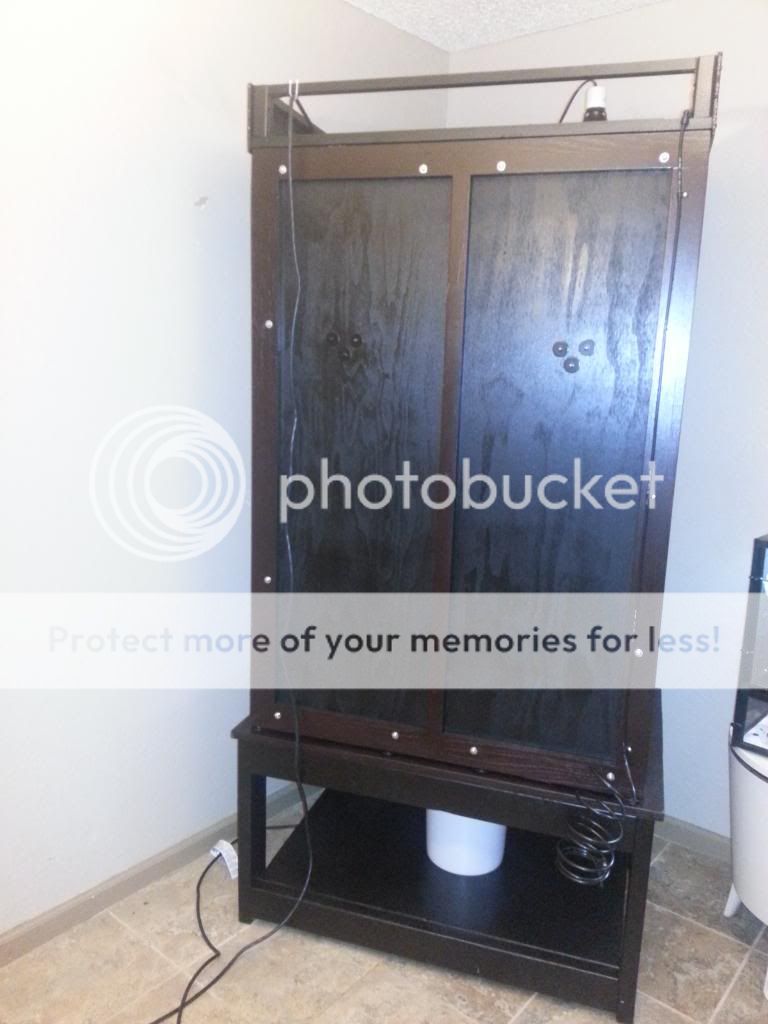
The stand was made from 2" x 4" framing studs with red oak 1" x 6"s. The stand was painted satin black except for the oak top that was stained black cherry to match the rest of the cage. I also built it with heavy duty casters on the base so it just rolls around when I need to move it. I also counter sunk all of the screws and filled in the holes with wood putty to hide everything and make it look a little cleaner.
The back wall was made from a 1/2" styrofoam sheet with a 1/2" plywood backing for strength. It has two planters built in to it with pothos planted in each one.
I'm hoping to get the screens sometime in the next week so that I can get schefflera, branches, and orchids all set up in the cage. I'll take some more pictures of everything once it's completely finished.
What do you guys think so far? Feel free to give me suggestions for what it might be missing or ask any questions about how I built it.


 Great job, sir.
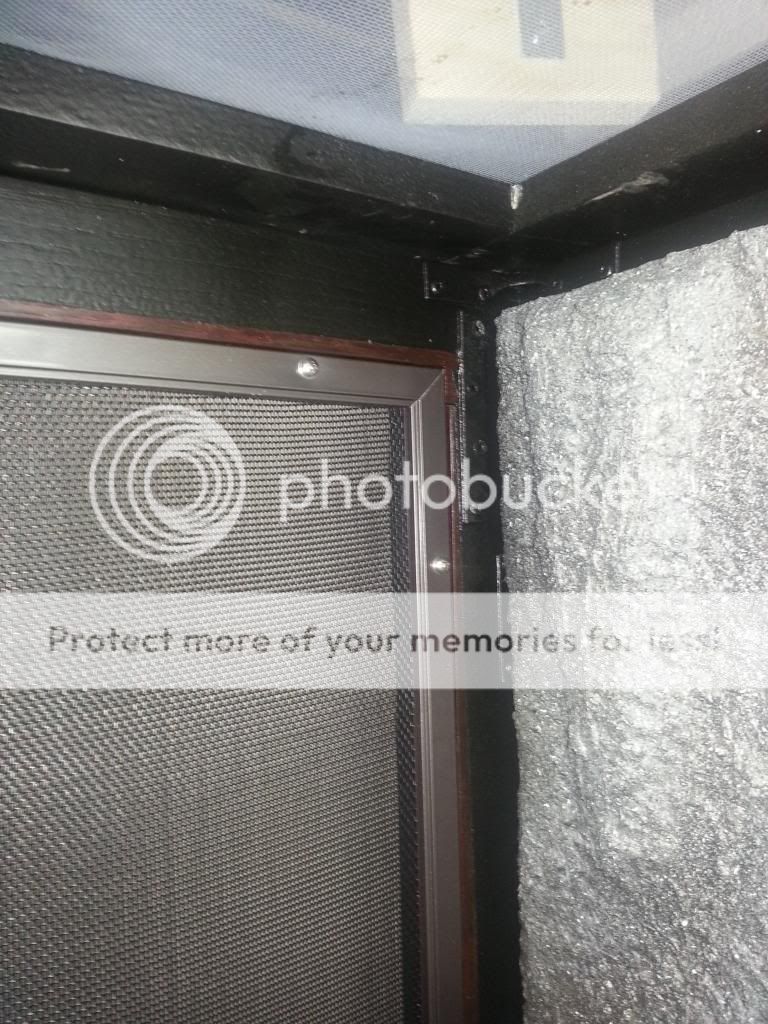


")