Custom Eight Cage System

frankpayne32

Avid Member
After several months of brainstorming and planning I have begun construction on an eight cage system to house my arboreal lizards, primarily chameleons. While it will not be the same, I drew heavy inspiration from Chris Anderson's "DIY Versatile Cage Designs" build, http://www.chameleonnews.com/06SepAndersonDIY.html .

I wanted something more permanent and attractive in my reptile room beside the various cages thrown together on wire racks that I have now. My requirements for the new system are that it provides adequate size for the lizards, retains heat and humidity well, provides adequate ventilation, allows for water drainage, allows for removable dividers, and be cost effective. While the process will be much more time intensive it should prove to be quite a bit cheaper than eight similarly sized pre-made screen cages with many benefits that they lack. I've budgeted it out to be around $400 but I will be keeping track to see what my final costs will be. Now on to the pictures...

First of four base frames built.


Each unit of the system will be equipped with an all-purpose tub for natural substrate. Each will eventually be plumbed for passive drainage.


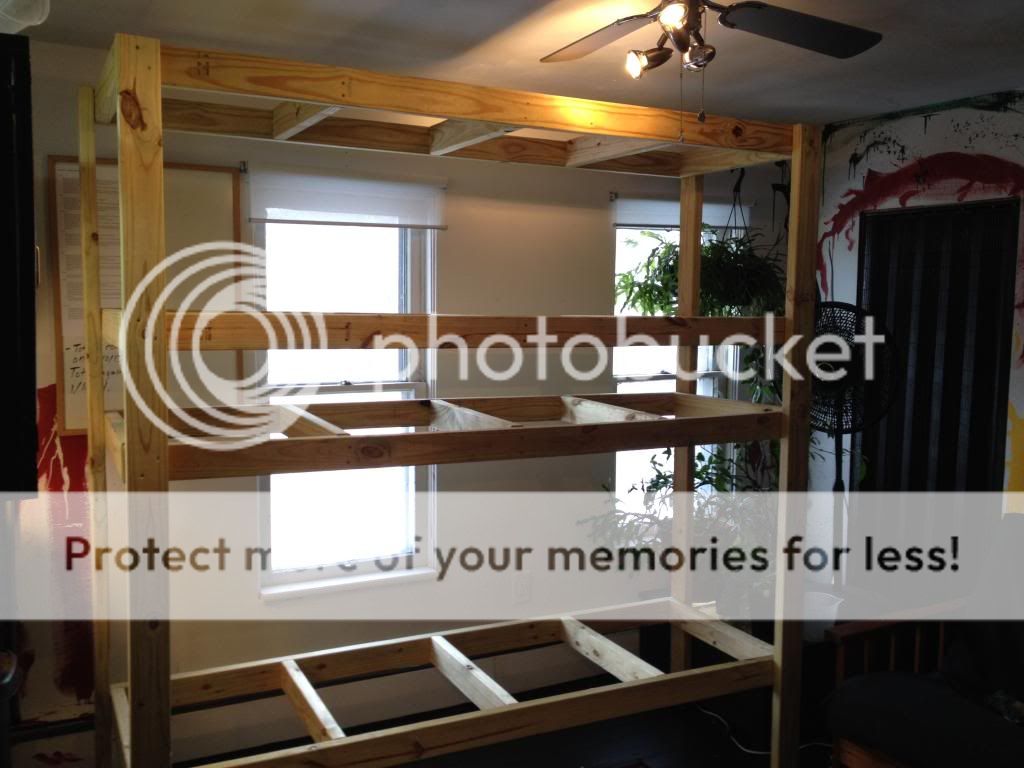
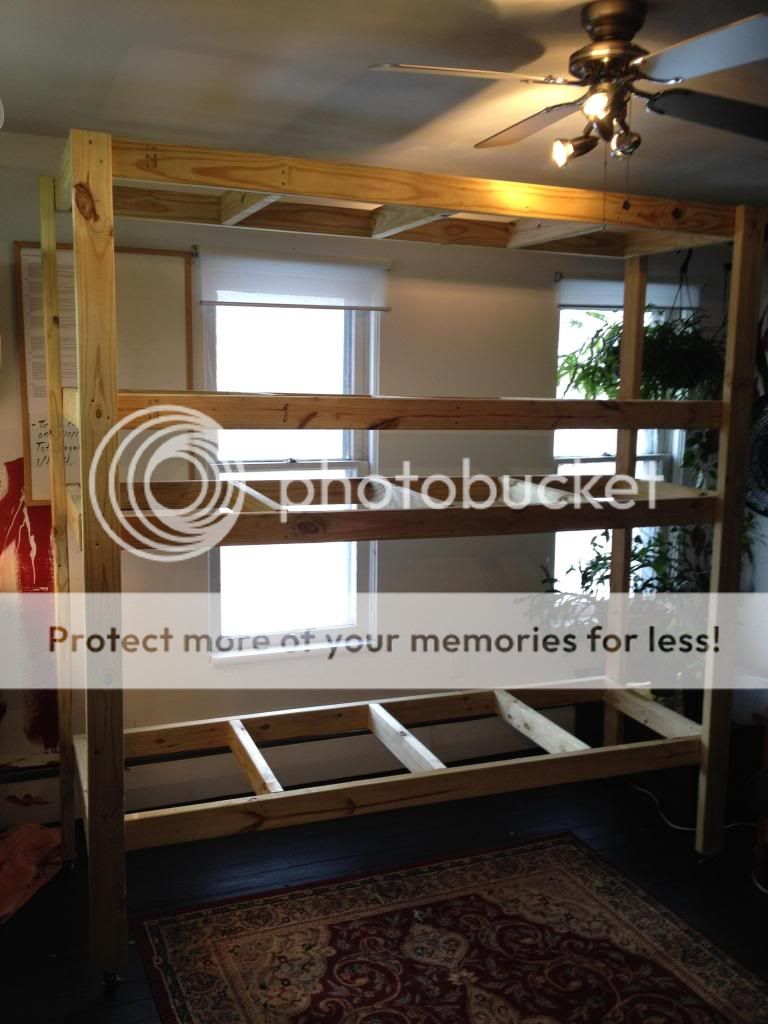
The basic frame work had to be assembled in situ in my reptile room. Very cramped with the current cages still there...


The whole system is 82" tall, 82" wide, and 27" deep. There will be four shorter cages on the top level, each measuring approximately 20.5" wide, 27" deep, and 20.5" tall. This does not include the volume of the tubs. These cages are almost identical in volume to standard 18"x18"x36" screen cages. These will be used for female chameleons and smaller species of lizard like Abronia graminea. There will be four taller cages on the bottom level that will measure approximately 20.5" wide, 27" deep, and 28" tall. These are about 1.4 times larger than the smaller cages. However, for the foreseeable future, two of the dividers will be removed to make for two larger cages to house two male chameleons. If I like the end result I will probably build another similar system but with just four large cages instead of eight smaller ones to house males.

I will try to keep this thread updated as often as possible as I progress through the build. Thanks for looking!

Frank
 
Completely framed in and painted white. I have made some big supply orders and will be picking up the coroplast sheets tonight to continue construction. I've spent a lot of time planning this and am getting really excited for it to come together. I'm also really excited to be able to walk around my reptile room!

It's hard to get good, full pictures with the size of the cage system and with how cramped the room is now.
 
Got the coropalst sheets last night and started playing around with it. This stuff is seriously great. Any new cages I build in the future will be made from it. Got the back panel installed for the top row of cages.


My lovely assistant helping with the install. :)


Its hard to see form the pic but I cut out 3.5"x3.5" sections out of the corners so that the back panel interlocks with the top and side supports. I will take a picture of it when I do the bottom back panel. This makes it much more secure and tight fitting. I then used stainless steel screws and washers to anchor the panel to the supports where needed.


Here you can see how the panel extends over the 2x4 support in the front because of the cut out corners.


And how it looks from the front. You can see that we also installed the aluminum screening for the tops.


It took a lot of restraint not to call off work today and keep working on it... Things should progress pretty quickly now though. The only thing I am still undecided on is how I want to do the doors. I have a few ideas banging around. Thanks for looking!
 
Glad to see that my design was able to provide you inspiration! I really like the tubs in the bottom. Great addition! Look forward to seeing how it turns out in the end!

Chris
 
Glad to see that my design was able to provide you inspiration! I really like the tubs in the bottom. Great addition! Look forward to seeing how it turns out in the end!

Chris

Thanks! And thanks for putting so much great information out there for everyone to learn from.
 
Got lots of work done today. But never as much as I'd hope.

Here's the system completely sided in with tubs in place.


The tubs are drilled for the Mist King bulkheads for drainage. There will be a one inch layer of hydroton expanded clay pellets to separate the drainage layer from the soil.


The tubs are daisy-chained together for common passive drainage.


To incorperate the removable dividers I used PVC molding to act as guides.


Now with the first panel in place. Very snug but still movable.


And last, for the sake of completion, one complete compartment with Mist King nozzle in place. :)


That's it for tonight. One compartment down, seven to go. Time to relax and for a few beers. :) Thanks for looking!
 
Got lots of work done today. But never as much as I'd hope.


Here's the system completely sided in with tubs in place.


The tubs are drilled for the Mist King bulkheads for drainage. There will be a one inch layer of hydroton expanded clay pellets to separate the drainage layer from the soil.


The tubs are daisy-chained together for common passive drainage.


To incorperate the removable dividers I used PVC molding to act as guides.


Now with the first panel in place. Very snug but still movable.


And last, for the sake of completion, one complete compartment with Mist King nozzle in place. :)


That's it for tonight. One compartment down, seven to go. Time to relax and for a few beers. :) Thanks for looking!


So what will the final setup be? Are you going to place an enclosure on top of the tub? Is the tub the base of the enclosure? How will you clean when necessary? Thanks!
 
So what will the final setup be? Are you going to place an enclosure on top of the tub? Is the tub the base of the enclosure? How will you clean when necessary? Thanks!

What you see is basically one enclosure done EXCEPT for the door. I have bought DIY screen window kits to make doors that will be attached to the open front side that will swing down. There will be eight doors. I am still just working out how I want to do the locking mechanism for the doors.

Looks fantastic! Can't wait to see it completed.

Thanks, me too!

Looks like you thought this out pretty well! :D

Absolutely, I can't tell you how many hours of planning and research I've spent on this before cutting the first piece of wood.

Very nice. I really like the divider set up!

Thank you. I hope it works out as well as I planned. Right now my collection is pretty small and this will allow me to give my current collection lots of space but give me the ability to expand my collection without having to build more cages.
 
This looks great. I have one concern. I think you the 1/4 inch drain tube is going to give you trouble. You are going to need a bigger tubing in order to get the water moving, if gravity is your power supply. I think the cohesive and adhesive properties of water will constrict the flow in such a small tube, I bet you will need 1/2 to 5/8 to get adequate flow. You can buy cheap fittings at Home Depot and tubing is cheap also. I hope I'm wrong. I would recommend trying it now while you can fix it easily. Good luck.
 
This looks great. I have one concern. I think you the 1/4 inch drain tube is going to give you trouble. You are going to need a bigger tubing in order to get the water moving, if gravity is your power supply. I think the cohesive and adhesive properties of water will constrict the flow in such a small tube, I bet you will need 1/2 to 5/8 to get adequate flow. You can buy cheap fittings at Home Depot and tubing is cheap also. I hope I'm wrong. I would recommend trying it now while you can fix it easily. Good luck.

Thanks for the compliment and the good advice. However, I have used the 1/4" bulkheads and tubing to drain tanks before without problem. It just does so pretty slowly which is fine because with the soil and misting sessions I run I'm not dealing with gallons of water at a time. I will definitely double check before fully planting because that would really suck if it didn't!
 
that is so sweet! I am afraid to share this post with my boyfriend because he would build it in heart beat so we could have 8 lizards!

I am a little bit jealous though.
 
Very inspirational! Very descriptive! Very visual!
Thanks for the inspiration!
Good luck to you. :D

Thank you!

that is so sweet! I am afraid to share this post with my boyfriend because he would build it in heart beat so we could have 8 lizards!

I am a little bit jealous though.

Thanks! I am lucky to have a very understanding fiance. She just lets me do my thing and she's actually starting to get into it herself. :)
 
Back
Top Bottom