Navigation
Install the app
How to install the app on iOS
Follow along with the video below to see how to install our site as a web app on your home screen.
Note: This feature may not be available in some browsers.
More options
You are using an out of date browser. It may not display this or other websites correctly.
You should upgrade or use an alternative browser.
You should upgrade or use an alternative browser.
New Enclosure
- Thread starter windex
- Start date
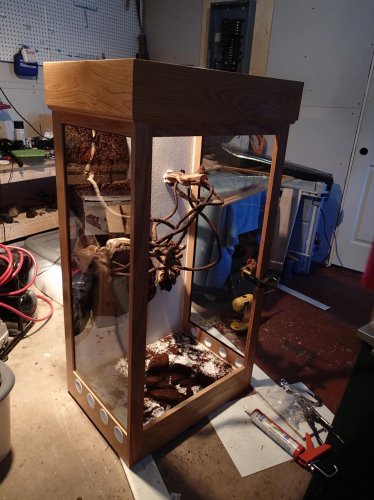
Thanks.. Its going to be in the man cave so I wanted it to look as close to a piece of furniture as possible.. For the background I'm pretty sure I'm going to go with Great Stuff foam coated in something for 1/2-2/3 of the back and tree fern panels for the remainder.. only question I have and can't seem to find an answer is how long does tree fern last? is it something I will have to change out after a couple years? 5? 10? Because it would be a total pain to have to change it out as well as expensive.. Also how long would prepared driftwood last in such a humid environment?
I have tree fen and GS foam vivs approaching 10 years
windex
New Member
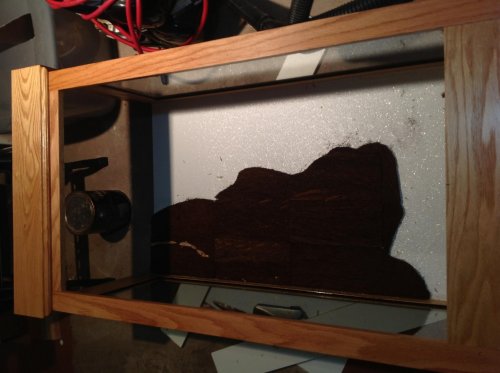
Got some tree fern today. It pays to flirt with the pet store girl, I got the exo-terra tree fern for $8.99 each. Employee discount
windex
New Member
That's the only reason I'm getting the pond stuff is for the color.. I'm going to be attaching drift wood, grape wood, and river wood inside the enclosure and som of it might be attached with silicone to the glass then the ends covered in foam.. Just waiting for the extra vents and GS to come in as well as some vines and river wood.
windex
New Member
Most of the GS is going to be on the white plastic on the back, and it has a rough surface so is should adhere to it nicely.. progress has been slowed down considerably since I'm waiting for the rest of the supplies to come in... Just been pondering what I'm going to do for drainage. The current enclosure gets misted four times a day for 45 seconds each time and I have a brown mat on the floor of the enclosure.. water build up is not an issue with it but in the new enclosure I will be running two maybe three nozzles and plan on running it a bit longer so I'm sure there will be water pooling..
http://www.petsandponds.com/en/aquarium-supplies/c378109405/p17532790.html
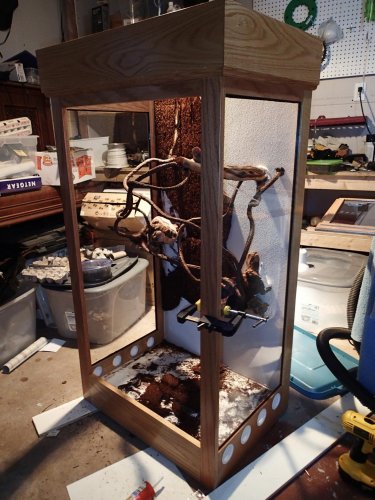
two of these is what I've decided on, counter sunk slightly in the base so that its flush, then run hose to a "Y" adapter which in turn will run to a rubbermaid tote in the drawer on the stand for the enclosure.. I also think I'm going to slope the back a little towards the middle and have these directly at the base of the slope, that way most of the water will be channeled to them and I'll still have the front half flat for a potted plant.. lots of ideas running through my head anyways, first thing first though I need to get the vents in so I can see what room I have to play with.. I'm going with four 2" round vents along the bottom of each side.. should be enough ventilation? that would give aprox 25 square inches of ventilation..
windex
New Member
Progress update.. Tree fern is Siliconed to the back and the vent holes are drilled in the bottom.. There is eight 2" vent holes.. Hopefully that is enough, I might be able to rig something up on the back if you guys don't think that's enough.. Door is assembled and has the first coat of varnish on it, only three more to go and then the silicone..


Have a little bit of fiddling to do with the tree fern since you can see the individual panels, hopefully moss will cover that all up though..
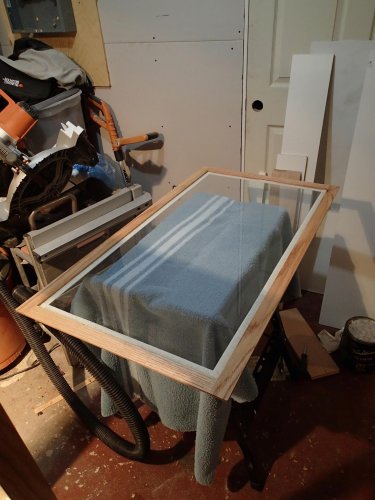
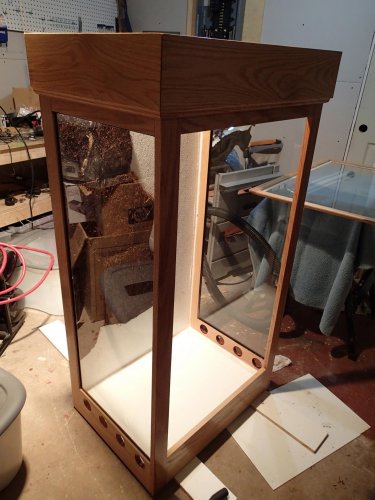
Have a little bit of fiddling to do with the tree fern since you can see the individual panels, hopefully moss will cover that all up though..
windex
New Member
Don't get your expectations to high  the background will be brown lol.. I won't be able to get any decent live plants until the weather warms up and the garden centres open up. Still have to install the conduits for the digital thermometers and hygrometers.. Hoping to get the Foam sprayed tonight, which would let me cover it tomorrow and Install the screen and MistKing and drainage system.. hoping to have it all done by the weekend. I hate waiting for stuff to cure/dry!
Carlton
Chameleon Enthusiast
I would not do melamine, it swells up, and sealing that works the first month, mysteriously doesn't the next month.
Do plexiglass on the floor, it is awesome for cleaning.
Nick
Agree. Melamine won't last if it gets wet repeatedly. Molding melamine STINKS!
Ooops, sorry for the out of date comment!
windex
New Member
LOL, yeah a little out date  I did use melamine for the back and bottom but then covered it with a white plastic and siliconed all the seams like crazy. that plus the expanding foam covering all the back there should be no water touching it at all.. Looking back I should of just used 1/2" plywood or even 3/4" but it should all be good now
windex
New Member
Got the Great Stuff on, the stone and pond stuff doesn't expand near as much as the regular stuff.. Oh well, almost didn't have enough, would of liked to have another can but I'm not going to wait another week minimum to get the stuff ordered.. another bunch of waiting for it to cure then smooth it out with the bread knife  Should be siliconing and covering it tomorrow morning while my daughter is in school.
[URL=http://s1071.photobucket.com/user/windex961/media/P1071951.jpg.html] [/URL]
[URL=http://s1071.photobucket.com/user/windex961/media/P1071951.jpg.html]
 [/URL]
windex
New Member
Ok, great stuff siliconed and the coco fiber covering it. Stuck a few airplants in various places, and just waiting for the silicone to cure to vacuum up the loose coconut. All that's left is drilling the holes for the drainage, attaching the door, and adding green too it.. Right now all I have is some fake plants, they will have to do until the weather warms up and I can find some live ones at the nurseries..


Similar threads
- Replies
- 14
- Views
- 719

