Hey all,
I have been planning this for a LONG time now and I have finally begun construction. I thought some of you may be interested") I'm very proud to say that all engineering and aesthetics are designed entirely by myself. The actual build is also being done almost exclusively by myself, with a little muscle help from my girlfriend from time to time . The build isn't complete yet but so far its been a great experience!
I'm very proud to say that all engineering and aesthetics are designed entirely by myself. The actual build is also being done almost exclusively by myself, with a little muscle help from my girlfriend from time to time . The build isn't complete yet but so far its been a great experience!
BACKGROUND:
-Clark (my ambilobe) has been free-ranged since I got him at 3months old on a 3-post cat-tree with each post having a planter on it: 1 hibiscus, 1 taller ficus, and 1 planter with no plants but a large batch of those sticks you can buy from any art store (usually in the fake plant section, its just like dried sticks). I added the sticks because I realized he regularly sat at the very top of the ficus, which was about 6' off the ground. The sticks go, literally, to the ceiling and he spends his night up there every night since.
-I cup-feed him crickets/dubias and had his heat lamp and UVB bulb both projecting sideways onto the plants. The UVB was sitting on its side on my desk and the heat lamp was hanging from a clip on my blinds. Both JUST out of reach of him, of course (else he tends to try and climb right into it).
-This initial setup cost me around $40 total probably (I already had the cat tree)
PROJECT:
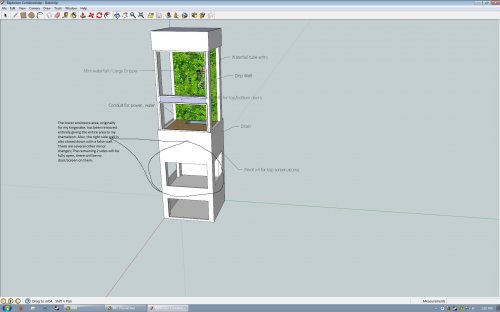
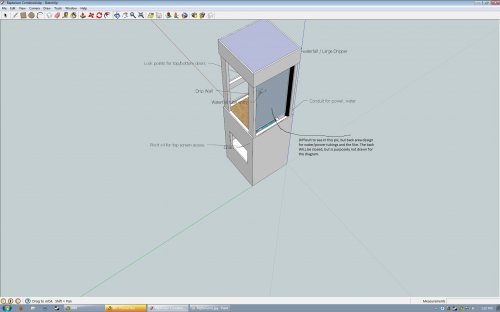
-**ALL** wiring/piping/etc is out of sight. This entire project is built with AESTHETICS in mind. Absolute minimum seams present.
-38"x38"x92" (approx 3'x3'x8') self-standing wood frame.
-2 sides will be housing "false-walls"/planters.
-2 sides will be open
-Hood houses home-made 4-bulb T8 fixture (F32T8 @ 6500K)
-Hood houses misting nozzles
-Hood is inaccessible to animals, but light flows freely
-False bottom with drain
-Front opening hidden door.
-Small storage space underneath.
-Misting pump, water reservoir, and drainage chamber underneath.
-Can be FULLY disassembled and moved (this took me FOREVER to design!!!!!)
-Water-feature and an "air-waterfall" (hopefully I don't mess this part up...!)
-Approximate MATERIALS cost: $600
-Approximate PLANTS cost: $250
NOTE: You will need a power saw and power drill, as well as most basic hand tools.
BLUEPRINTS/SCHEMATICS: I have spent countless hours thinking about this project and I have a somewhat photographic memory so I have the blueprints "drawn" so to speak, in my head. If anyone is interested enough, I could draw some up for you. I will try to point out the design features as I build them through this build log as well.
----------------------------------------------------------------------------
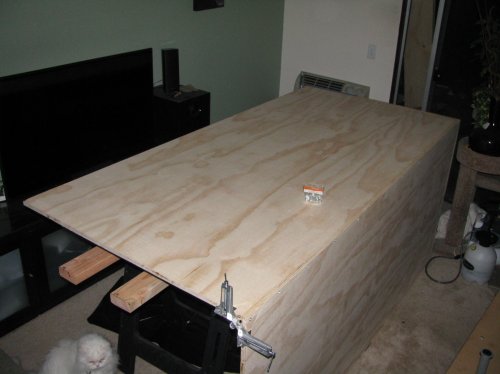
IT STARTS!
So far over the past 2 days I have spent a good $200 on plants and another $400 at home depot for wood and miscellaneous supplies. I have yet to buy any of my airplants and I still need a few more pieces of plywood, but for the most part...construction has begun
I will upload pics as I go and will attempt to keep a thorough build-log. I *HOPE* I have finally considered everything that may come my way, but I highly encourage everyone to throw bad scenarios at me.
I just wanted to throw up this thread while I'm taking a short break...I will add pics and updates soon !
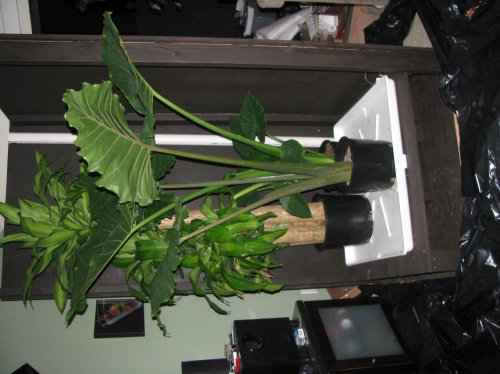
Pic of some of my main plants to start things off...I'm praying those palms are cham safe...any ID help appreciated https://www.chameleonforums.com/plant-id-safety-help-plz-photos-inside-64533/#post601788
I have been planning this for a LONG time now and I have finally begun construction. I thought some of you may be interested
I'm very proud to say that all engineering and aesthetics are designed entirely by myself. The actual build is also being done almost exclusively by myself, with a little muscle help from my girlfriend from time to time . The build isn't complete yet but so far its been a great experience! BACKGROUND:
-Clark (my ambilobe) has been free-ranged since I got him at 3months old on a 3-post cat-tree with each post having a planter on it: 1 hibiscus, 1 taller ficus, and 1 planter with no plants but a large batch of those sticks you can buy from any art store (usually in the fake plant section, its just like dried sticks). I added the sticks because I realized he regularly sat at the very top of the ficus, which was about 6' off the ground. The sticks go, literally, to the ceiling and he spends his night up there every night since.
-I cup-feed him crickets/dubias and had his heat lamp and UVB bulb both projecting sideways onto the plants. The UVB was sitting on its side on my desk and the heat lamp was hanging from a clip on my blinds. Both JUST out of reach of him, of course (else he tends to try and climb right into it).
-This initial setup cost me around $40 total probably (I already had the cat tree)
PROJECT:
-**ALL** wiring/piping/etc is out of sight. This entire project is built with AESTHETICS in mind. Absolute minimum seams present.
-38"x38"x92" (approx 3'x3'x8') self-standing wood frame.
-2 sides will be housing "false-walls"/planters.
-2 sides will be open
-Hood houses home-made 4-bulb T8 fixture (F32T8 @ 6500K)
-Hood houses misting nozzles
-Hood is inaccessible to animals, but light flows freely
-False bottom with drain
-Front opening hidden door.
-Small storage space underneath.
-Misting pump, water reservoir, and drainage chamber underneath.
-Can be FULLY disassembled and moved (this took me FOREVER to design!!!!!)
-Water-feature and an "air-waterfall" (hopefully I don't mess this part up...!)
-Approximate MATERIALS cost: $600
-Approximate PLANTS cost: $250
NOTE: You will need a power saw and power drill, as well as most basic hand tools.
BLUEPRINTS/SCHEMATICS: I have spent countless hours thinking about this project and I have a somewhat photographic memory so I have the blueprints "drawn" so to speak, in my head. If anyone is interested enough, I could draw some up for you. I will try to point out the design features as I build them through this build log as well.
----------------------------------------------------------------------------
IT STARTS!
So far over the past 2 days I have spent a good $200 on plants and another $400 at home depot for wood and miscellaneous supplies. I have yet to buy any of my airplants and I still need a few more pieces of plywood, but for the most part...construction has begun
I will upload pics as I go and will attempt to keep a thorough build-log. I *HOPE* I have finally considered everything that may come my way, but I highly encourage everyone to throw bad scenarios at me.
I just wanted to throw up this thread while I'm taking a short break...I will add pics and updates soon !
Pic of some of my main plants to start things off...I'm praying those palms are cham safe...any ID help appreciated
https://www.chameleonforums.com/plant-id-safety-help-plz-photos-inside-64533/#post601788