Fearaffect
Avid Member
Ok, so a few members have asked me how to make my cages. I will list the tools and a general step by step way of making them....
U can get the stuff at a Home Depot. I get my screen and spline at Metroscreenworks.com since its cheaper to buy in bulk for what I do and they have a wide assortment of screen types. Shipping is very reasonable to from them.
Tools needed:
Miter Saw
Table Saw
Sander
Planer(Not needed, but you'll wish u had one if your making alot of cages....) Home Depot has good prices on these......
Cordless Drill
Screening Tools
Tape Measure
Screw Driver
Cutting knife(Utility type)
Materials:
1x2 Pine boards.....enough to do job and xtras for mistakes.
Gorilla Glue
Wood Screws
Screen
Spline
Stain(MinWax Water Based)
Door Hardware(your choice on what kind..)
Material for floor(Melamine, plastic or something else that is water proof)
Building the cage:
Get your boards, choose for straightness. Plane the full boards. Measure to desired lengths(remember to take into account the dimensions of the other boards and cut accordingly(with Miter Saw)....if your cage is gonna be 24" long, and your length frame is attached to the sides from the inside of them....cut 23.5" since the board thickness is actually 1/2"( 23.5" x 1/2" is 24")
Sand the edges lightly...to much and it will not look seamless when u put together. On your Table Saw, set the blade depth to the desired depth and run the wood through it to create the spline grooves(about 1/4 or so from the side of the wood)Dont do this for the bottom frame!! Now, your gonna need to make yourself a "square" on the table to properly align the wood up. Once done, drill small holes in the wood that will have the screws go into....do not drill holes in the other pieces that the you attach these pieces to. Once u get that done, then you can fully drill the pieces together, glueing them together before installing the screws. Make sure you dont go to fast or you'll split the wood.
Once you cage frames are fully put together, take the cage apart(leaving each frame intact. Stain the wood with 3 coats of stain(1/2 or so between each coat). Next, your gonna screen the frames. Roll the screen over the frame, cut the length about 1/2" or so longer then frame. Work from the far side first. If using regular aluminum screen, your gonna have to do a pregroove step. Just use the spline tool and prechannel the screen before actually using the spline. U dont have to do this with Super Screen. Ok, so get your spline, measure out on the frame how much you'll need(it stretches) and push the starting point in as best u can. Use the spline tool and while your keeping the spline stretched, run the tool over the spline as hard as u can without cutting the screen. At same time, make sure the screen on other side of frame is stretched as best u can(having another person makes it much easier..lol) Do all for sides working in a clockwise fashion and to all frames.
After screening, use the utility knife and cut the screen. You have to get really into the groove and press down if using aluminum screen. Its ok if u cut some of the wood...I still do this, Just make sure u dont cut the spline!!.
Now u can put everything together. Put your hardware on, make a door stop(inside so the door....stops...ahem and door keepers on the outside.
Put your floor (cut to the dimensions of course) in and your done! Takes me 6-8hrs from start to finish...will probably take you 2 days first few times(my first one took 2 days)
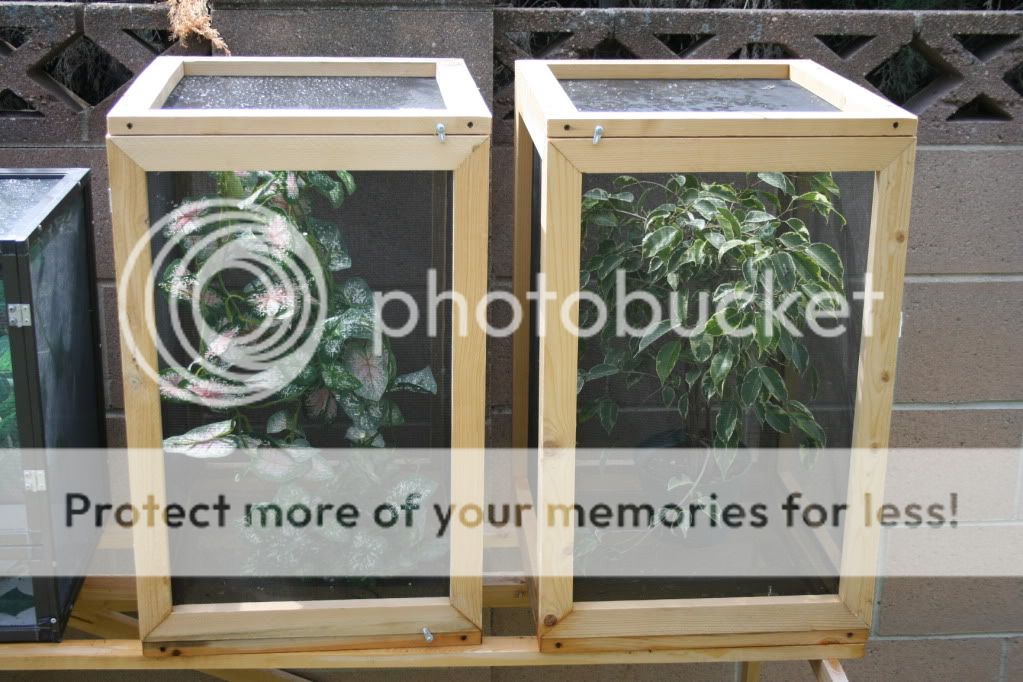
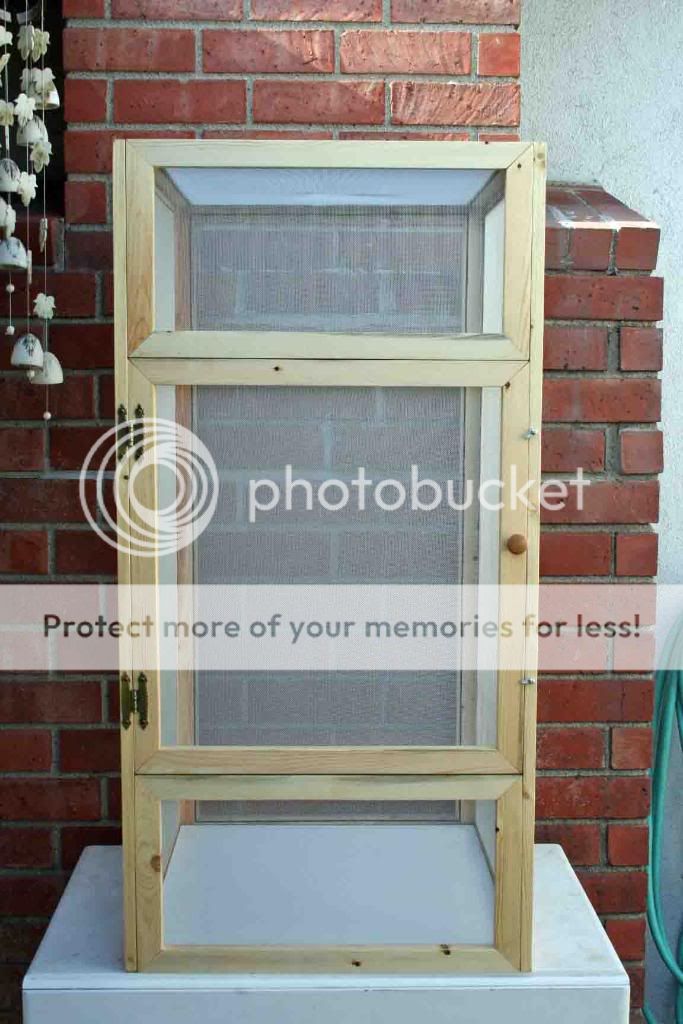
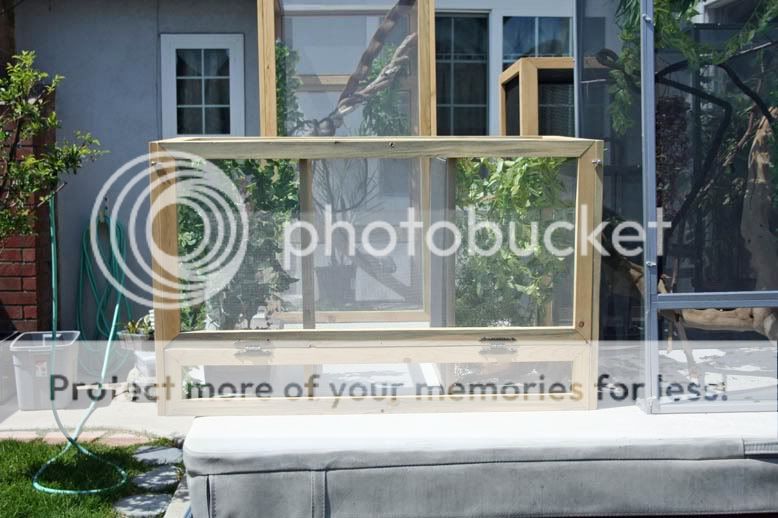
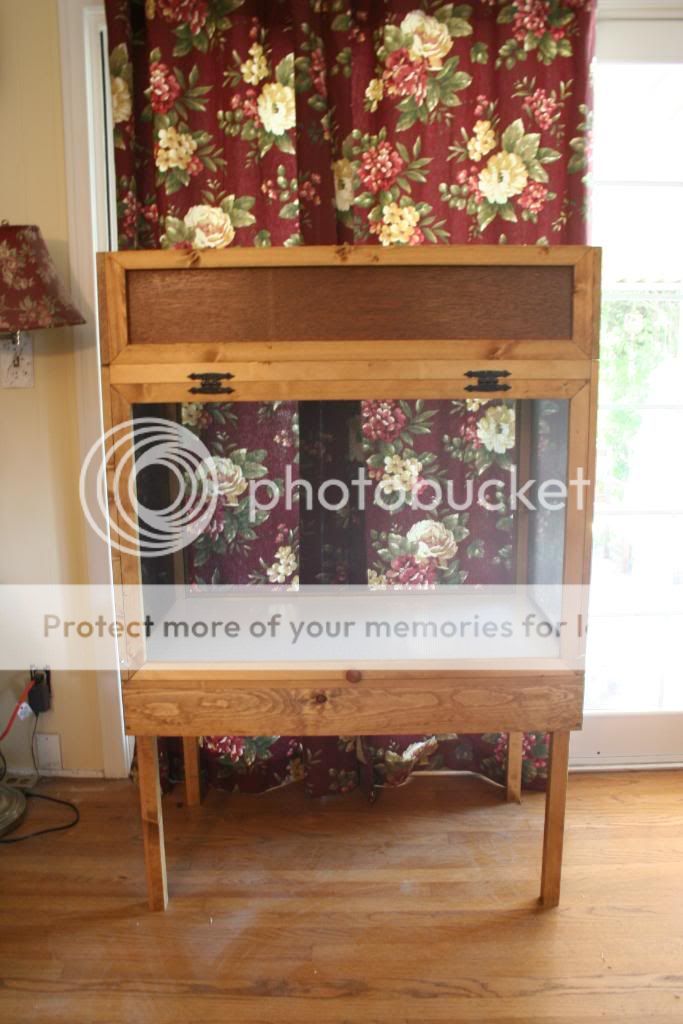
Some cage pics: Notice how I take great care to not have any exposed screws on the front side of my regular(non sun) cages.....this makes it look really finished and professional. All screws are installed from the side and back.....no screws are installed to where u can see from the front. Nice clean look!!

U can get the stuff at a Home Depot. I get my screen and spline at Metroscreenworks.com since its cheaper to buy in bulk for what I do and they have a wide assortment of screen types. Shipping is very reasonable to from them.
Tools needed:
Miter Saw
Table Saw
Sander
Planer(Not needed, but you'll wish u had one if your making alot of cages....) Home Depot has good prices on these......
Cordless Drill
Screening Tools
Tape Measure
Screw Driver
Cutting knife(Utility type)
Materials:
1x2 Pine boards.....enough to do job and xtras for mistakes.
Gorilla Glue
Wood Screws
Screen
Spline
Stain(MinWax Water Based)
Door Hardware(your choice on what kind..)
Material for floor(Melamine, plastic or something else that is water proof)
Building the cage:
Get your boards, choose for straightness. Plane the full boards. Measure to desired lengths(remember to take into account the dimensions of the other boards and cut accordingly(with Miter Saw)....if your cage is gonna be 24" long, and your length frame is attached to the sides from the inside of them....cut 23.5" since the board thickness is actually 1/2"( 23.5" x 1/2" is 24")
Sand the edges lightly...to much and it will not look seamless when u put together. On your Table Saw, set the blade depth to the desired depth and run the wood through it to create the spline grooves(about 1/4 or so from the side of the wood)Dont do this for the bottom frame!! Now, your gonna need to make yourself a "square" on the table to properly align the wood up. Once done, drill small holes in the wood that will have the screws go into....do not drill holes in the other pieces that the you attach these pieces to. Once u get that done, then you can fully drill the pieces together, glueing them together before installing the screws. Make sure you dont go to fast or you'll split the wood.
Once you cage frames are fully put together, take the cage apart(leaving each frame intact. Stain the wood with 3 coats of stain(1/2 or so between each coat). Next, your gonna screen the frames. Roll the screen over the frame, cut the length about 1/2" or so longer then frame. Work from the far side first. If using regular aluminum screen, your gonna have to do a pregroove step. Just use the spline tool and prechannel the screen before actually using the spline. U dont have to do this with Super Screen. Ok, so get your spline, measure out on the frame how much you'll need(it stretches) and push the starting point in as best u can. Use the spline tool and while your keeping the spline stretched, run the tool over the spline as hard as u can without cutting the screen. At same time, make sure the screen on other side of frame is stretched as best u can(having another person makes it much easier..lol) Do all for sides working in a clockwise fashion and to all frames.
After screening, use the utility knife and cut the screen. You have to get really into the groove and press down if using aluminum screen. Its ok if u cut some of the wood...I still do this, Just make sure u dont cut the spline!!.
Now u can put everything together. Put your hardware on, make a door stop(inside so the door....stops...ahem and door keepers on the outside.
Put your floor (cut to the dimensions of course) in and your done! Takes me 6-8hrs from start to finish...will probably take you 2 days first few times(my first one took 2 days)
Some cage pics: Notice how I take great care to not have any exposed screws on the front side of my regular(non sun) cages.....this makes it look really finished and professional. All screws are installed from the side and back.....no screws are installed to where u can see from the front. Nice clean look!!