Search results
-
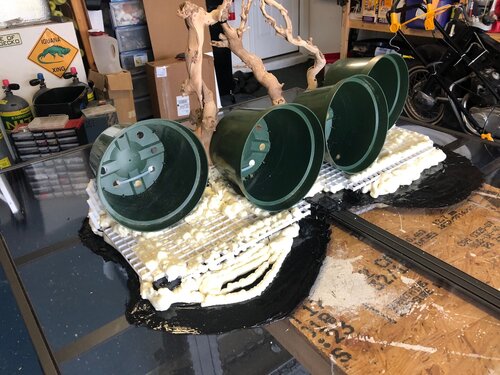
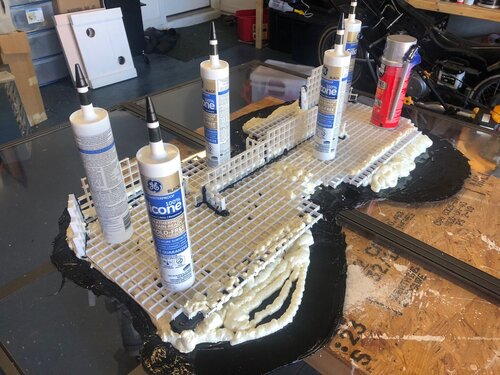
Step Seven
This is another shot of the pots as well as more grapevine that is foamed in. After the cage is done I will use bendy vines to connect the grapevine branches and will also drape pothos over them to create small hideaways for the chameleon. I hope this helps and please feel free to PM me with...- absolutbill
- Blog entry
- Category: General
-

Step Six
On the back we are placing 4 pots. I use the 8" plastic pots and foam them into place. My plants are in other 8" pots so I can slide them in and out as needed. I have tried using smaller pots and was disappointed. By using 8" pots you can grow a nicely sized pothos or spider plant (my 2 go-to...- absolutbill
- Blog entry
- Category: General
-
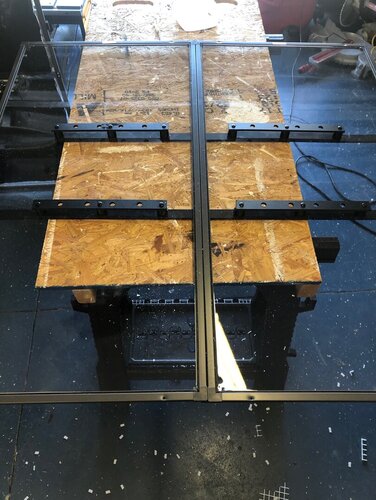
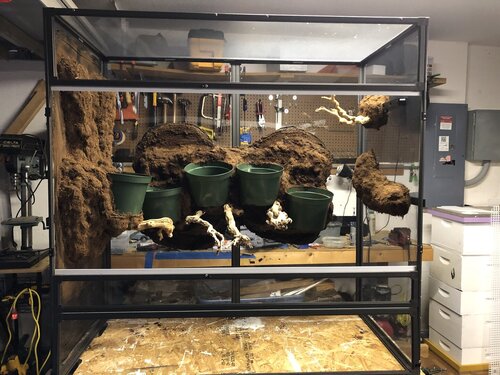
Step Five
These are the 2 back panels of the cage. We only work on 1 side panel, or the 2 back panels at a time both for space and to not go crazy.- absolutbill
- Blog entry
- Category: General
-
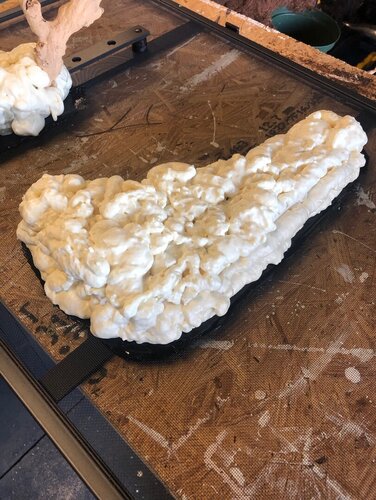
Step Four
Carve down any bumps you don't like and add some foam to any holes (foam is cheaper than silicone). Liberally squeeze the silicone onto the foam. Work in smallish areas never applying more than one tube of silicone at time. Then scoop and pack your not completely dry coco husk and pack it with...- absolutbill
- Blog entry
- Category: General
-

Step Three
We like adding grapevine directly into the expanding foam for extra stability. Again, zip tie the pieces to hold them into place then foam after snipping the ends of the zip ties. When you are doing the layers of foam add it ONE LAYER OF FOAM AT A TIME, letting it dry completely between layers.- absolutbill
- Blog entry
- Category: General
-
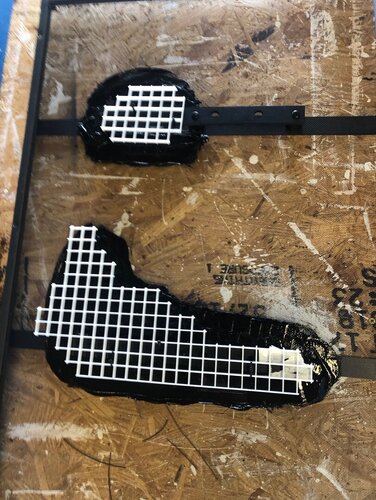
Step Two
Decide if you will have a branch or pot for a planter on this piece. Secure those to the egg crate. Use horizontal pieces of egg crate zip tied to the vertical egg crate to create ledges for pots or dimension to the structure. Now it's time for the expanding foam. Put down a base layer of foam...- absolutbill
- Blog entry
- Category: General
-

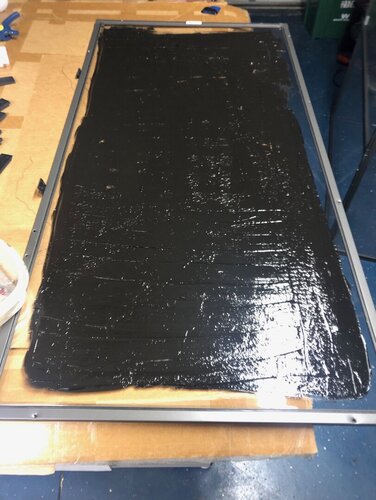
Step One
The first step we covered 1 side panel with black silicone. This step was only necessary for us due to the placement of the cage in our reptile room. This cage will have it's side facing 2 other cages, so instead of doing a moveable barrier I didn't want to have to worry about that and instead...- absolutbill
- Blog entry
- Category: General
-
Supplies
The first step is to gather your supplies. You will need: One 2 ft x 4ft sheet of egg crate (light diffuser) plus scraps I had around. I purchased at a local Box hardware store. They have smaller pieces available for use in aquariums on Amazon for smaller projects. Search egg crate light...- absolutbill
- Blog entry
- Comments: 1
- Category: General
-
Setting up a Large Clearside DragonStrand Cage
As promised, I've put together a blog post about how to set up a Large Clearside Dragonstrand Cage. This was our third cage and we finally got things where we'd like them. We live in Florida, and are fortunate enough to have a house with a garage that we could use to complete this project - it...- absolutbill
- Blog
- Blog entries: 8
-
Setting up a Large Clearside DragonStrand Cage
As promised, I've put together a blog post about how to set up a Large Clearside Dragonstrand Cage. This was our third cage and we finally got things where we'd like them. We live in Florida, and are fortunate enough to have a house with a garage that we could use to complete this project - it...- absolutbill
- Blog
-

Comment by 'absolutbill' in 'Blaptica dubia Roach Keeping, Breeding, and Feeding'
What a thorough guide - thanks a lot for posting this!- absolutbill
- Blog entry comment