Search results
-

Ferdinand's Giant Outdoor Cage Step 8: Zen and the Art of Chameleon Decorating
Coming soon! ---------------------------------------------- Back to Step 7: http://www.chameleonforums.com/blogs/lathis/897-ferdinands-giant-outdoor-cage-step-7-latches-finishing-touches.html -
Ferdinand's Giant Outdoor Cage Step 7: Latches and Finishing Touches
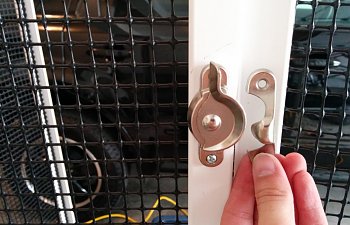
So... always measure twice, cut (or drill) once. Especially when installing closures. First time around... oopsie! I used the self-tapping screws that came with the latch for installation. I also added an additional latch for security at the top of the cage to secure the top to the frame... -
Ferdinand's Giant Outdoor Cage Step 6: Gettin' Hingey With It
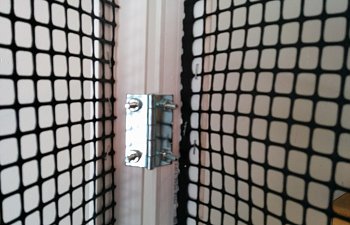
Installing the hinges was as much an art as a science. I positioned each hinge 6-inches from either the top or bottom of the panel. You have to be sure to offset the hinge just a bit to give room for the pieces to swing freely. Again, I used machine screws to attach the hinges. Once the... -
Ferdinand's Giant Outdoor Cage Step 5: The Best Laid Plans...
So not everything will always go according to plan. I expected the hardware cloth to act as a diaphragm to hold the frame together... no such luck. The corners immediately stated to fall apart and pull out all the staples. So I needed to reinforce the corners. Back to the hardware store! I... -
Ferdinand's Giant Outdoor Cage - Step 4: M*E*S*H
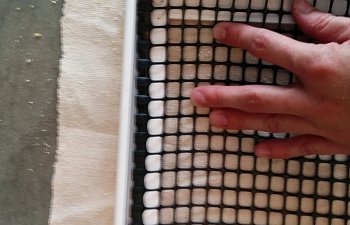
Now that the frame is together, it is time to install the hardware cloth. If you opted to use screen, the process would be nearly identical. Place the frame face down. Fit one of the finished edges of the hardware cloth against the frame (inside the L-shaped piece for me). Staple in place... -
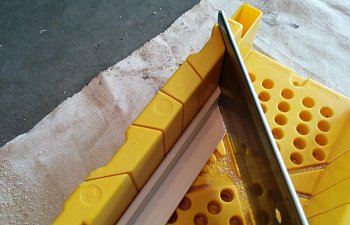
Ferdinand's Giant Outdoor Cage Step 3: Cutting and mitering and fitting, Oh My!
First, measure out everything to make sure you have enough material. Then, realize you don't and return to Step 2. Cut your first short and long piece. Now use these pieces to measure all the other pieces for consistency. Because I used an L-shaped piece of PVC (and because Ferdinand is... -
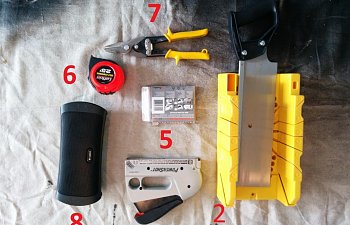
Ferdinand's Giant Outdoor Cage Step 2: Shopping!
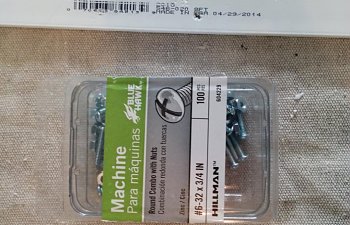
I don't have a workshop or power tools, so everything needed to be something that I could do by hand in my half of the garage. Tools you will need: 1. Screwdrivers (not shown) 2. Miter box and saw 3. Sanding block (not shown) 4. 1" Machine screws and 1/2" self-tapping screws (not shown) 5... -
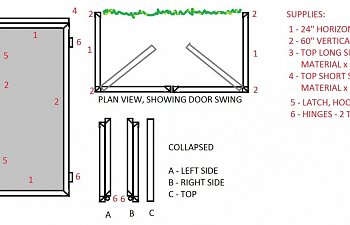
Ferdinand's Giant Outdoor Cage - Step 1: Formulate a Plan
First things first - you need a plan. I sat down and listed what I wanted for an outdoor cage: 1. Collapsible without unscrewing anything. 2. Very light weight and easily moveable. 3. Weather resistant and maintenance free. 4. HUGE! With easy interior access. 5. Secure from birds and... -
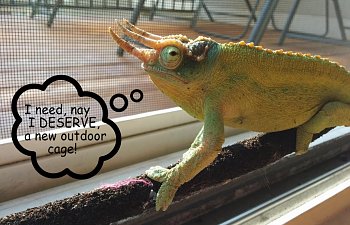
Ferdinand's Giant Outdoor Cage
In my ongoing efforts to make Ferdinand the most spoiled chameleon in the history of chameleons, I decided that his outdoor enclosure was not nearly posh enough. This is my first blog post here, so I thought I would walk through the steps of Ferd's GOC. Here we go... -