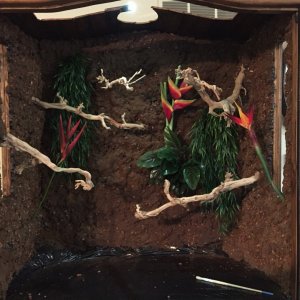
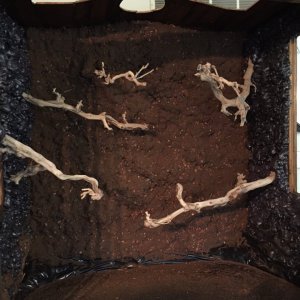
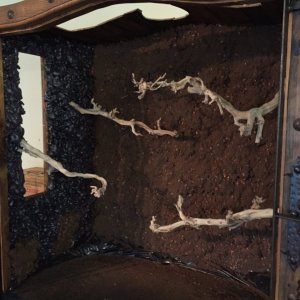
Did the left different than the back. I put silicone down, then sprinkled the wood chips, then the coco fiber after versus having the two mixed together. I think it looks better than the back wall.
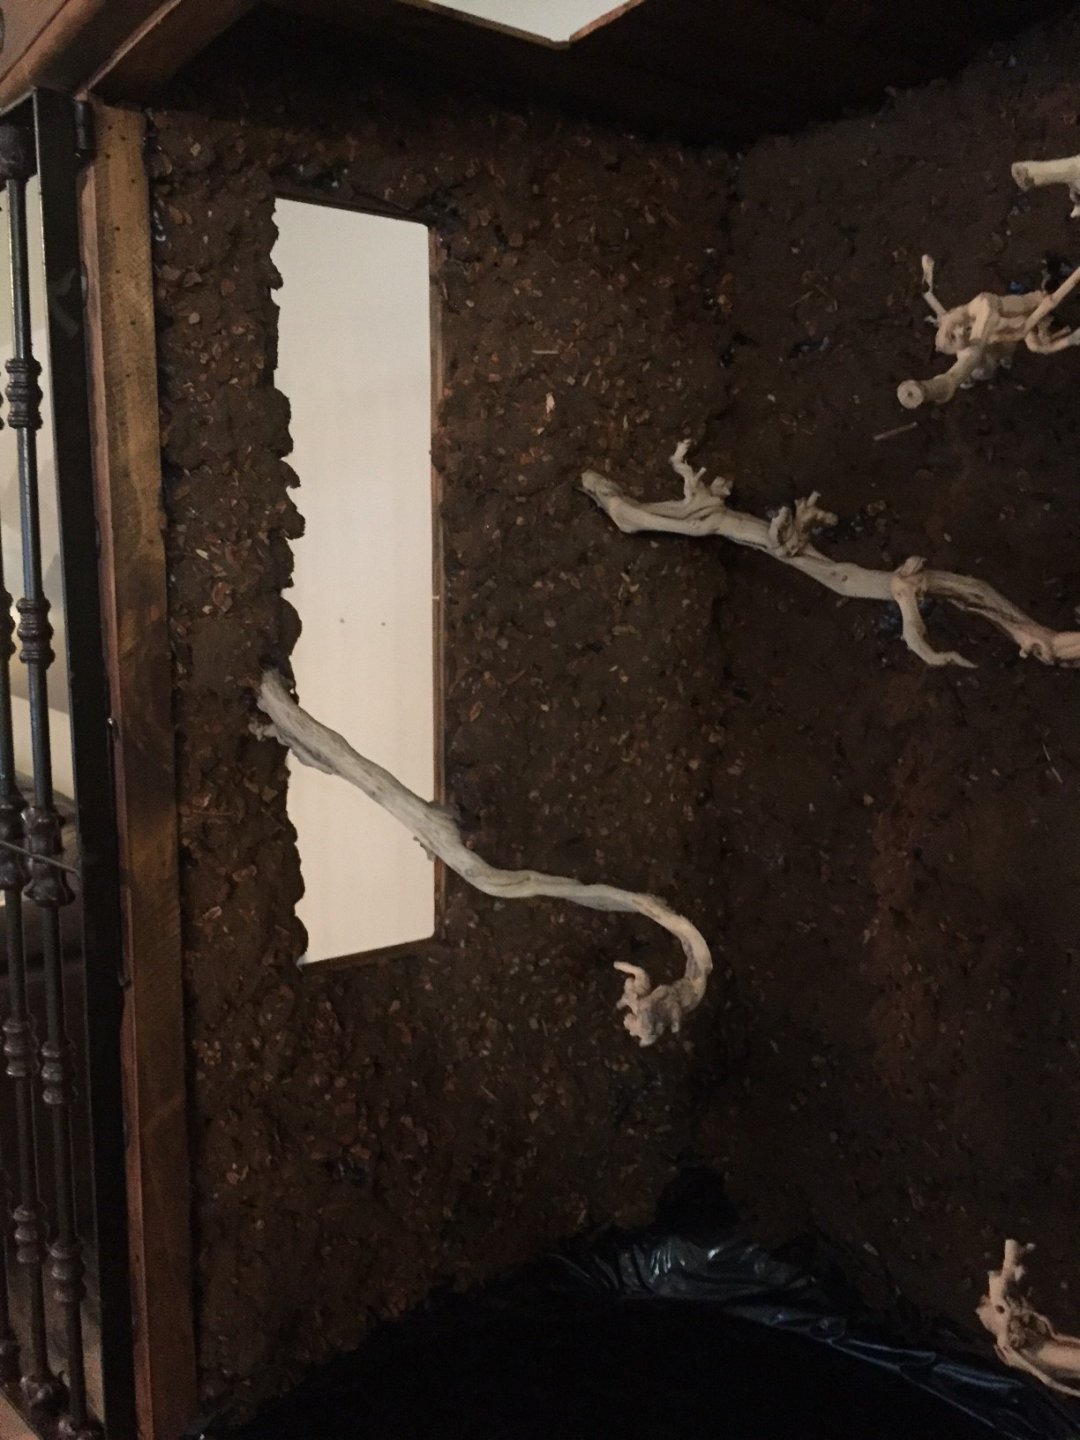
@Spags I am going to make a thread that goes over everything I did building this (once I'm done, hopefully this week), but to over simplify since you're putting it into a dragon strand I would first get a piece of 1/4" plywood and cut it to the size of the wall you want it on (make sure it's your inner dimensions). Lay the board on a flat surface and then put down some wire mesh. I used galvanized wire mesh from Menards and a staple gun to affix it to the wood. You want there to be some space between the board and the wire mesh so that the foam can get between the two. The foam will end up sliding off the board once it cures without the mesh to adhere to (you can see where that happened to me in an earlier pic where I just had foam around the base and it pulled away from the wood). I used Great Stuff Pond and Stone as it is meant to be fully submersed in water and still not be harmful to fish etc. Once your foam cures overnight then you can put down your silicone. BEFORE starting, make sure you have all of the following ready to go as you have a limited window until the silicone starts to tack up. I used black silicone and it probably took 3 tubes for the side wall you mentioned and it's roughly 26"x48" for your reference. So have your silicone, bark and coconut fiber all ready to go. OH, oh and don't forget disposable gloves!!!! They will make this much cleaner for you!
Ok, start to put down silicon (cut the tip back a ways so you're getting 1/4"-1/2" beads and start putting it all down. It will take quite a bit, but once you have all of your silicone down, use your gloved hand to smear the silicon all over the foam making sure too get all the nooks and crannies and make sure you don't spread it too thin especially in the raised spots, it's very easy to push it off there and not have a thick enough layer. Once your silicone is spread well, sprinkle a little of the bark on the silicone as thick as you'd like it to be and then sprinkle the coco fiber down. Put down about twice as much coco fiber as it takes to look covered. Then, use a BARE hand to very lightly tamp down the coco fiber. This will help push the bark pieces into the silicone and fill the voided space with coco fiber. The reason for a bare hand is so you can feel if there are any spot where silicon is coming through, if you feel that, put down more coco fiber in that spot and keep going. Once it's all down let it cure, the longer the better, but at least over night before setting it upright. While it's curing, don't put a fan or anything on it as it may push off more coco fiber than you want. Make sure there is no "vinegar" type spell before placing in your enclosure too.
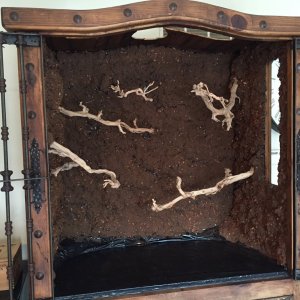
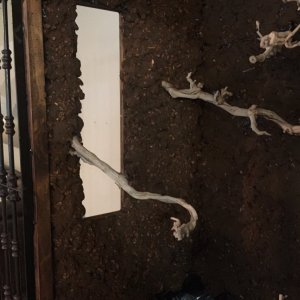
Oh and if you want branches off your board like my walls a helpful hint, make sure that they are angled downward off the board once it is set up vertically so that any moisture does not go into the "wall" you made as it will create mold problems, but will drain toward the tip of the branch and away from the wall. the picture doesn't show it that well, but my branches are all 25-45 degree slopes downward out of the wall. I just screwed those grapevines directly to the wood over the wire mesh and then foamed around them. The screws should secure it fairly well and the foam will also help sturdy the branch.
Sorry for getting sooo wordy with it, just trying to help avoid the hickups I ran into making mine!
Good luck and let me know if you have more or specific questions.
@JoCarp thanks, this will really help. I've heard about people skipping plywood and just using plastic egg crate for it to adhere to similar to your wire idea. What do you think about that?
@Spags I'm sure it would work, I'm a project manager for a metal fabrication company so metals are usually my go to since I know their tolerance and how it will behave in elements. I don't see any reason it wouldn't work, just make sure to put some holes through it so the foam can penetrate in some spots "lock in" to itself and around the "base". I think I usually make stuff more stout than necessary to be honest.
As I was typing a light bulb went on in my head and I realized you may be talking about the plastic crates versus the egg carton (for a dozen eggs) that I thought you meant at first. if that's the case I bet it would work just fine, you should have the rigidity you'd need, with the plastic "webbing" to allow the same adherence as the wire mesh. If you're going to use that, maybe just put some wax paper or something down and put the crate material over it (so your foam doesn't stick to the ground or whatever you have the grates resting on).