Step Two

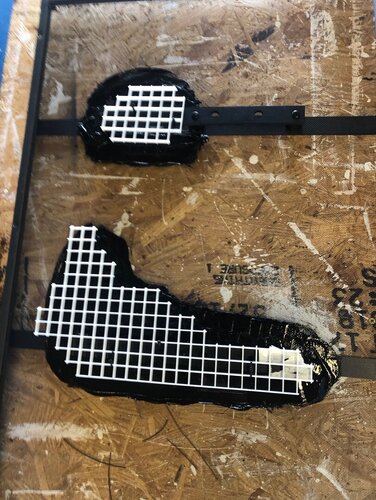
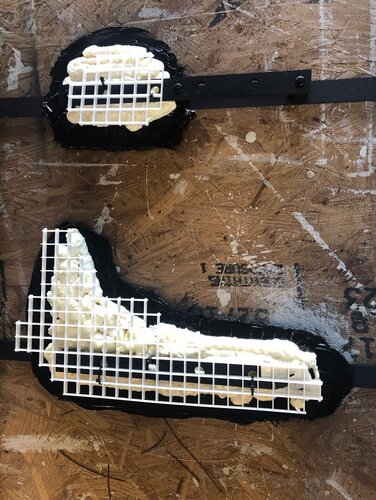
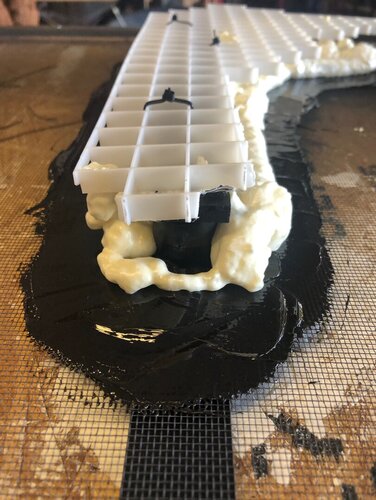
Decide if you will have a branch or pot for a planter on this piece. Secure those to the egg crate. Use horizontal pieces of egg crate zip tied to the vertical egg crate to create ledges for pots or dimension to the structure. Now it's time for the expanding foam. Put down a base layer of foam under the egg crate. Seriously one thin layer at a time DO NOT put more foam on top of a layer of foam until it is fully cured. If you do not, the foam will have no place to expand and break out the back of the cage. If the egg crate is not properly held down, weight it down to prevent the edges from pushing up from the foam. A69E7393-5A91-4534-93C2-5DB13BD41499.JPG 468C92DB-8B4C-406A-A6AB-1359C85393E4.JPG 3E698CDD-A72C-4A37-A570-0A65F15A90FE.JPG

Comments

There are no comments to display.

Blog entry information

Author
absolutbill
Views
656
Last update

More entries in General

More entries from absolutbill

  • Step Seven
    This is another shot of the pots as well as more grapevine that is...
  • Step Six
    On the back we are placing 4 pots. I use the 8" plastic pots and foam...
  • Step Five
    These are the 2 back panels of the cage. We only work on 1 side panel...
  • Step Four
    Carve down any bumps you don't like and add some foam to any holes...
  • Step Three
    We like adding grapevine directly into the expanding foam for extra...

Share this entry

Back
Top Bottom