New Cage Build!

Tyaeda

Established Member
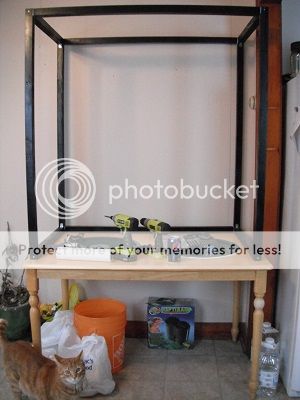
A couple months ago my parents gave my husband and I a solid wood dining table. A few scratches - nothing special. It soon became the dumping ground for random junk. Naturally, it didn't take long for us to find a new purpose for it :)

Mr. Pink's current setup serves the purpose well, but it's not the prettiest thing, structurally. He's our first cham, so a lot of the finer details were a "learn as we go" process. Knowing what all of our needs are now, we're able to go all out. :D


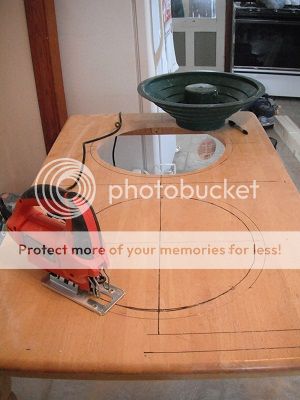
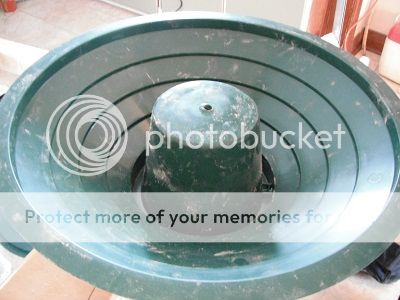
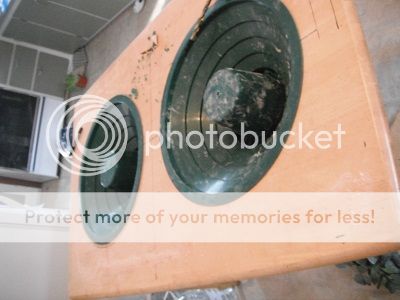
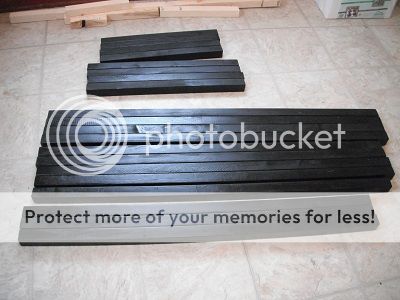
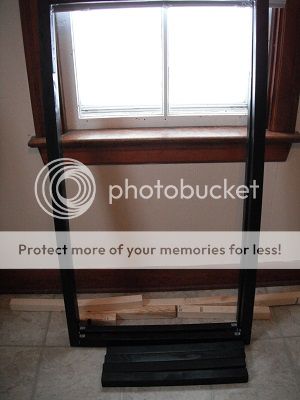
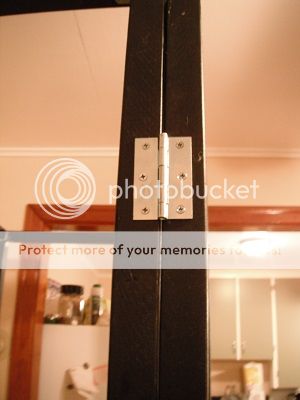
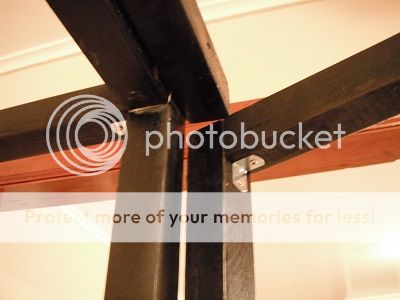
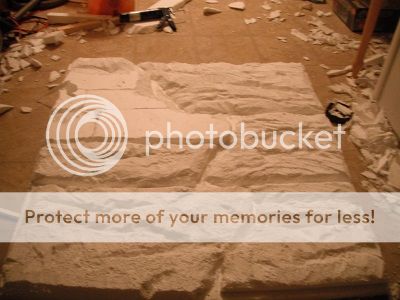
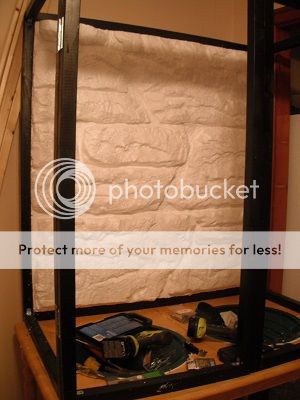
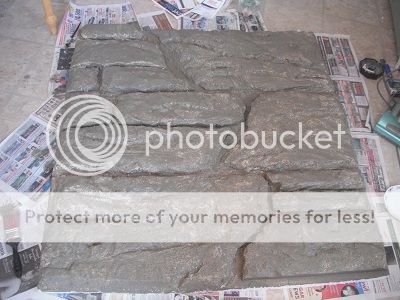
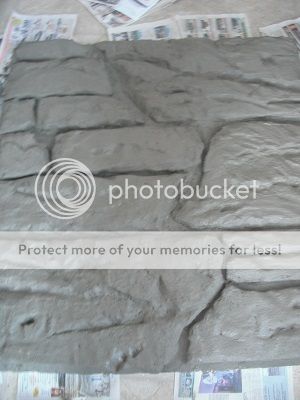
We've gathered all of the building supplies, and have finally started construction today! This time I'm going to document everything as I go, along with pictures to share.
 
First thing we wanted to tackle was the all important drainage.

We were originally going to use a kitchen sink, until we happened on a strange but awesome discovery. Christmas Tree stands. Yep that's right. Turned upside down, mounted like kitchen sinks, they're a funnel with a built in plant stand :cool: (Plus they were 75% off at walmart because they're out of season. $1.50 each I think?)


DSCF1914_zps4020a358.jpg


DSCF1915_zps41318f53.jpg


Drilled some holes in the bottom for drainage.


DSCF1918_zps8a45ae1a.jpg


I sanded the table top down around the rim of the trays. I applied silicone to both the tray and the table - all the way around with no gaps.


Next up is the wood framing. We have all of the pieces cut to size, now all we have to do is paint them and assemble. More updates and pictures to come
 
Oh, this should be fun to watch! :D Can't wait to see what happens next! Looks like it will be very big though! :cool:
 
I can't wait either - but unfortunately I have to, because 2 cans of spray bomb were not enough. :p

At the end of all this, I'll post the supply list, and the cost. (They'll be in Canadian though). This will include a 3d rockwall in the background. He would be able to climb it, but if I can figure out how to, I'll be installing a couple small planters.

Also purchasing a brand new UVB fixture - on sale at the local pet store for $62, which isn't bad for a 36".

Last but not least on the list is a MistKing. I was going to go with aquazamp, however based on the videos I've seen - the mistking seems to be quieter.

So pumped!
 
So we cut all of the pieces we needed.
DSCF1926_zpsd372e77d.jpg


We sanded each one down a little, and sprayed them with 3 coats of black spray paint.

DSCF1929_zps1dc2c233.jpg


I'm not too concerned about the conditions of most of the sides, because they will be used as the sides that we staple the screen onto, and will eventually be covered with trim.

Once the paint dried we began assembling all of the pieces together into a frame. Starting with the two side panels.
DSCF1931_zps423f2e21.jpg


For each screw we drilled pilot holes, so the wood didn't split. For the extra waterproofing peace of mind, we siliconed in between all of the joints. Since we want the least amount of structural obstruction we can get, we won't be putting in any side braces. To make up for the lack of support, we added small furniture to each corner.
DSCF1933_zpse1522755.jpg


We joined the two with 3 horizontal posts. We were going to go with four, but decided to not have one for the bottom in the front. It will make cleaning and rearranging planters much easier that way.
DSCF1934_zps104b8544.jpg


Next up will be the doors. :D
 
I'm really happy with how it's turned out so far.
We've finished the door framing, applied the plywood backing, and measured and cut the first layer of styrofoam for the 3D rockwall. Pictures to come :)

I finally found THE instructional videos I needed for carving, and painting foam to look like a real cliff face.

http://www.youtube.com/watch?v=MQ_PF27nA4s

http://www.youtube.com/watch?v=-I8Qk6E4RNU

I'm going to follow this guys techniques, but I'll be sealing everything really well for water proofing.
 
Great build! I just checked out about 30 seconds of the video for the foam wall, looks awesome! How do you plan on waterproofing it? Chameleons grip is so great I would think their nails would penetrate right into the foam?.
 
Great build! I just checked out about 30 seconds of the video for the foam wall, looks awesome! How do you plan on waterproofing it? Chameleons grip is so great I would think their nails would penetrate right into the foam?.

My rockwall will be a little more flat than these, I'm hoping that he won't attempt to climb it too much.
I watched another video previously where a guy made an insert for an aquarium. He carved his foam, and then afterwards he "painted" on a few thin coats of cement with a paint brush. I figure if it's good enough to be submerged in a fish tank, it will hold up to whatever the mistking can spray at it. It should make the foam feet-proof too. Once I have the cement on, I'm going to paint on some details. (shadowing, highlights, etc) and then I'm going to spray the crap out of it with an outdoor lacquer. It will give all of the rocks a glossy finish that will make them look wet, like they're under a waterfall, or something. The back of the foam will be sealed with a silicone gasket, so nothing seeps in behind and ruins the plywood backing.
 
So, like I said before, we finished the door frames. We built them exactly like the side panels, with the brackets in the corners for extra support.
On each side, we installed the hinges and made sure everything opened and shut freely by leaving a very small gap from the table top. We did this by putting a shim under the door before we put on the hinges.
DSCF1941_zps90817620.jpg


Since we're going to eventually install a top plate that hides all of the hardware up top, we needed to put an extra 2x2 above the door, so that it will line up once the trim / top plate is installed. Again we left a small gap between the door and the top by using shims in between the doors and the plate.

DSCF1940_zps09b4ca64.jpg


After that we cut 2 sheets of plywood down to size, and screwed them to the back of the cage.

DSCF1947_zps25f6dd27.jpg
 
Thanks!! We hope to have everything completely finished before we have to go back to work on Thursday.

Right now it measures approx. 2' x 4' x 4' - Mr. Pink is going to love it!
 
Just completed the carving portion of the rockwall.


We took 6 total sheets of 2" x 14" x 48" pieces of styrofoam. I used 3 of those sheets as a backing. First I cut them to size, then I joined them together to make a giant sheet by driving some shish kabob skewers into the edges that were joining, laid a straight bead of silicone in between and then pressed them together. I let that sit over night. This morning I cut the remaining pieces of styrofoam into various rock shapes, and arranged them into a pattern that I liked. After I got the layout right, I siliconed each piece to the foam backing. Once that dried, the fun part began! Using an ordinary serrated steak knife, I began carving the rocks to look more like... rocks.

DSCF1952_zpsa44c35de.jpg


DSCF1956_zps13a3e01d.jpg


Once I had each rock carved out the way I wanted it, I noticed a small problem. Because styrofoam is made up of a billion zillion small foam balls, some of the edges looked bumpy. Not only that, the surface was still pretty slick to the touch. My husband and I were worried that the cement wouldn't adhere properly. So I came up with the genius, but not entirely safe plan of using a hair dryer to melt the surface of the foam. If you have a heat gun, I'd try that first IMO. To get the dryer hot enough I had to block off the intake, basically making the entire thing over heat, and even spark a little... worked though! :D

Now it looks more "rocky" and is rough like sand paper. The cement, which is going on tomorrow, will have no problem sticking to it now.


Here's what it looks like now, setup in it's wall in the cage :)

DSCF1962_zpsf88bc3fe.jpg
 
Thanks :) I wish I went this route for my first cage. Spending the extra time and money has made a huge difference so far.
 
I'm happy to post it for you guys. :D If it wasn't for this forum, this wouldn't be possible. I've learned so much here, so it's important to me to give back in a sense. Hopefully this will inspire other people for their builds. Plus I like showing off my chameleon stuff to people who share the love for these little guys :)


-------------------


So today I continued the rock wall project. Working with foam like this is new to me, and everything I've done so far has been a mixture of steps taken from various you tube videos. Some of which did not work, but I'll get to that in a bit.


First and most time consuming task was applying the Quickcrete fast drying cement. The first batch I mixed up was thin like paint. Just enough to coat the foam, and give the second coating something good to stick to. Here's what it looks like after the first coat. It's hard to see, but notice the white styrofoam peaking through in the high spots.

DSCF1966_zpsb6c79c5c.jpg


Once that dried, I mixed up a thicker batch of cement. This batch wasn't thick enough to mold into anything like normal cement, it was just thin enough to spread evenly with a paint brush. For this coat, I made sure to get into every nook and cranny, completely covering the foam as evenly as possible. As you can tell in this picture, the surface is far more consistently covered.

DSCF1973_zpsd8857b79.jpg


I had to be careful as this layer was drying. For the first one, I just put a fan on it, and it didn't take very long at all. But for this one, I needed it to dry as evenly as possible, making sure not to rush the process. If it dried too quickly, it would have cracked and crumbled off. After I finished applying the cement I lightly misted the entire project with water. I misted again about 20 minutes later, and then again 20 minutes after that. After the cement set, I lightly soaked up any excess puddling water with a paper towel. This also helped everything dry evenly.


FINALLY after god knows how many hours, it was dry! Although it looked awesome, it didn't look natural enough, even with the shadowing from the light, the coloration of the rock was not very natural.

DSCF1977_zpsb5728ea1.jpg


As you can see in the photo, I began to paint the bottom corner. Here's where things got tricky.

Cement is porous - not water proof. Styrofoam melts when certain paint is applied. I'm really glad I made a test piece, because I otherwise would not have known that spray paint eats foam. ;)

Instead of my first choice (spray bomb) I used everyday acrylic paint, thinning it down with water. I covered everything in a dark grey with very small hints of browns and greens as a base coat. Since the second coat of cement dulled out some of the sharper rock edges, so to re-extenuate those details I went in with a darker/greener version of the base coat and painted in between each rock. I also darkened the shadowed areas on the rock face, and created darker areas that made it look more natural.

It's still not entirely complete, and these photos do not really show the colour variations well, but here's where I left off.

DSCF1982_zps6c5fe500.jpg


And here's a close up

DSCF1987_zps99a7a06d.jpg
 
It's absolutely fantastic if i hadn't been watching you through the process i would have never believed you done it yourself it puts the exo terra backgrounds to shame its ashame you don't live in the UK as i whould pay top money to have you make one for me well done and keep up the good work looking forward to seeing the rest
 
Lol thanks! I flunked art in high school, so if I can do it with a little research and planning, I think anyone could. :p I looked at an abnormally large variety of photos of real rock, and looked up a bunch of videos on different carving techniques. I personally wanted something that kind of reminded me of mine and my husband's trips up North where everything is rock.

Here's some pictures one of those trips. Nature is awesome :D

81871789.jpg


81871790.jpg


81871799.jpg


81871808.jpg


I'm currently doing the very scary finishing coats of paint on my rock wall. I've switched to spray bomb, and I've been slowly and carefully applying very very thin coats, as to not to let it seep into the cement and melt the foam - cause that would be disastrous at this point. :eek:

Pics to come :)
 
Back
Top Bottom