Back Wall of Vivarium

Woodinville

New Member
Hey Gang,
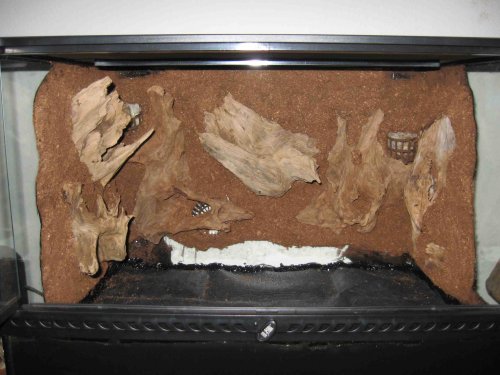
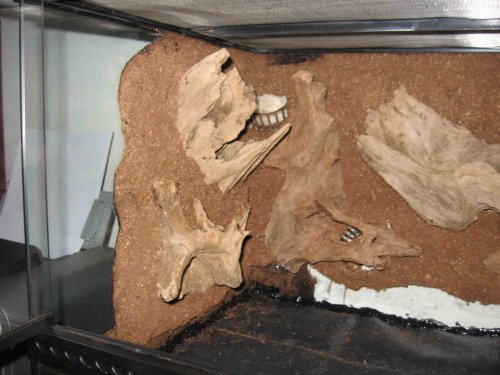
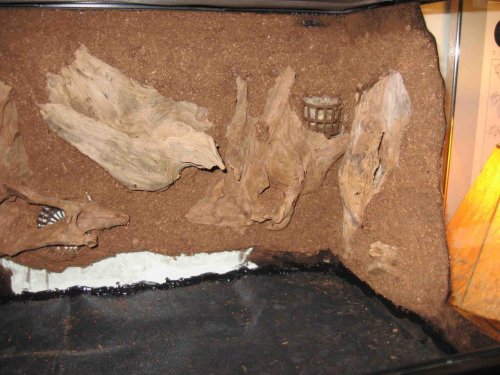
Another question for you long-time Cham pro's! I've decided on a 36x18x18 Exo-Terra for my pygmy brev's (when I get them). Regarding humidity, and presentation, I want, of course, the best of the best. Has anyone tried the technique that they have displayed on Black Jungle with expanding foam covered with silicone, and then coco fibre? It turns the back wall of the terrarium into a living back drop. Here is the technique if you'd like to take a look: http://www.blackjungle.com/gallery2/main.php?g2_itemId=2108
I won't use the hidden tubing to create waterfalls, but figured it would make for an awesome wall of moss/plants as a background. I'll have automatic misting, and hope that the living wall will help keep the humidity up. The down side is that it could be a pain without the irrigation, like they use in the set up in the link above. Let me know your thoughts :)
 
I've done it quite a few times for frog terrariums. One thing I recommend that I have started doing is to make the background on a separate piece of foam, outside of the tank, then glue it into the tank when your done. It makes applying all the silicone and coco fiber, and cleanup less of a hassle. Exoterra's come with a foam insert, so that make it even easier.
 
just curious wont the foam mold if some of it is sumbmerged in water?

It could, but many of the foams used are designed to be resistant to microbes. Another neat choice for a back panel is Epiweb. You can also make your own with expanding foam (I think it is called Great Stuff) and brown silicone. Instructions are in the FAQ on dendroboard.com.
 
I have had great success with the exact technique you are talking about. I based my cage design on the link you provided as well
 
Stages

Wow, I'll have to try the Epiweb. Meanwhile, I've finished the first steps of my vivarium. I decided to go with the exo-terra: 18x18x24. From what I've read, this size of viv will house 1.2 nicely. Here are some pics of what I've finished so far. The Great Stuff foam worked beautifully. I had to carve it down quite a bit though. It REALLY expanded as it dried. Still, it allowed room to create nice textures on the wall. In the pics, the wall looks much less 3 dimensional than it actually is. I chose wood that has hollows and spaces for plantings. I also chose to mask the bottom front and sides of the viv with black silicone. I feel it makes a cleaner look, rather than showing the hydroton and charcoal layers. In the upper right and left sides, there are "U" shaped slots for tubing and wires, provided in the screen and rim of the exo-terra. There I placed a cutting of plastic water bottles to create shallow tunnel behind the foam. This runs top to bottom so I can place any heating cables, and temp/humidity wires behind it, and hide them under the soil, or in the plants. I'll fill the gaps with foam, and cover with silicone and coco fiber before adding the pygs. I'll post the next step in a few weeks, once I get some plants and the tank hood arrives. I'll mist manually until I can get a Mist King system, which I've chosen to use. Cheers!
 

Attachments

  • FullView.jpg
    FullView.jpg
    232.3 KB · Views: 801
  • Left Side.jpg
    Left Side.jpg
    211.7 KB · Views: 579
  • Right Side.jpg
    Right Side.jpg
    257.3 KB · Views: 501
from what research i have done regarding pygmy enclosures and auto mist systems, the auto drip systems can drip for sometime after the pump has stopped. This may pose a problem for standing/excess water in the enlosure.

Dont take what i have to say to heart, i am by no means an expert!

I remember reading something that Brad posted on one of my posts about pygmys. It was an article on chameleonnews.com.
 
Thanks for the input, I appreciate it. I'll definitely keep checking into it before getting anything. I had heard that the Mist King system has high-tech no drip nozzles, which can be adjusted to mist as little as 5 second intervals. Still, I'll keep researching :)
 
Back
Top Bottom